
Pre-Wedding Slow Photography in Bali with Vintage lenses

WEDDING & PORTRAIT PHOTOGRAPHY with VINTAGE LENSES
Over the last 3,4 years, I have transitioned from using modern auto-focus lenses to using exclusively vintage lenses with manual focus.
Not only for my private photos but also for commercial assignments. Those include wedding and engagement photography in my home that is Bali – Indonesia.
Using old, manual lenses had a very positive impact on my photography. And I have termed that approach SLOW PHOTOGRAPHY. I have written about this here and here.
In the following, I would like to share with you a recent assignment doing wedding & portrait photography with vintage lenses.
And also tell you why it was so rewarding to only use some of the gems of my vintage glass collection.
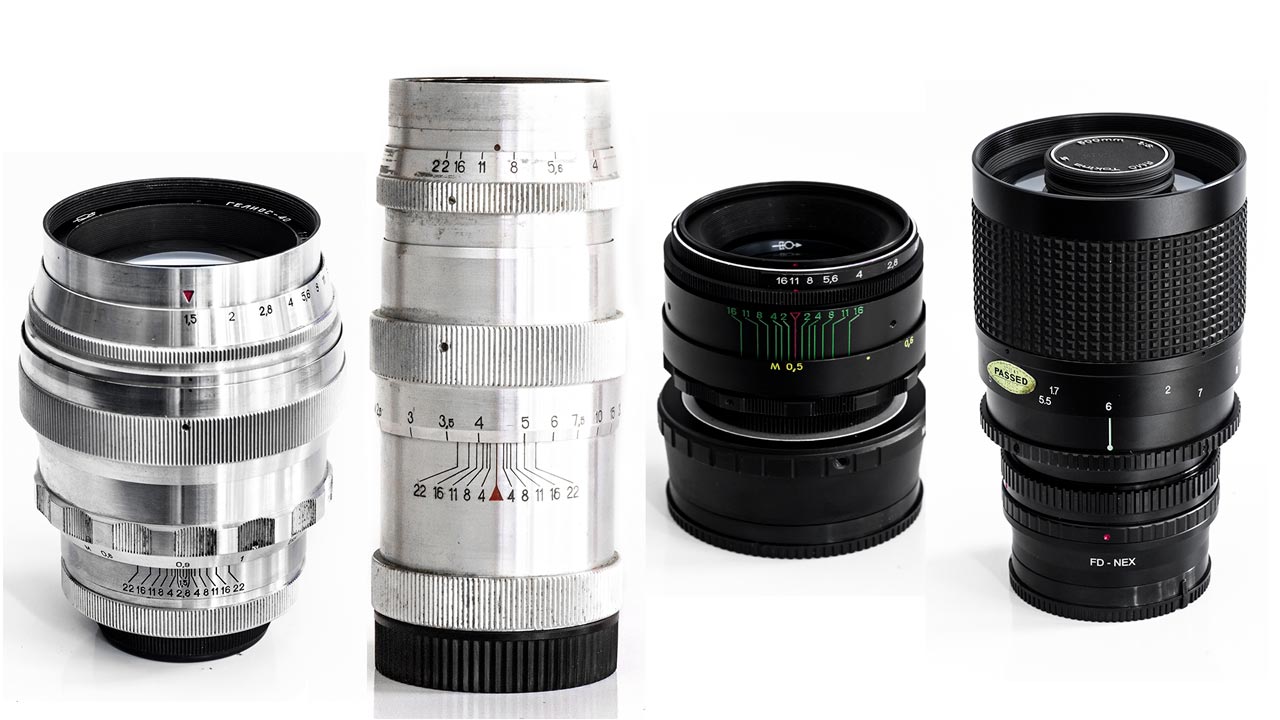
These are the vintage lenses I used – from left to right:
HELIOS 40 (85 mm / f 1.6) | JUPITER-11 ( 135 mm / f 4.0) | HELIOS 44-2 (58 mm / f2.0) | TOKINA mirror lens ( 500 mm / f 8.0)
DISCLAIMER: The name in the watermark on my photographs is MICHELLE PASTEL – this is a synonym I use to distinguish my vintage lens photography work from my conventional wedding photography work which I do under my real name.
Street portraiture approach for pre-wedding & engagement photos ?
First things first: To my utter surprise, my client found me online through an article I had written about street portraiture – the way I do street photography in cities around the world.
I was surprised because when I wrote the street portraiture article, I wrote it for other photographers. It was a rather technical article.
And I never thought it would get the attention from clients from the wedding world too.
Brides are usually blissfully oblivious to the technical aspects of photography.😇
Rightly so.
I also don’t care in which oven or with what kind of pan a chef has prepared my meal. Or what kind of knife, he uses to cut the ingredients…
But Nicola, my client loved the photos I showed in the article. As an accomplished filmmaker in Hongkong, she also happens to understand the role lenses play in photography and film making.
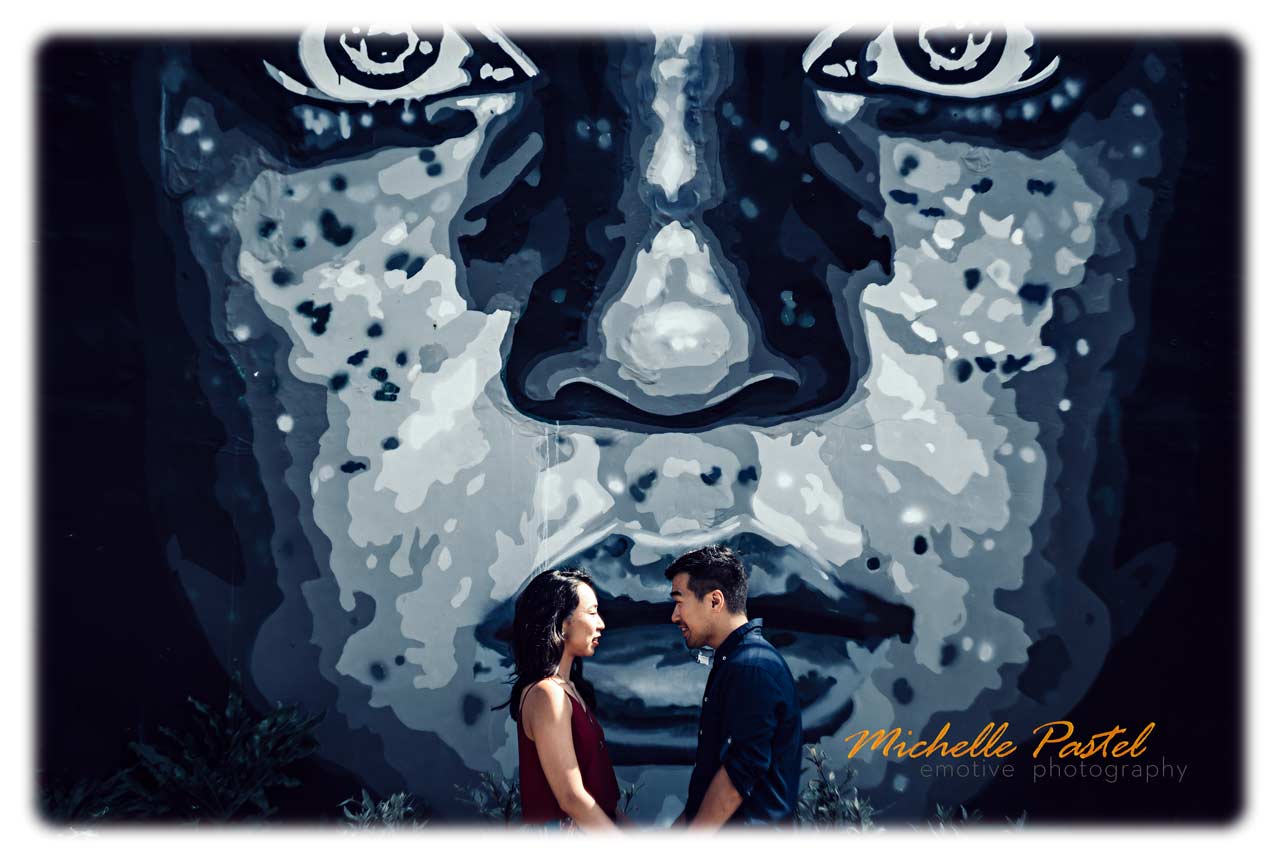
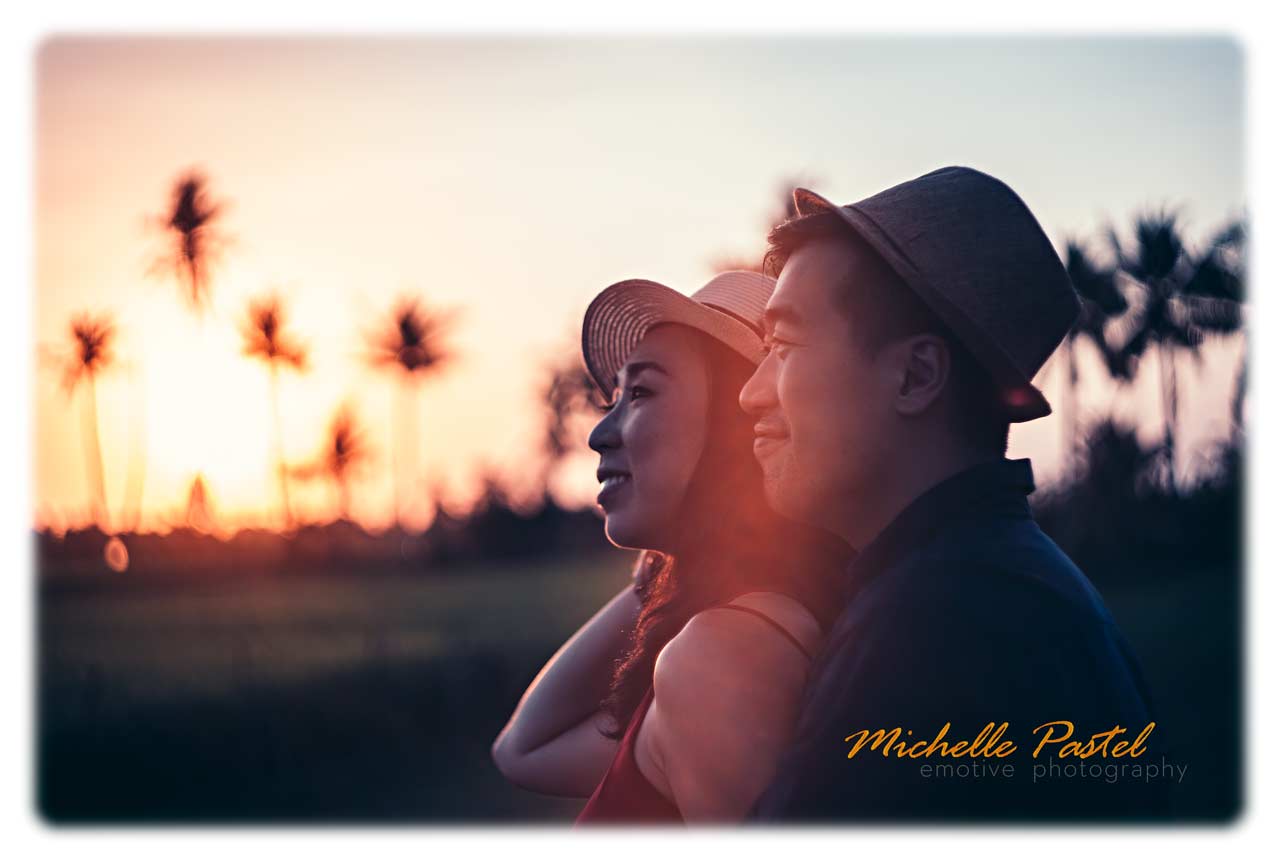
She explicitly asked me to do her pre-wedding photos in my street portraiture style – which involves using a super-tele-lens.
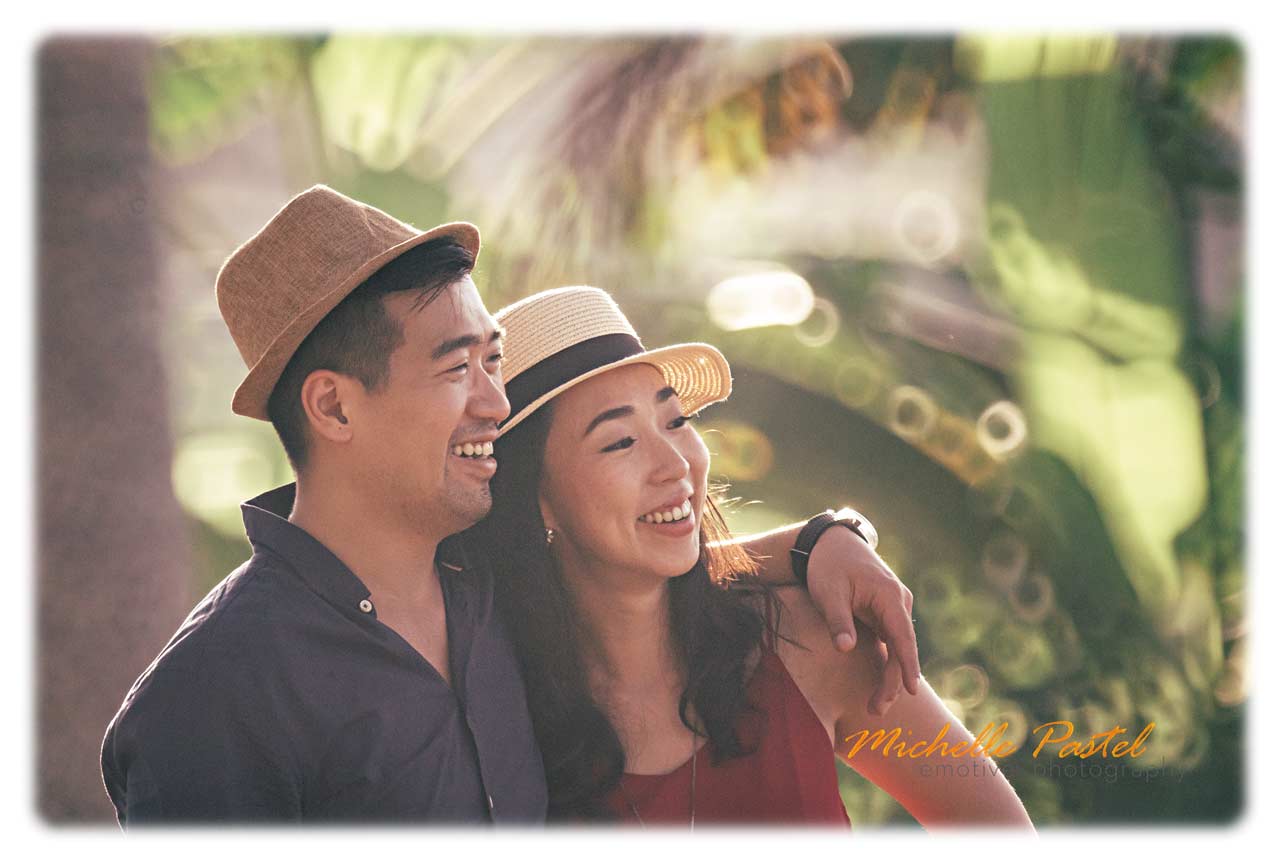
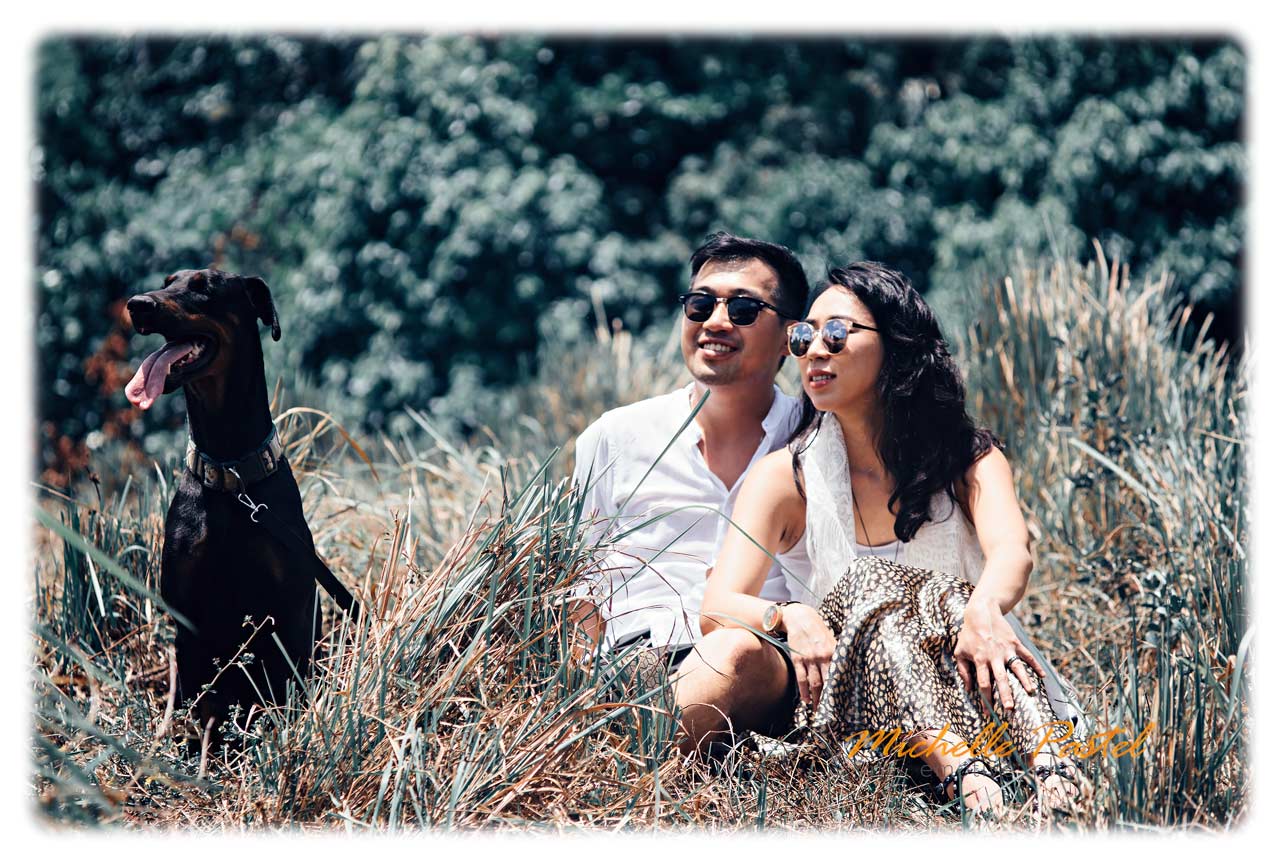
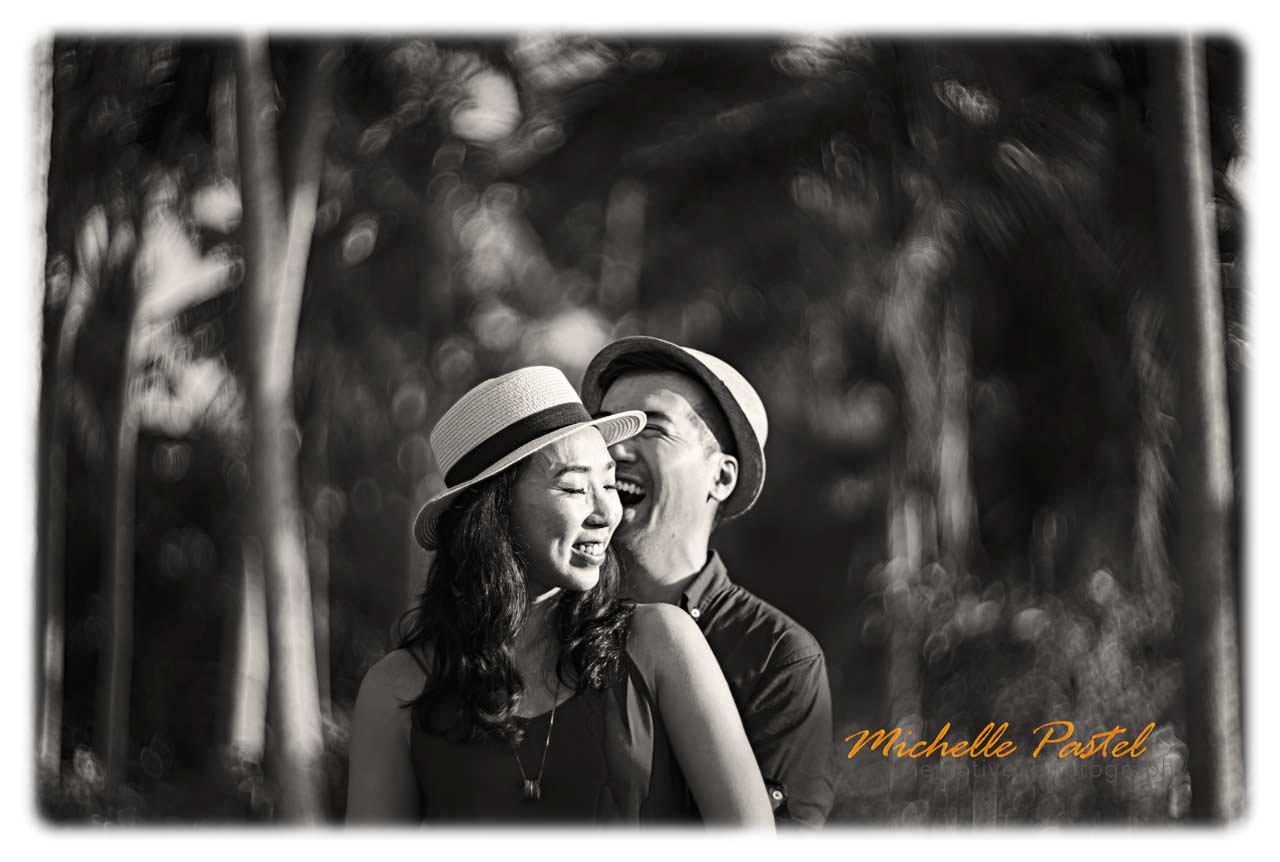
To set the stage here are some of the photos which I was able to capture with this beast of a lens.
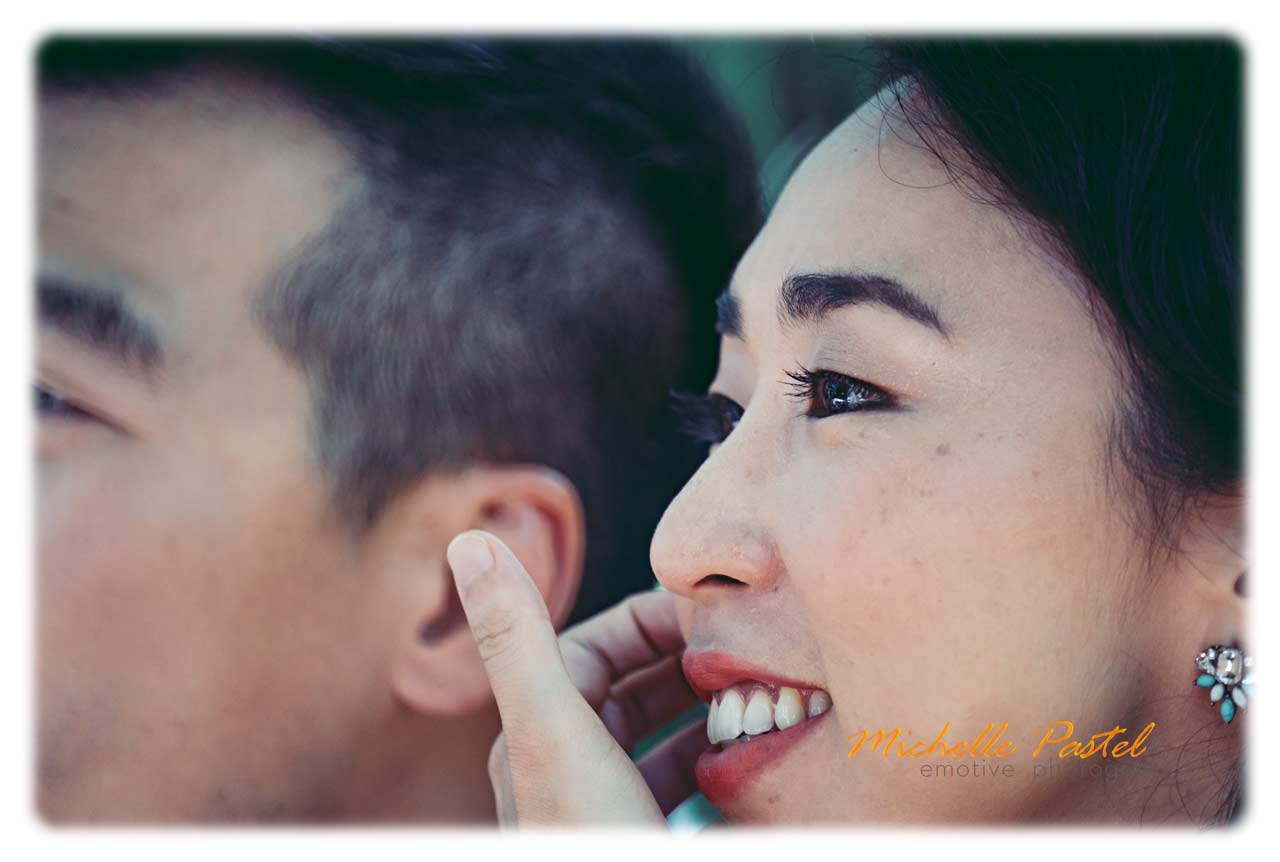
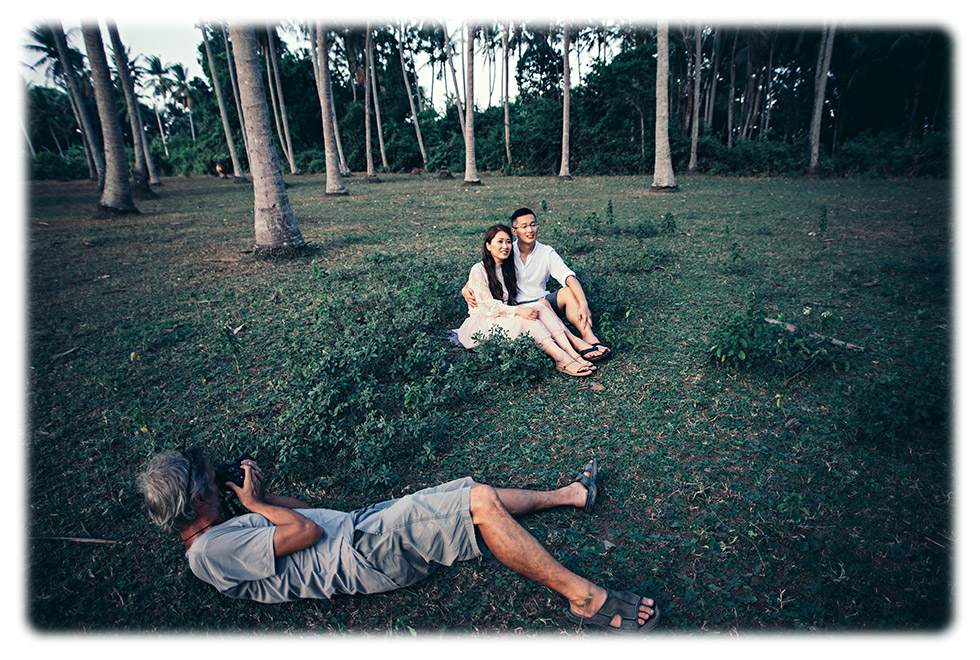
Getting in – really close… TOKINA 500 mm Mirror lens
I am about 60 meters or more away from the couple
A 500 mm mirror lens for wedding portraits – am I mad ?
At first, I was not so fond of the idea to use a 500 mm manual focus mirror lens for a pre-wedding project.
Here is why.
For wedding & portrait photography with vintage lenses using a 500 mm focal length lens, is not a technical challenge. It is purely a practical matter.
Due to the required distance between the photographer and the subject communication and giving directions to the couple becomes difficult or even impossible.
I am a huge proponent of photographing couples naturally and with as little as possible directing.
However, it is usually not enough to say to them ‘act natural and be candid’.
Therefore, some small hints and directions are necessary. For example, the occasional joke which will make your subject smile or laugh naturally.
But all this becomes very difficult if you are 20 – 30 meters ( 70-100 feet ) away from your subjects.
And it gets even more difficult for photographs where I also want to incorporate some of the environment. I then need to be at a distance of as much as 50 -70 meters (190 – 230 feet)!
Even such basic directing like asking them to turn a bit into the light, for instance, becomes impossible.
If I am out there in nature with nobody around then shouting over the distance is an option. Whereas in a noisy or urban environment with lots of people the shouting option is off the table.
And indeed, we were doing a lot of the photos in a rather urban environment. So no shouting…
Here is what I did.
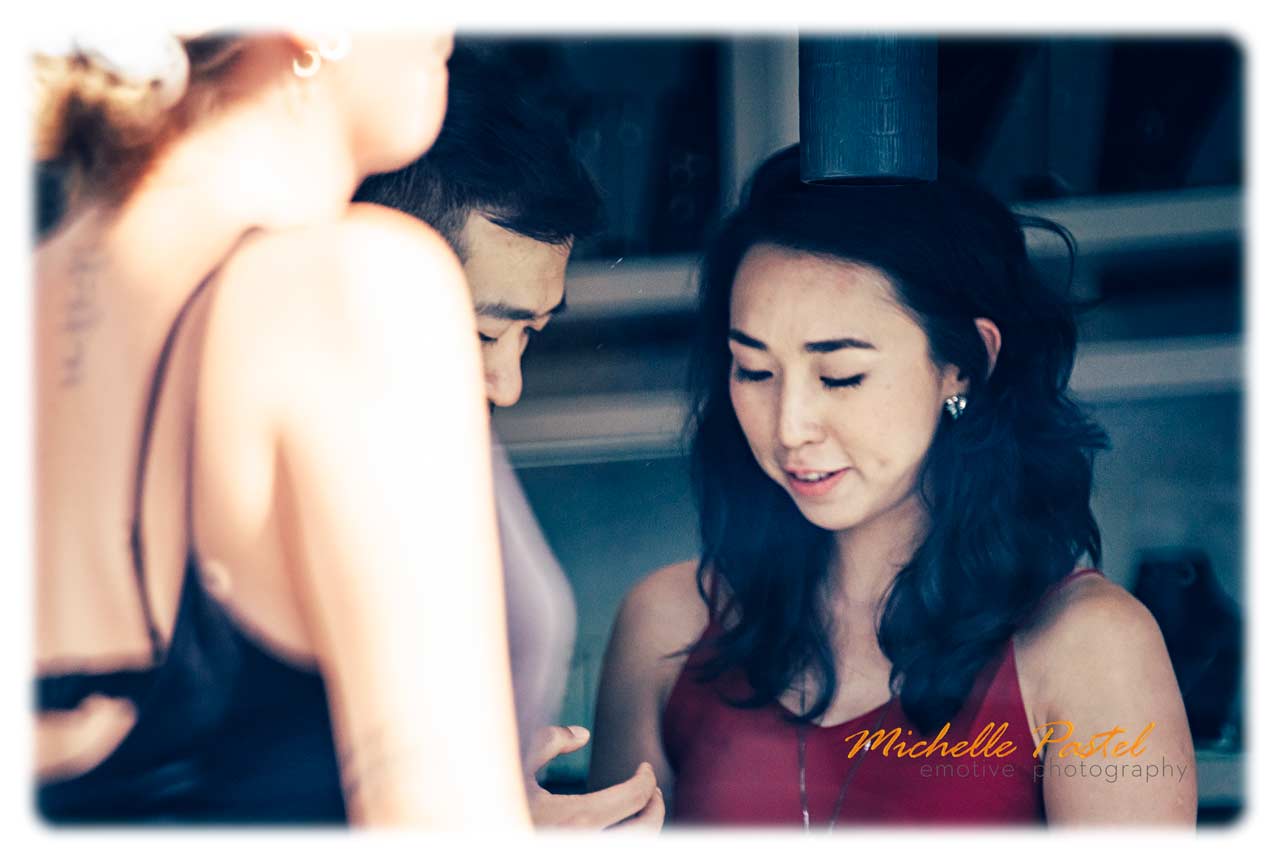
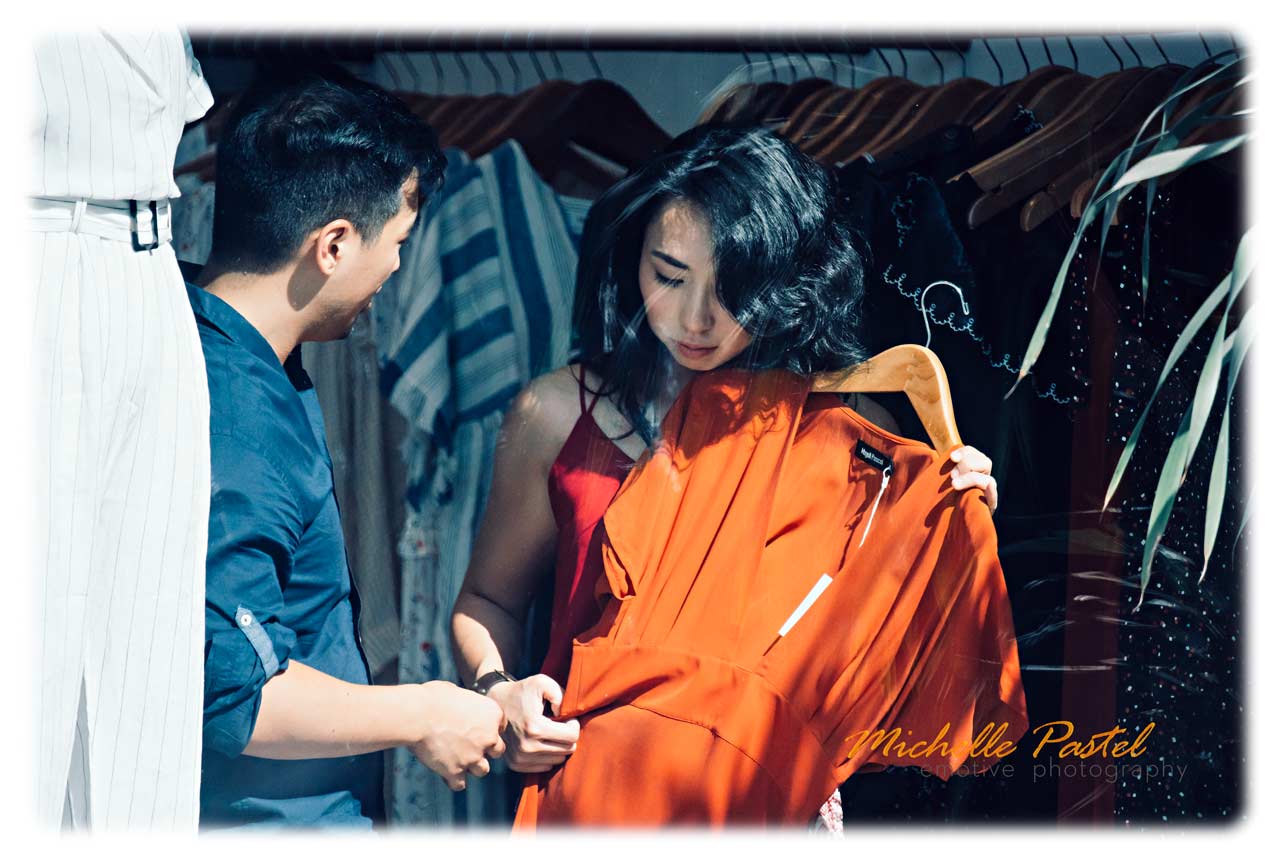
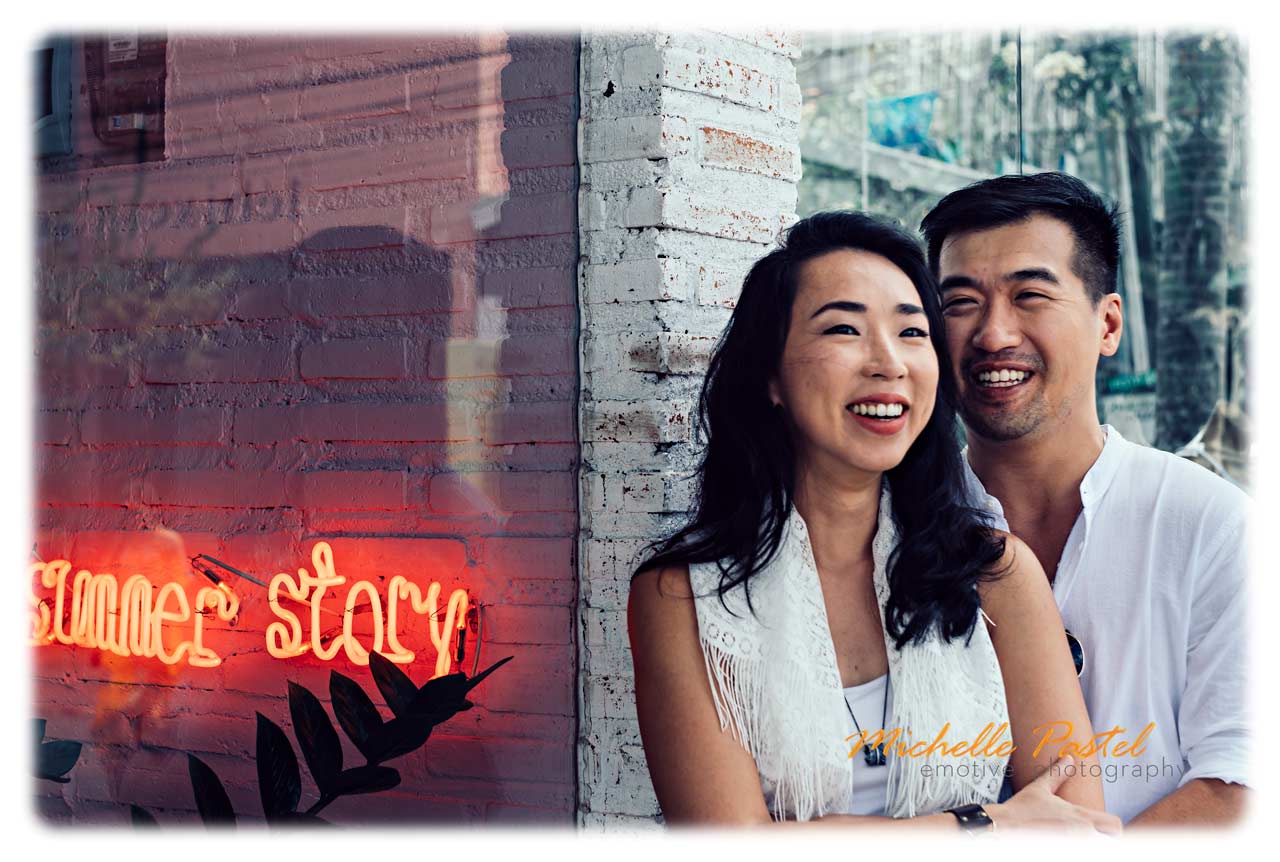
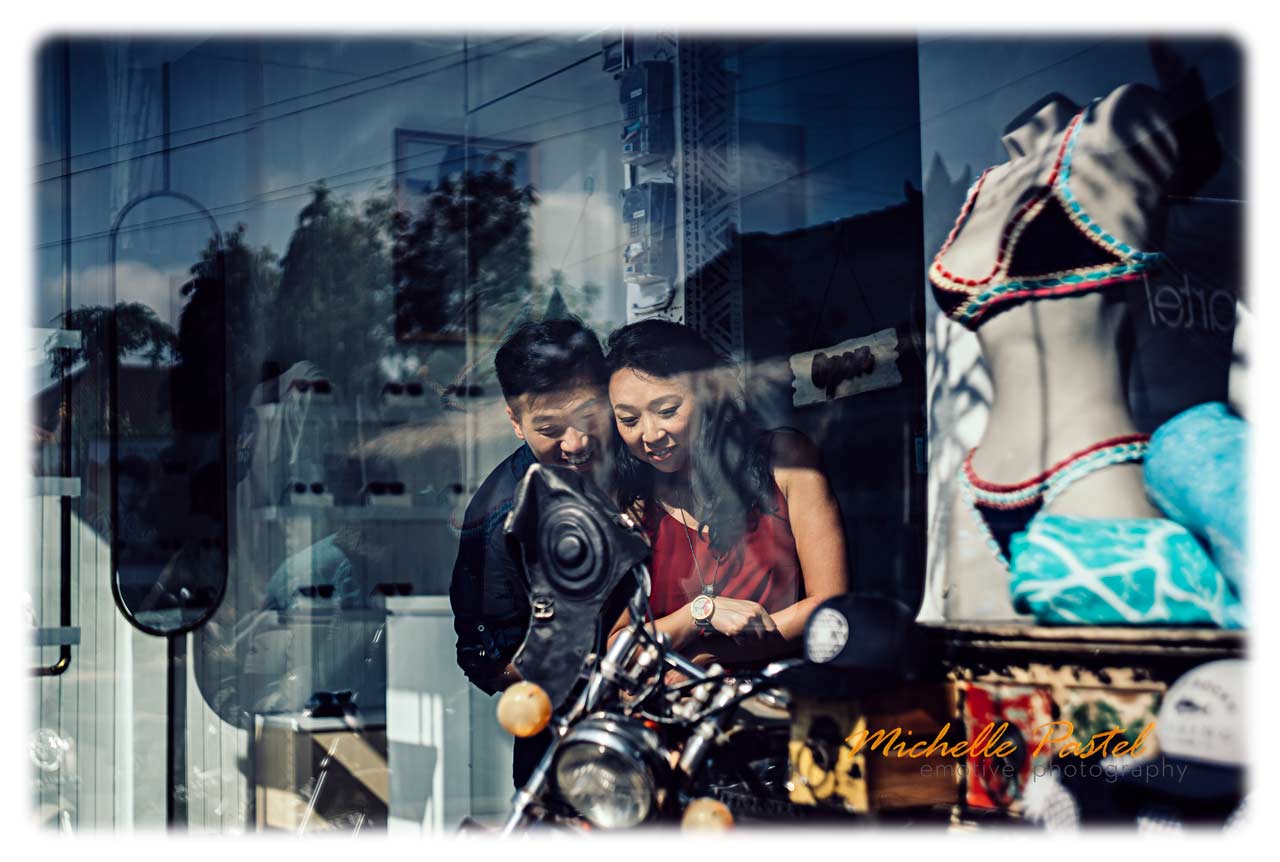
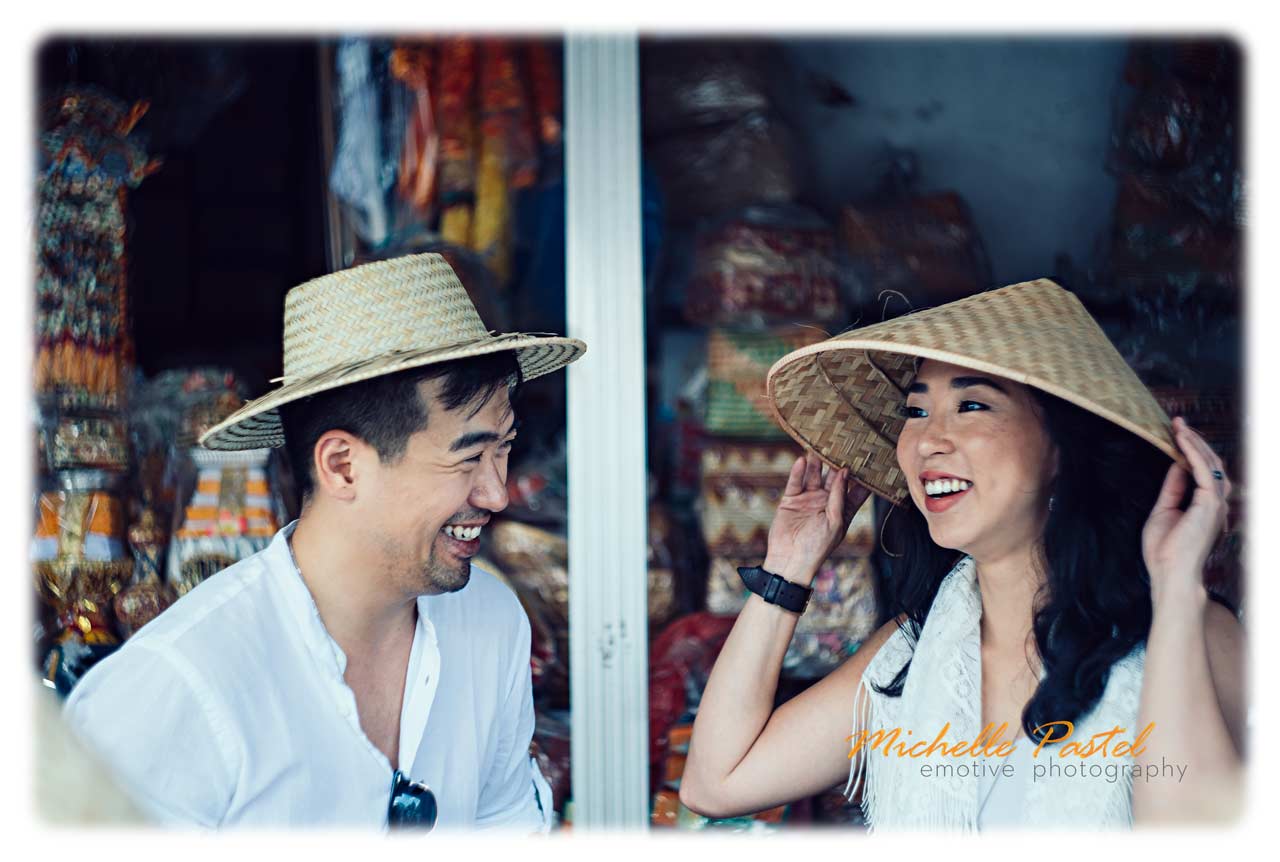
I choose a busy street with lots of funky shops and boutiques and I decided to photograph them inside the boutiques through the shop window. Because the reflections in the shop window where another style element I wanted to incorporate.
Here are some of the resulting pictures:
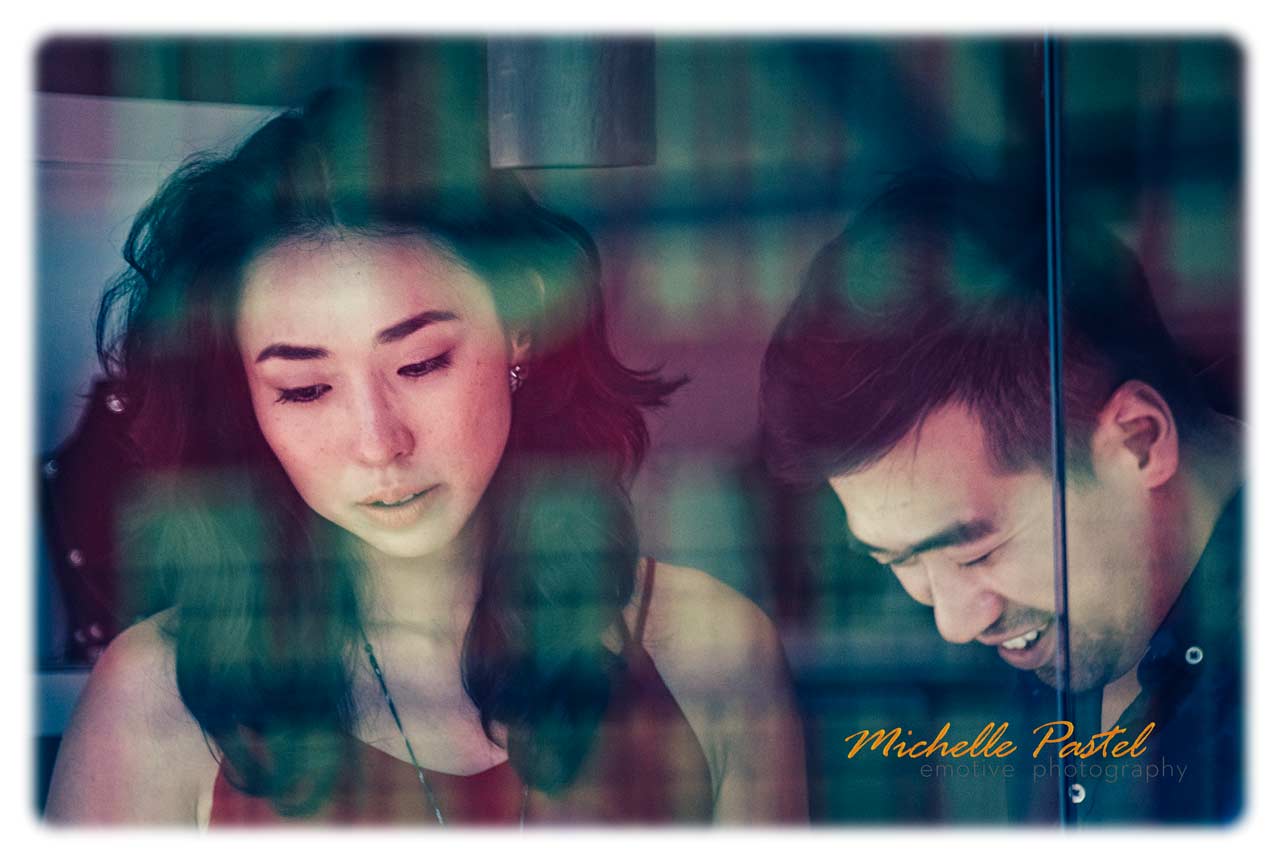
Photographed from across the street through a shop window – TOKINA 500 mm mirror lens
a TOKINA 500 mm mirror lens in action – admittedly with the focus being off a bit…
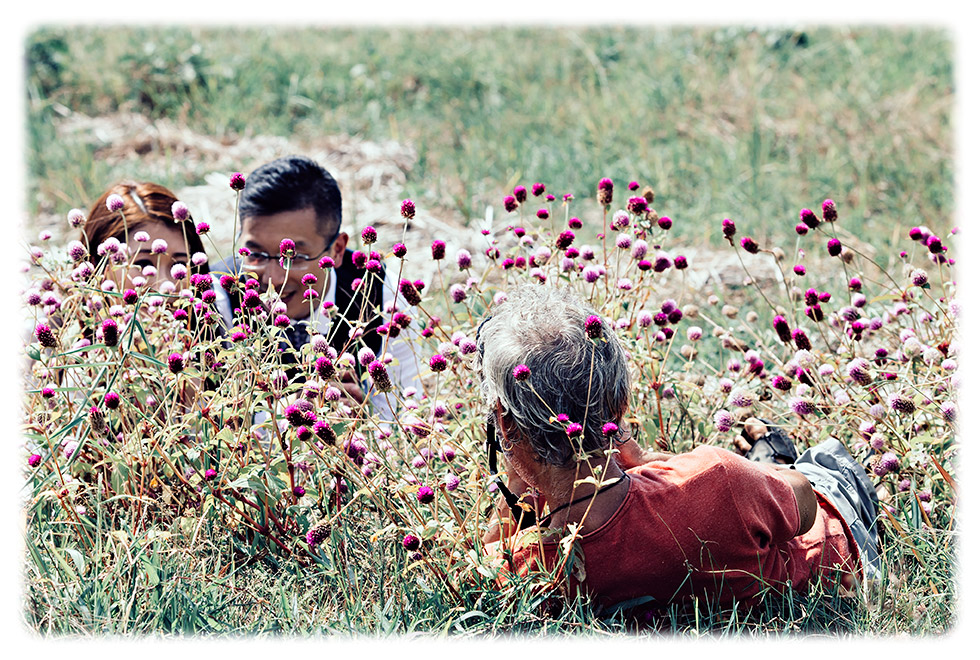
The 500 mm TOKINA mirror lens used for street portraiture photography
Portraits with a 500 mm lens – how I pulled it off:
Before sending my couple into a shop I had to brief them what they were supposed to do. Where to stand, etc…Because once they were in the shop I could not give directions to them.
I positioned myself on the other side of the road. Which gave me enough distance to my subjects and also allowed me to be ‘stealthy’. Because I would have perhaps not gotten permission from the shops to photograph there…
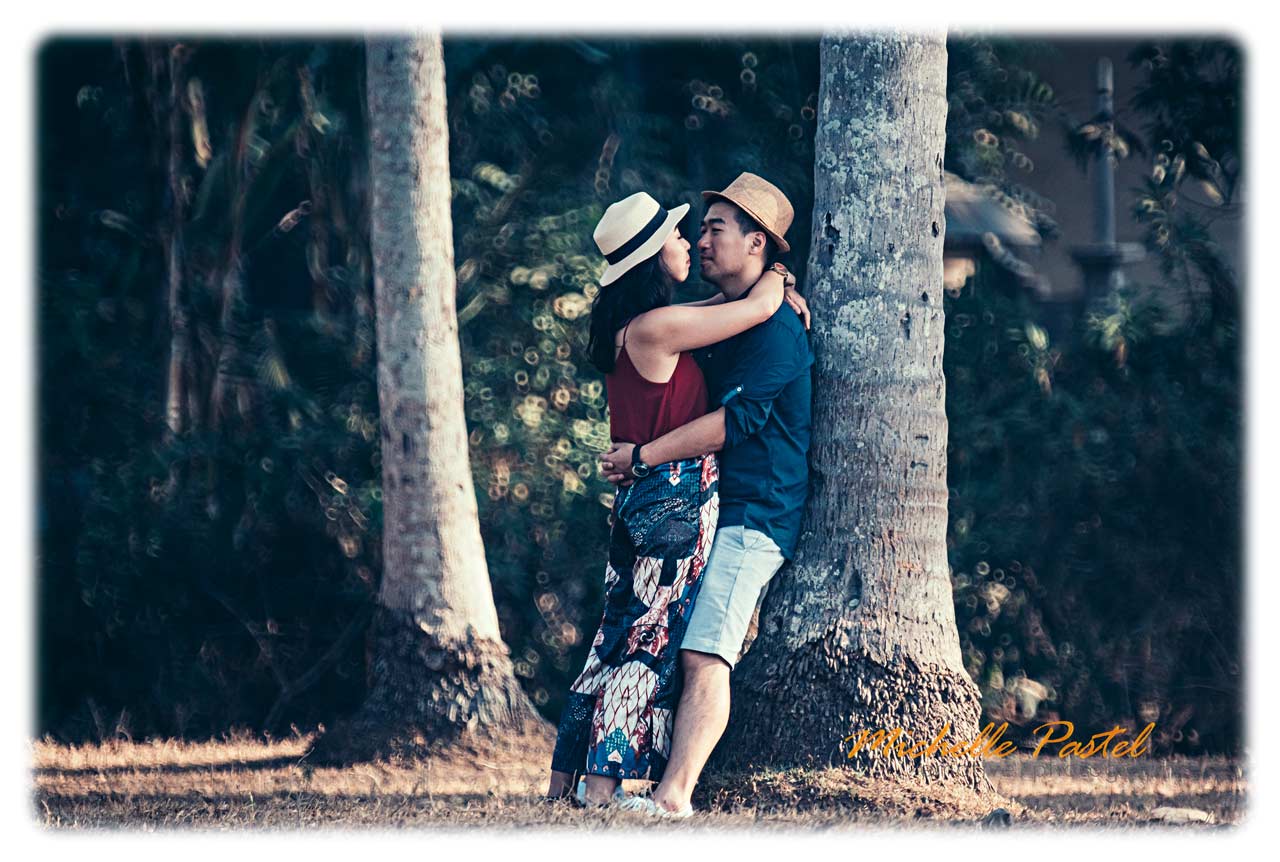
One more photograph with the Tokina 500 mm mirror lens. This photo also demonstrates the unique doughnut bubble bokeh that only mirror lenses can produce:
Here I am over 15 meters away from my subjects
Soviet Union lens JUPITER-11 (135 mm / f4)
I used this little puppy for very few pictures only. Why? Is it not good enough?
No, that is not the reason. Its over-all character does not fit it with the swirly bokeh from the Helios. And I wanted some consistency in the photos I make for my client.
I have several other JUPITER lenses which I will use together in upcoming projects. Stay tuned.
Also 135 mm was not a focal length I felt like using on that day. But why not for a few pictures.
Here are some photos with the JUPITER-11 135mm / f4 lens.

JUPITER-11 135mm / f4 lens

JUPITER-11 135mm / f4 lens
JUPITER-11 135mm / f4 lens
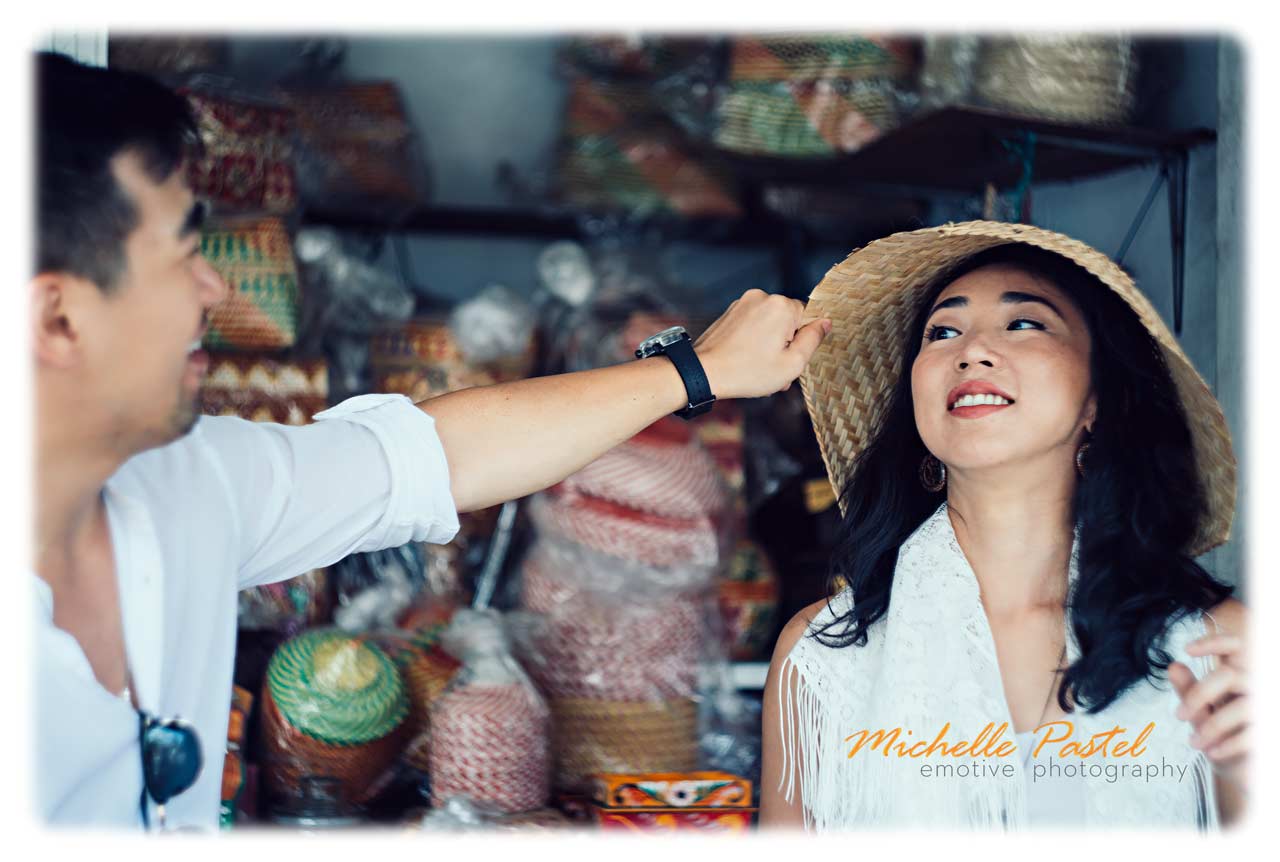
The HELIOS 40 and 44 – The ‘Dream Team’
Regular readers of my articles will know that I am an absolute fan of HELIOS glass. For the simple reason that it has the most unique background blur characteristics – namely the swirly bokeh effect.
So, it should come as no surprise that 70% or more of the photos I had taken for this couple were made with my two HELIOS lenses.
The 85mm / f1.5 ‘beast’ is a bit hard to handle. So the majority of the photos were taken with the 58 mm HELIOS.
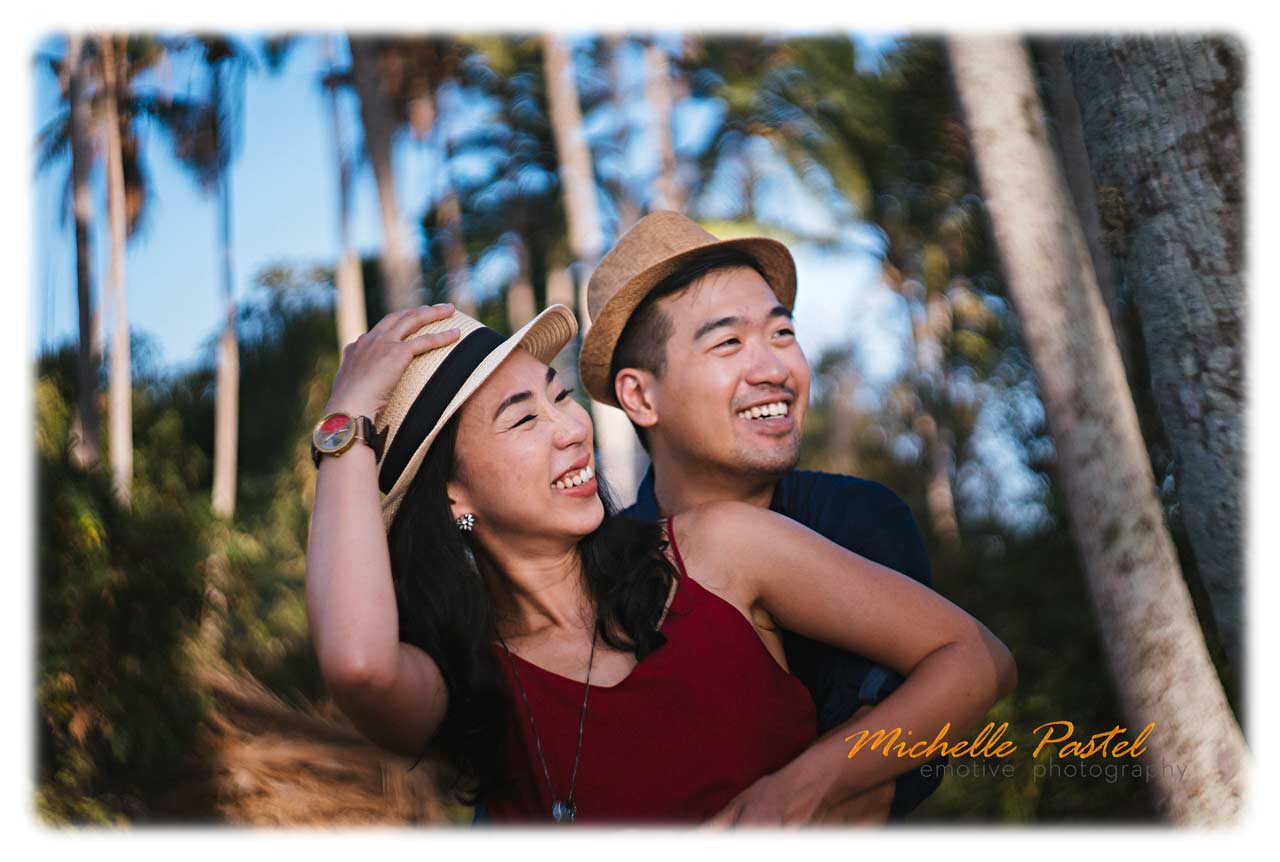
But let me show you first some images without the swirly bokeh.
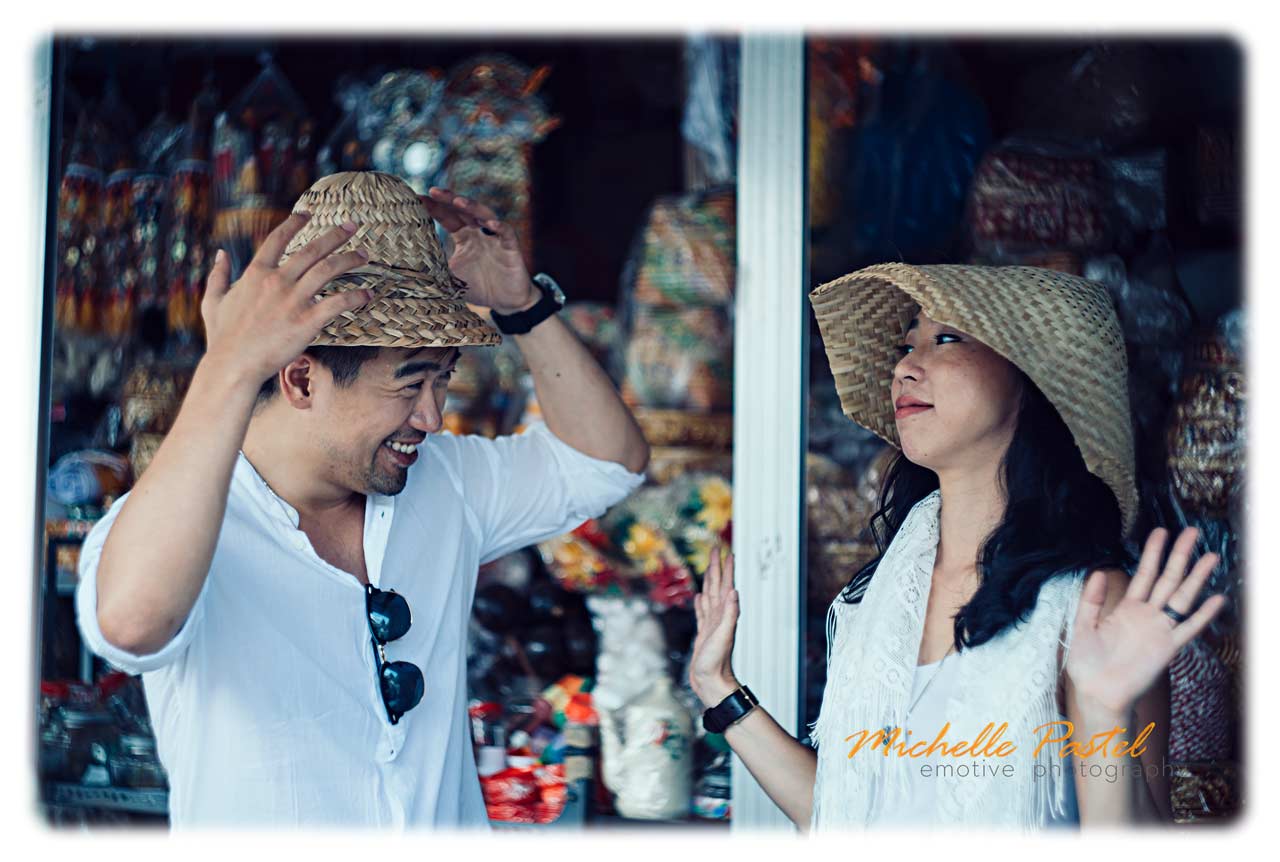
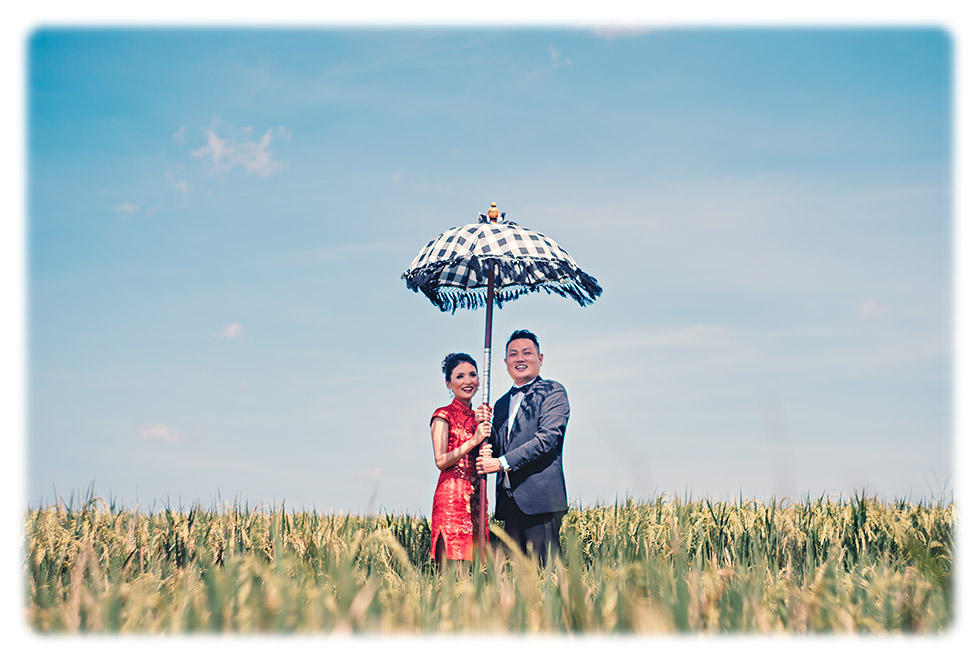
HELIOS 44-2 Lens
HELIOS 44-2 Lens – it does not always need to be swirly…
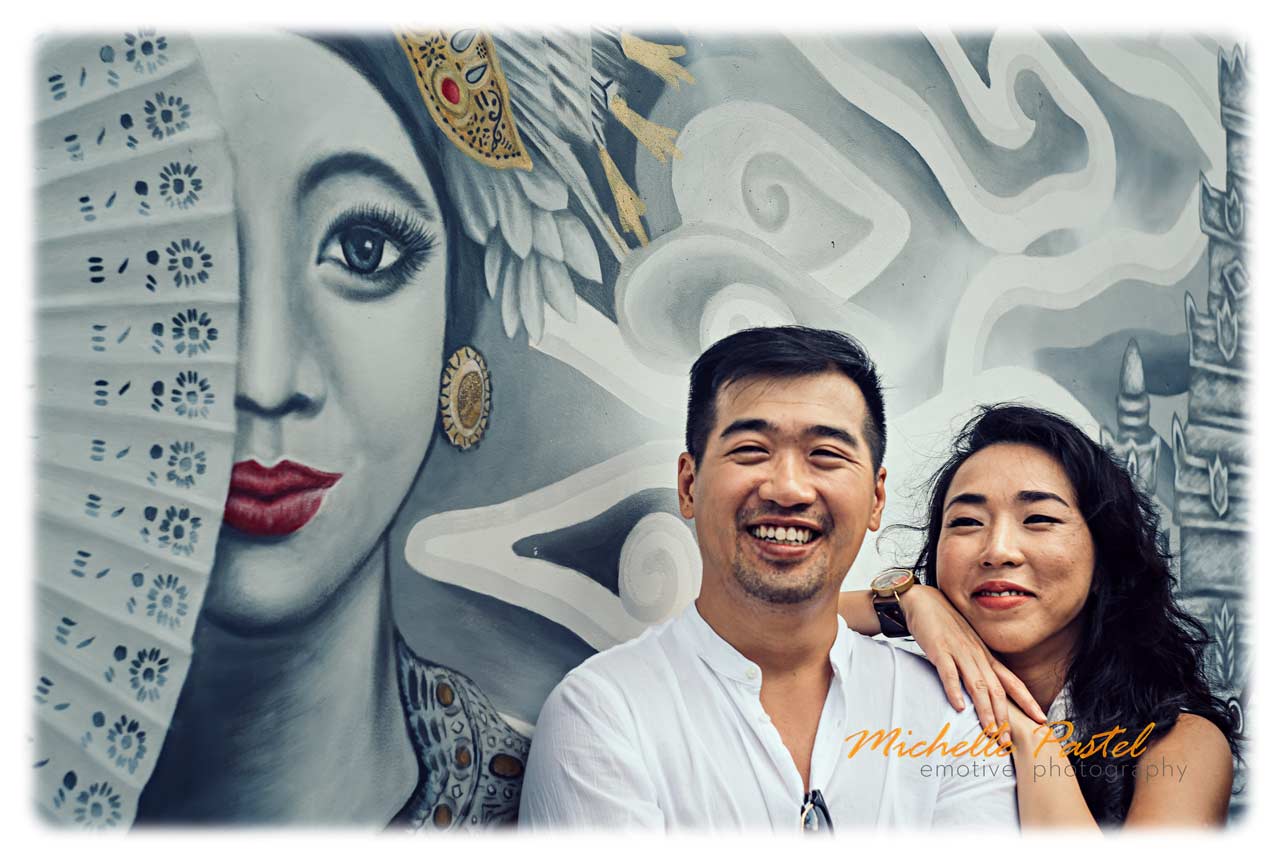
HELIOS 44-2 Lens in action
How to achieve the swirly bokeh in portraits with the Helios lenses:
To get the swirly bokeh there are a few things to note.
Firstly, the lens’ aperture needs to be wide open – f2.0 in case of the 58 mm and f1.5 in the case of the 85 mm lens.
The other requirement to get the swirly bokeh effect is your subjects need to be against a background that can produce such bokeh.
There is no swirly-ness in the sky for instance. Nor in buildings or other structures far in the background such as in the following picture.

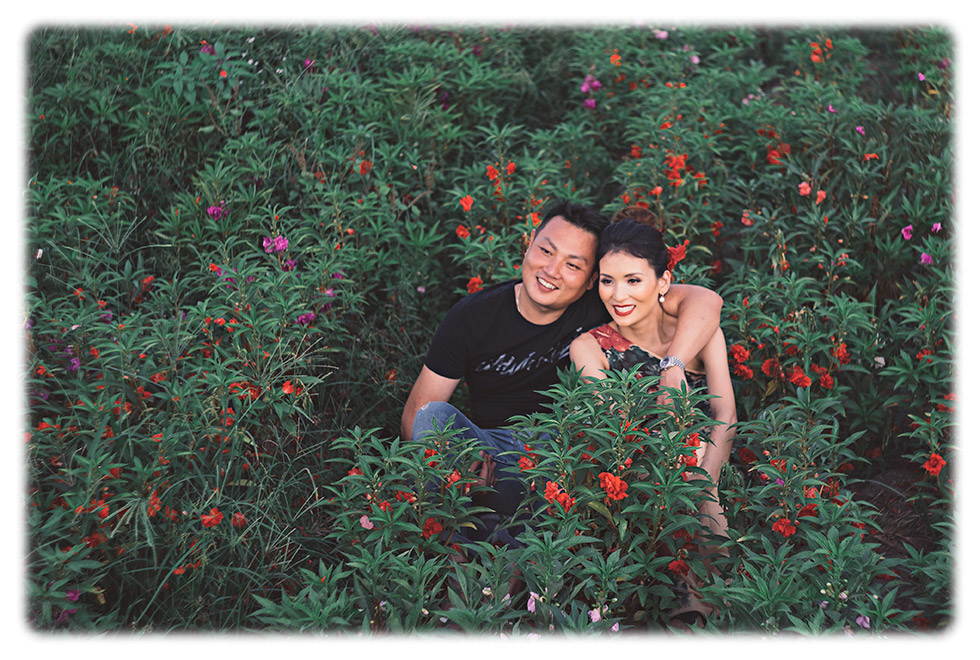
HELIOS-40 Lens 85 mm / f2.0
Ideally, you have a background with a lot of contrast and shapes. Bright light sources or back-light coming through trees can be ideal.
Secondly, the distance to your subjects matters also.
To get a good foreground-background separation, your subjects should be between 1 and 3 meters away from you.
Needless to say, finding or creating such conditions can be tricky and challenging.
But it can be done. And one of the best ways is to do some planning and location scouting. At least this is what I do before a photo project.
Now let’s get swirly and get your head spinning:
SOVIET UNION made Lens HELIOS-40 85mm / f1.5
is your head already spinning from the swirly bokeh ? HELIOS-40 85mm / f1.5
How sharp are the Helios lenses ?
The short answer is: sharp enough…
However, when used wide open they cannot achieve the same sharpness as their modern counterparts. But sharpness is not what you are after when you use a Helios lens.
Your clients will not even notice a slightly soft photo. Because they do not evaluate a photo on its technical merit but on the overall look and feel.
Also, a slight lack of sharpness or miss-focus can easily be mitigated with the texture, the sharpness and sometimes even the clarity adjustment brush in Lightroom.
The HELIOS-40 85mm / f1.5 can be very unforgiving when it comes to nailing the focus. So I have to constantly readjust the focus ring a tiny bit.
That is because I am not the kind of photographer who does the ‘go-there-and-smile’ kind of photographs where my subjects are still.
I rather create what I call ‘micro-scenarios’ or situations. Whereby I ask my subjects to do something while I photograph them.
Consequently, my subjects will constantly move a bit. We humans are not made to be still. Especially when we interact with each other.
And even a slight sudden tilt of the head or similar movements will throw the focus off.
As a result, there will be a rather high number of photos where the focus is off.
Enough of my bla bla bla. Here are some more examples of wedding & portrait photography with vintage lenses.
The ones in the following exploit another ‘strength’ of the HELIOS, namely how easy they flare.
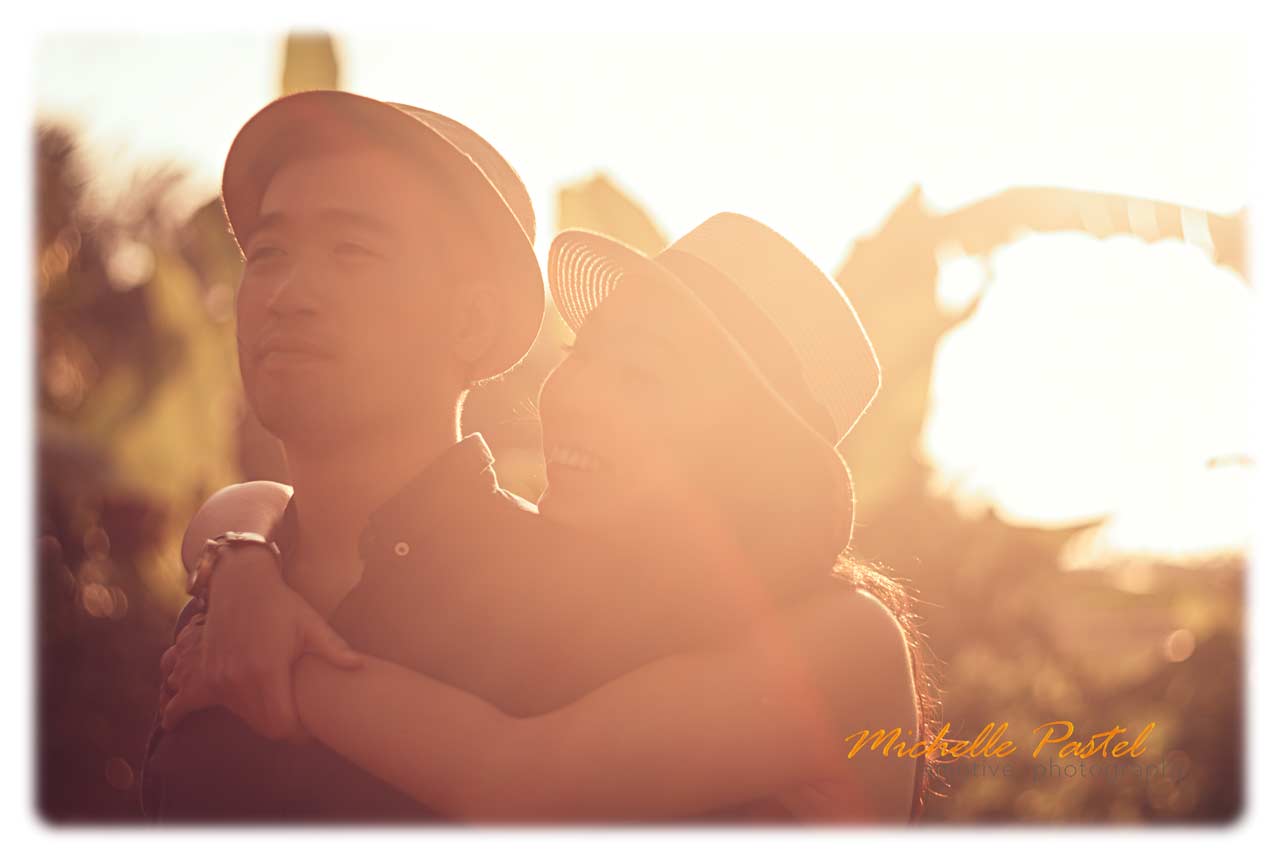
HELIOS 40 85mm / f1.5 can flare like crazy
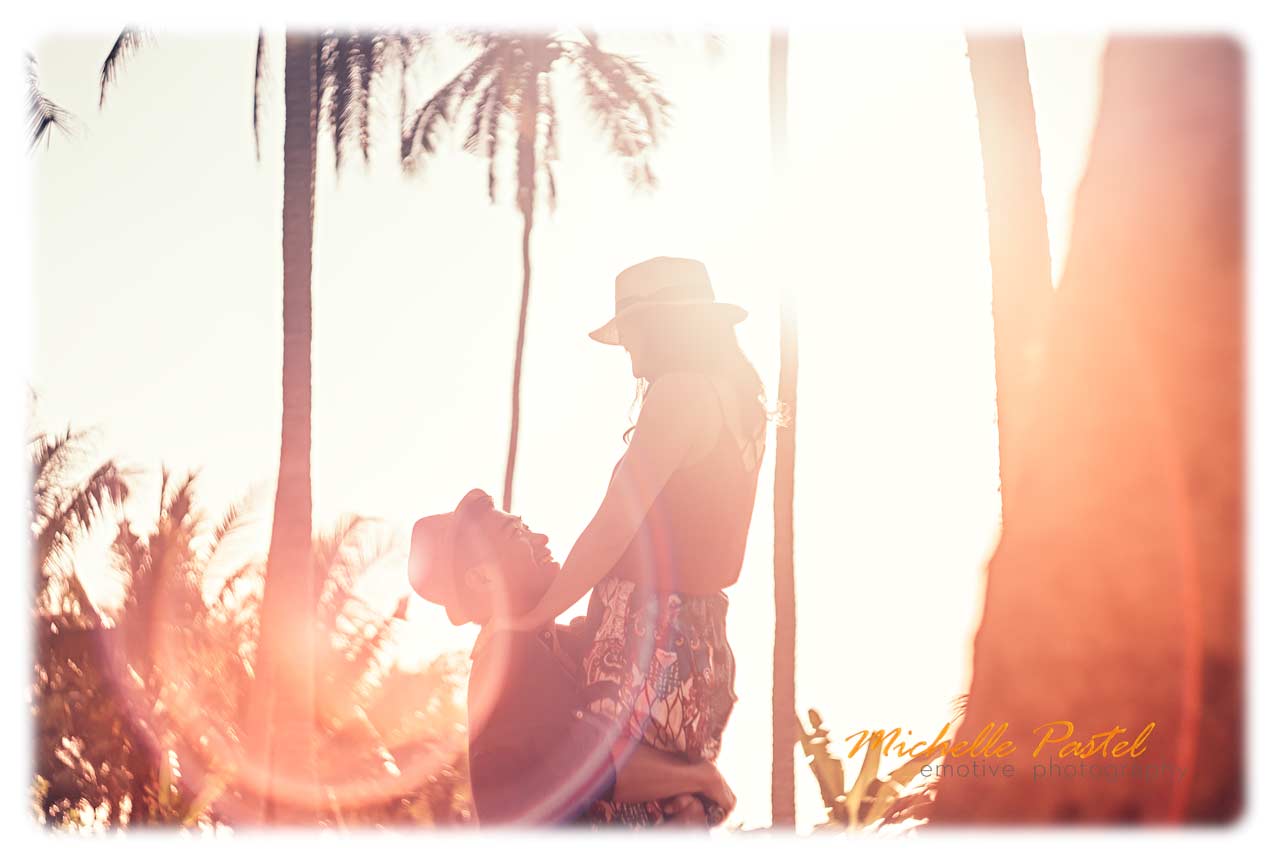
Another type of flare this lens produces
HELIOS 40 85mm / f1.5 – flare behavior is unpredictable…
The look and the editing
Of course, for wedding & portrait photography with vintage lenses, I am using a film-style look and toning for the images. There was no particular preset involved – I use some self-developed presets as the basis.
I then still tweak white balancing, exposure and sometimes shadows and highlights for each photograph.
The main component of the film look comes from the curves.
The other important ingredients are the colours. For this, I use tools such as H-S-L, split toning and even the camera calibration sliders.
In an upcoming blog post, I will shed more light on my editing process and also answer the question of whether vintage lenses require different settings when compared to photos done with modern lenses.
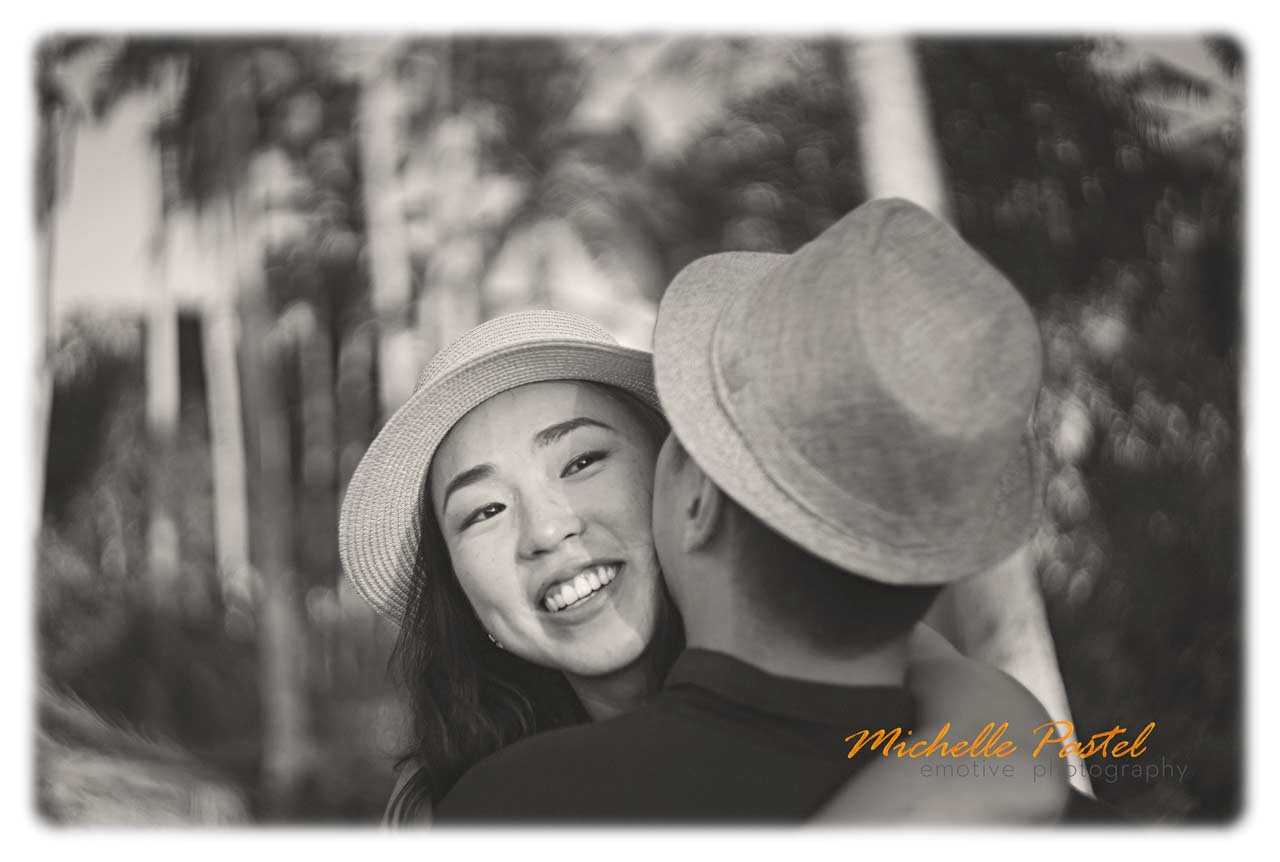
Here are more of my favorite photos from this Bali engagement photo project:
HELIOS 44-2
HELIOS 44-2 with slightly swirly bokeh
HELIOS 44-2 with slightly swirly bokeh
HELIOS 44-2 | fun for them – fun for me
I hope I have inspired you to also try wedding & portrait photography with vintage lenses.
And if you want to delve deeper into the world of vintage lenses and explore SLOW PHOTOGRAPHY as a way to approach the craft of photography then you must join our friendly and helpful Facebook group of like-minded photographers at:
SLOW PHOTOGRAPHYBe a member of the movement
So what is the conclusion here?
Wedding & portrait photography with vintage lenses can be very rewarding and produce rather unique images.
The quirkiness and technical inadequacies can enhance the character of the photographs.
The faded look of film-style photos or the lack of contrast, the lower saturation, and other looks-like-film characteristics can easily be emulated in post pro.
But the swirly bokeh or the doughnut bubble of a mirror lens can only be achieved with the real thing.
Are you also using vintage lenses for your commercial projects? Which is your favorite?
Or do you plan to try to use vintage lenses?
Please leave a comment below. I would love to hear from you.
Truly’ DOMINIK
FOLLOW ME ON


Ogoh Ogoh in Bali

Ogoh Ogoh in Bali – the demons of Bali
You may have heard about them. You may even have seen them. At least on photographs.
Yet most people outside of Bali know surprisingly very little about Ogoh Ogoh.
So, I thought an article about Bali’s Ogoh Ogoh would be in order.
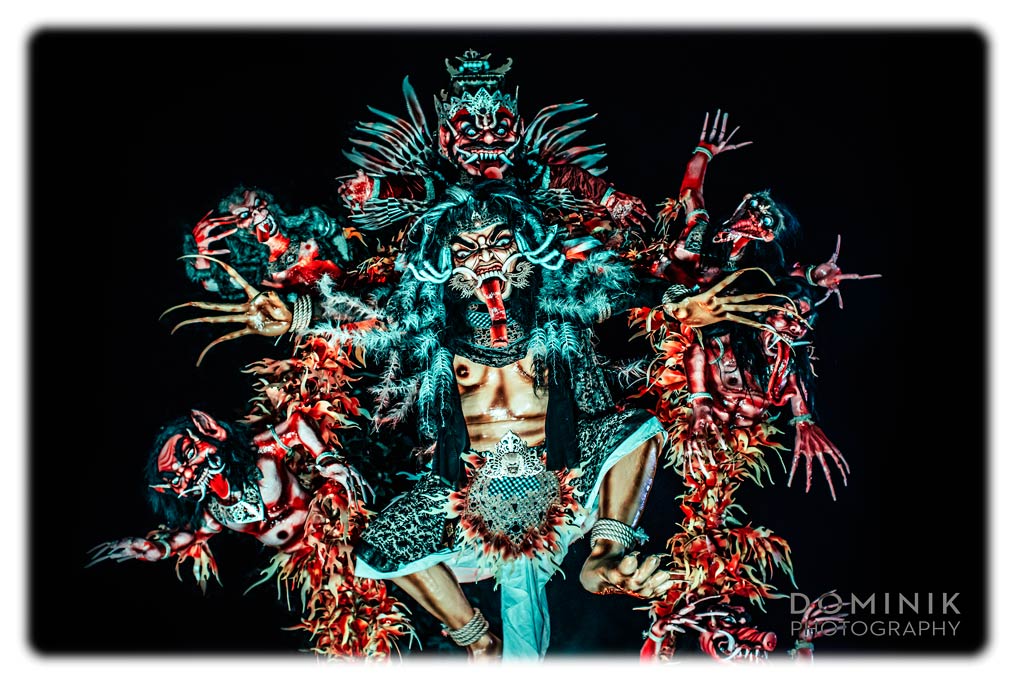
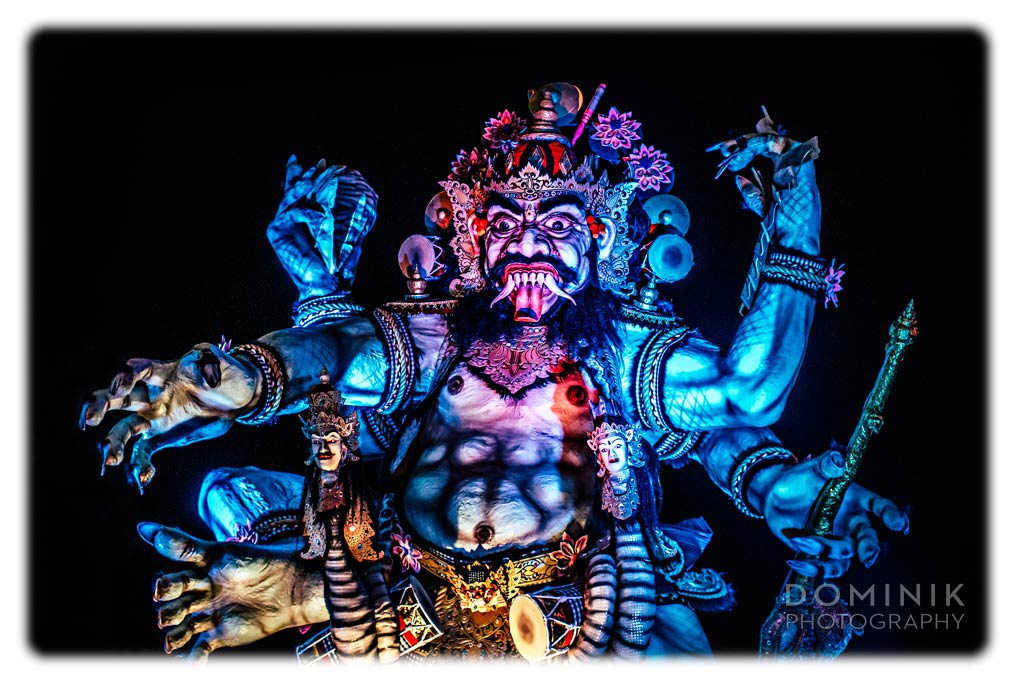
But before we dive in let’s see some of those ‘lovely’ Ogoh Ogoh first.
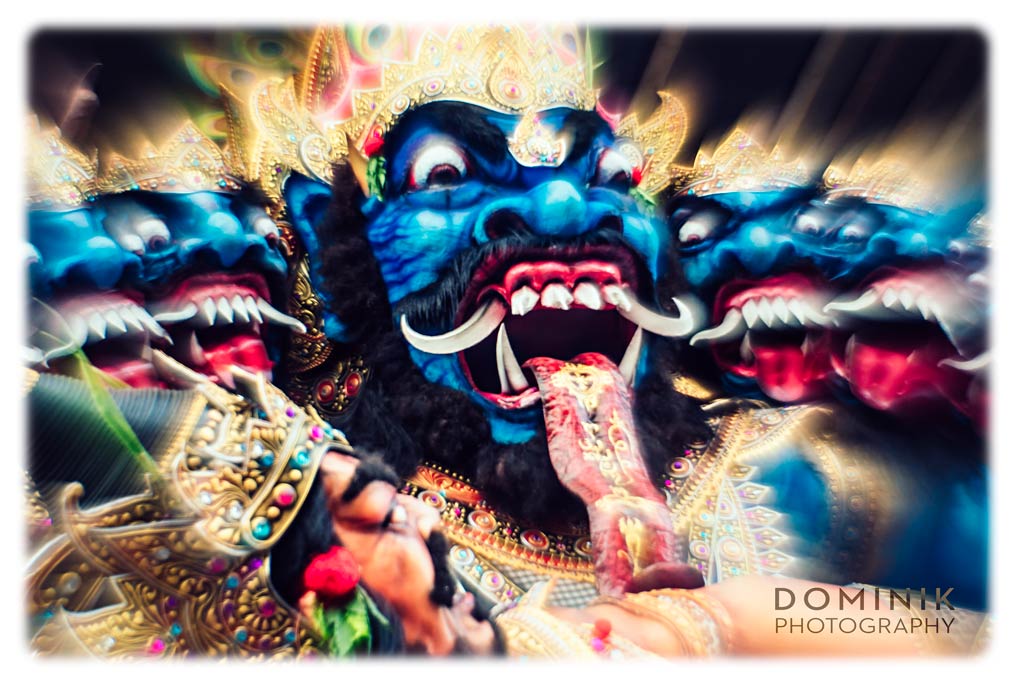
A ‘multi-headed’ in Blue – captured with a modified Helios 58mm / f2 lens with a modified front element

and another one in red. No Photoshop involved here – the painterly effect comes from using a modified vintage lens
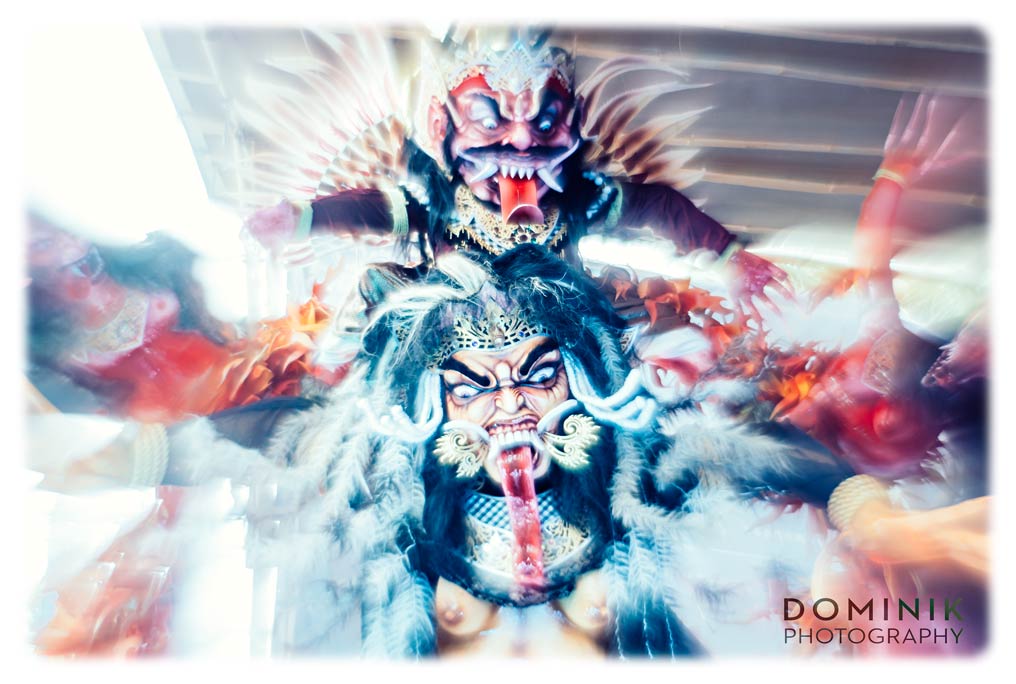
Interestingly most Ogoh Ogoh in Bali depict female figures
So what on earth are Ogoh Ogoh ?
Why are they made ? What purpose do they have ? What happens with them ? Where can you see them ?
Let’s examine those questions one by one.
And be prepared for a couple of surprises.
The purpose of Ogoh Ogoh making
Essentially, an Ogoh Ogoh embodies all that is evil, all that is bad. All that is to be feared.
They also symbolize the bad human traits such as hate, greed, envy and and and…
The tradition is like everything in Bali rooted in Hindu mythology, but it is not strictly a religious pursuit.
How much of this is religion and how much is folklore is hard to pin down. Opinions on this vary, even among the Balinese.
Ogoh-Ogoh figures are made in weeks leading up to Nyepi, which is Bali’s most important religious event. As significant as Christmas for Christians or Idul Fitri for those of Muslim faith.
It can take up to one month or even more to build an Ogoh Ogoh.
Ogoh Ogoh – an ancient tradition ?
If you think that Ogoh Ogoh are an ancient Balinese tradition which has been passed down from generation to generation I am afraid I have to disappoint you.
The Ogoh Ogoh tradition was introduced in the 1970ies and 1980ies. Its exact origin is disputed but it is generally believed that it was born out of intent to get the younger generation involved in religious pursuits.
As such the making of Ogoh Ogoh was initially done by the youths of a village. But in many places that has changed and the older generation is now also involved.
Villages in Bali strive to outdo each other and to have the biggest, the fiercest looking Ogoh Ogoh or whatever superlative you want…
Consequently, the cost for making those figurines can run into several thousands of dollars and I heard some could be as expensive as 5000 USD to make.
What are Ogoh Ogoh made of ?
Initially, they were made of papier-mâché applied onto a bamboo, wood, or wire mesh frame. But increasingly Styrofoam and other materials are also used.
Once the figure is shaped comes the ‘fun part’: coloring the whole thing. Putting hair and accessories on and generally decorating the Ogoh Ogoh. Here the Balinese show their full potential as master artisans. Their creativity knows no limits.
I won’t try to describe those wonderful creations, see my pictures and you’ll get the idea.
Nowadays some Ogoh Ogoh even have electricity built in and the eyes of the figurines are lit by light bulbs.
It’s an evolving art form. And it is interesting to see where it will go in years to come.
Some more pictures of Ogoh Ogoh in Bali:

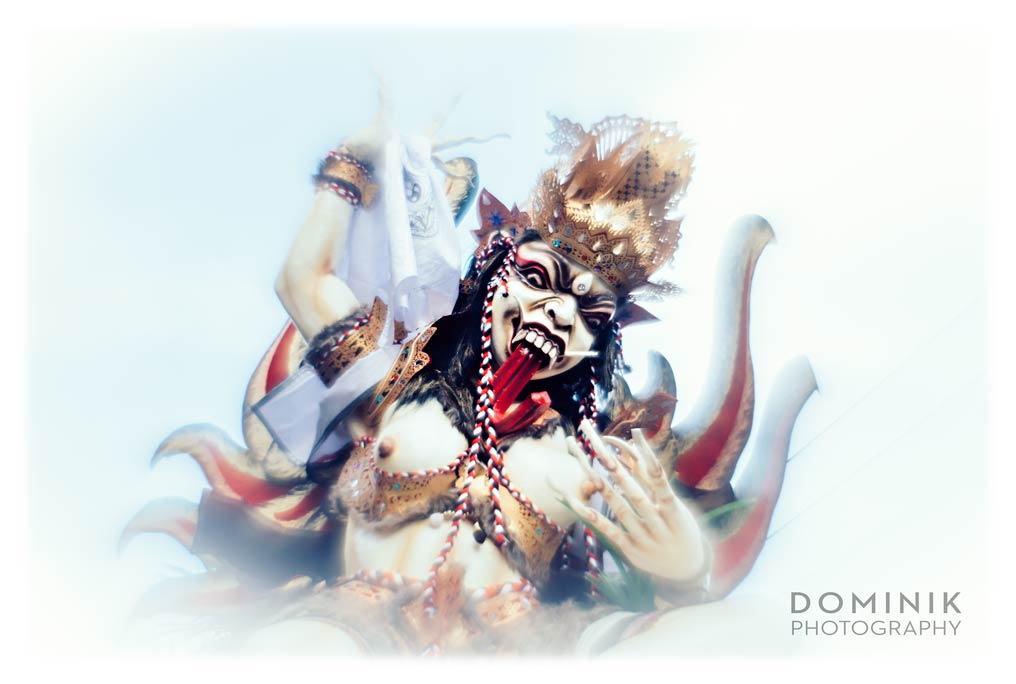
Traditional Balinese letters on the Ogoh Ogoh’s tongue.

I am gonna get you…

You will not find Ogoh Ogoh anywhere outside of Bali.
Ogoh Ogoh Parades
Over the years the pursuit making Ogoh Ogoh has evolved from just being a fun activity into a highly competitive ‘art form’. Villages in Bali strive to have the best Ogoh Ogoh. And they go through great length to achieve that.
In the evening often the Ogoh Ogoh from neighboring villages are brought to one large common space where they are paraded. Judges will award the best Ogoh Ogoh. For the villagers, it is highly prestigious to win such an award.
Most Ogoh Ogoh in Bali are burned after the parade. But I have been told that some being sold on to other villages or wealthy individuals.
Burning this highly artistic figures may seem to be a waste for outsiders.
But there is a reason for that. Remember Ogoh Ogohs represent evil spirits and the ‘darker aspects of existence’.
Thus burning them signifies the win of good over evil.
Also as good as those Ogoh Ogoh figures look they are usually not built to last. So they would anyway within a rather short time deteriorate and fall apart when exposed to the elements.
With all that in mind burning them actually makes sense, doesn’t it ?

How far Ogoh Ogoh is indicative of the ‘psyche of Bali’ I can’t say…

Always fiercely looking good…
Most Ogoh Ogoh have wings, but fortunately, they do not fly (yet)…
Where & when to find Ogoh Ogoh in Bali?
You need to come to Bali at the right time. Usually, the Ogoh Ogoh are only ‘on display’ for one, two days. Whereas, during the time when they are built most Ogoh Ogoh are more or less covered.
So actually the only day, when you can see those Ogoh Ogoh in all their glory, is the day before Nyepi.
FYI: Nyepi is the day of silence.
If you come and tour Balinese villages around 2 weeks before Nyepi you can see in many villages how they are made. But as I mentioned above – they are mosly covered during the time they are built.
Come to see Ogoh Ogoh is on the day before Neypi.
Since the traditional Balinese calendar follows a lunar calendar it falls on a different date every year. But just google for Neypi and it won’t be difficult for you to find out when the next Nyepi will be.
For the rest of the year, you won’t see any Ogoh Ogoh in Bali. Occasionally Ogoh Ogoh don’t get burned on the eve before Nyepi and remain on display for a few weeks after Nyepi. But not many.
You can see the Ogoh Ogohs throughout Bali. As a rule of thumb you can say: the more affluent an area in Bali is the better and more grandiose the Ogoh Ogohs will be.
Best is to stay in the South of Bali. But I would not be able to point out one particular village or place. Too many good ones.
Ogoh Ogoh at night when they are paraded.

Many have lights mounted powered by car batteries…
Balinese culture at its best
FOR PHOTOGRAPHERS
You should definitely bring a zoom lens. 24-70 or 24 – 105, even a 70-200 could be a very good option. Because most of the time you won’t have the freedom to choose the ideal distance. And you will need all the ‘zoom freedom’ you can get.
If you are ‘serious’ about photographing Ogoh Ogoh it is best to cruise around in the more rural areas and through villages. In my opinion, you are much better off using a motorbike than a car to move around.
You will also find Ogoh Ogoh in touristy areas like Kuta, Legian, Seminyak, etc..
I personally avoid the evening when the Ogoh Ogohs start to move around the village. Because it gets very crowded and I am not a ‘crowd person’.
It also would hurt my heart seeing something as beautiful as an Ogoh Ogoh being committed to the flames.
Even though the Ogoh Ogoh tradition has a religious component to it I would not know of any restrictions that apply. Of course, you won’t be able to climb on an Ogoh Ogoh.
But you can go as near as you can and I have never encountered any restrictions.
The Balinese tend to be very proud of their creations and there is definitely a ‘show-off’ element.
If somebody asks you for money for photographing politely decline and move on somewhere else.
If you plan on also photographing the Ogoh Ogoh parade in the evening better bring a fast lens ‘coz your flash won’t get you far.
I found photographing Ogoh Ogoh rather difficult because it is usually hard or impossible to get unobstructed backgrounds. Most of the time you will have buildings, electricity cables and other things providing for a rather ‘messy’ background.
If you are interested to join me for photographing Ogoh Ogoh and Melasti proceedings next year please drop me an email to enroll.
Well, I hope that after reading this article you have a better idea about the Ogoh Ogoh tradition in Bali.
And if you after reading this article got more interested in Bali’s fascinating culture and traditions you will definitely also want to discover the following article:
MELASTI BALI’S MOST HOLY FESTIVAL
Greetings from BALI
DOMINIK
may the light be always with you…
You can learn more about the background of the Ogoh Ogoh tradition in Bali at this Wikipedia article.
FOLLOW ME ON
First commercial project with vintage lenses only

First commercial gig exclusively with vintage lenses & manual focus lenses
A relatively large part of my work as a professional photographer in Bali are pre-wedding or engagement photo sessions.
Pre-wedding and engagement photography is hugely popular here in Bali. Hardly surprising given the natural beauty of Bali and the island’s standing as a major tourist destination.
Every week hundreds of couples from all across the world and in particular from Asia flock to Bali to have their photos taken here.
An entire industry has emerged for pre-wedding / honeymoon and engagement photography in Bali.
The vast majority of photographers catering for this sort of photography create the same kind of pictures in the same kind of locations. Mostly rather uninspiring, instant look-here-and-smile photography.
To differentiate myself my approach is ‘slow photography’. Part of which is to use vintage gear and manual lenses. Because it allows me to create quite unique looking photographs.
Let’s see some photos first from projects where I started to use vintage and manual focus lenses. And fell in love with it.

The lens flare is not Photoshop but courtesy of a Helios 40-2 lens
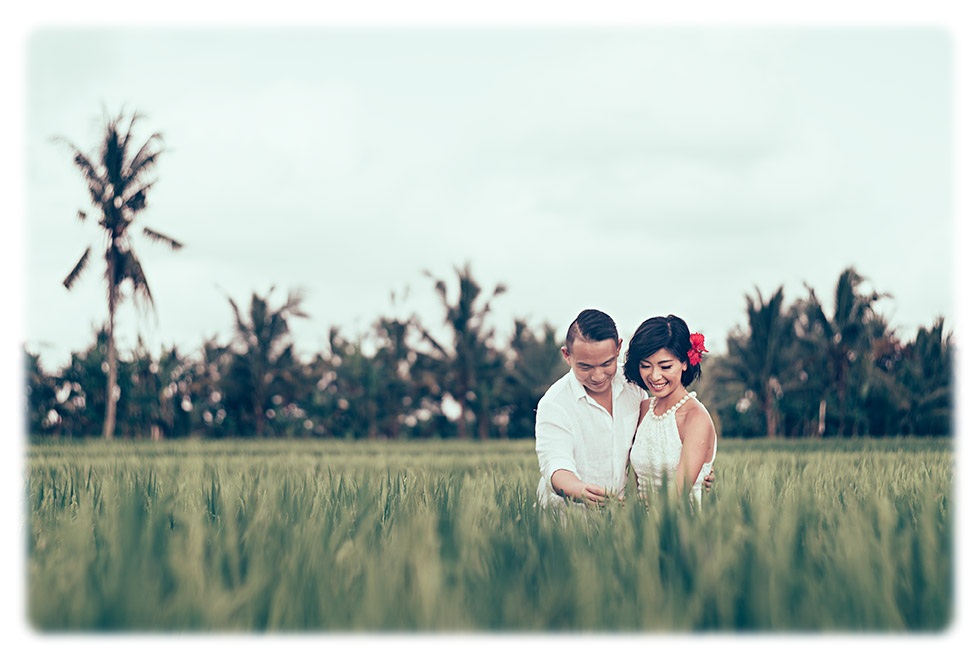
Also HELIOS 40-2

See the ‘swirly’ bokeh ? Helios 44-2

another light ray photo with the Helios 40-2 – a true gem for lens flare lovers

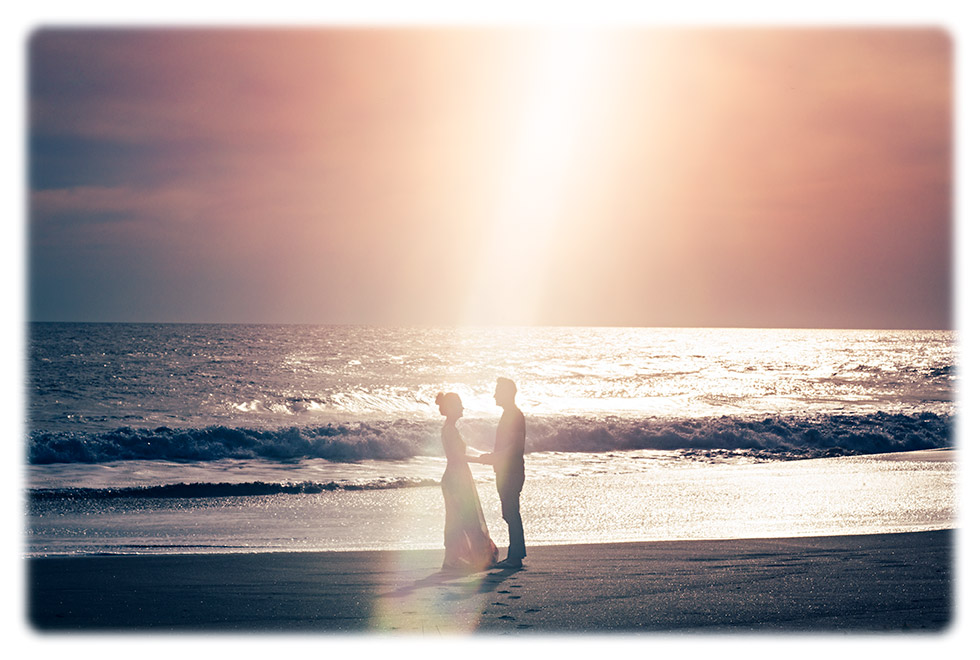
The Helios 85 mm / f 1.5 is also perfect for low light photography – all natural light
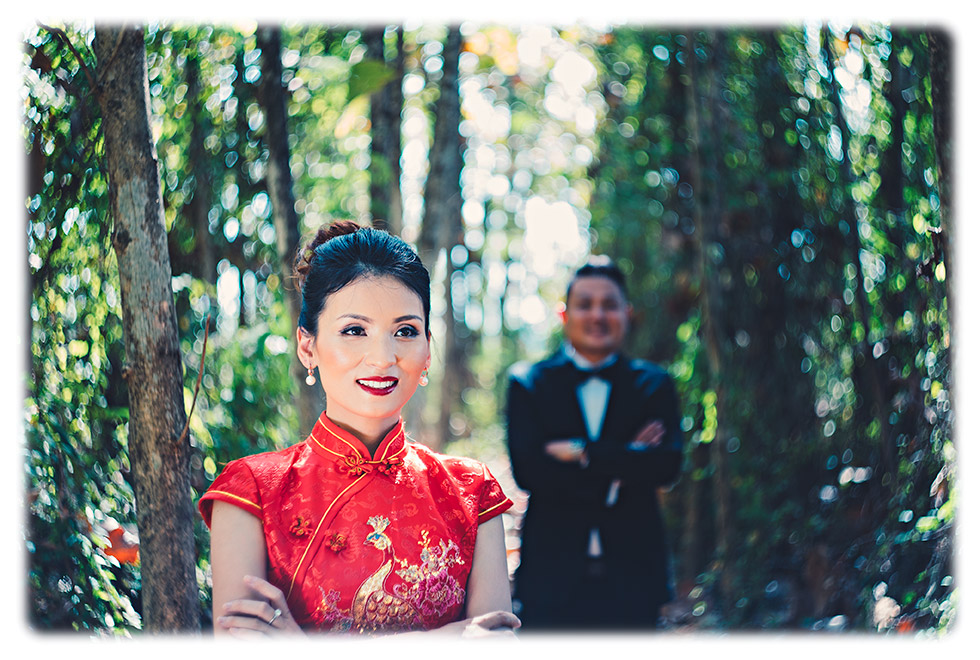
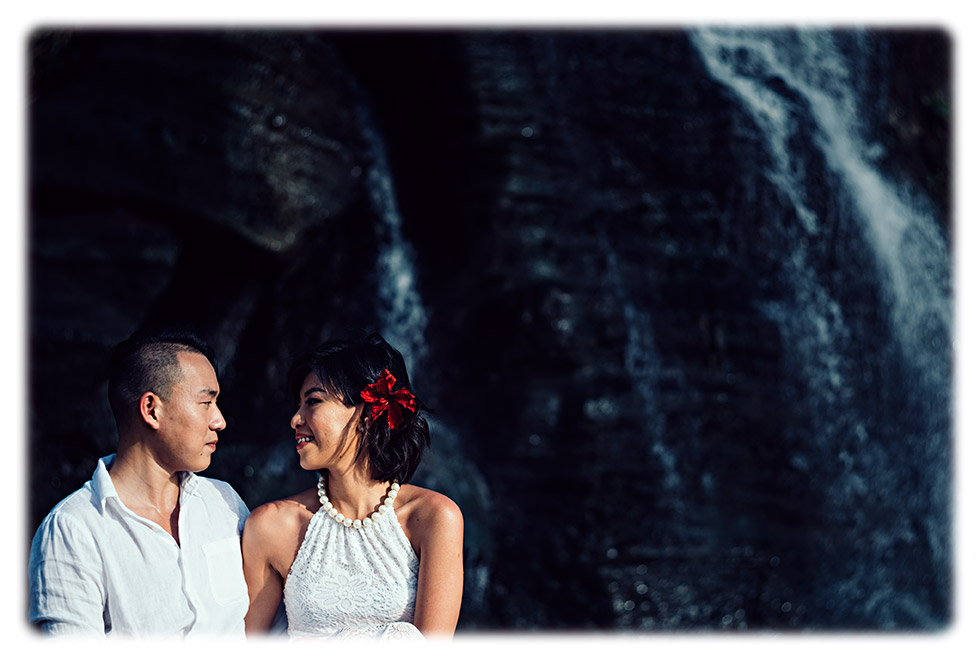
Lovely lady and swirly bokeh… 😉
An ‘old horse’ performs new tricks!
I have been doing wedding photography for over 15 years. Throughout my career, I used exclusively Canon DSLR cameras and modern autofocus lenses. Mostly Canon L glass and also a few Sigma and Tamron lenses.
Auto-focusing worked very well for me. I totally relied on it and trusted my camera’s ability to nail the focus – 99% of the time.
So I usually told other photographers who were always glued to their camera’s monitors checking for sharpness and focusing issues that they should stop doing that. Because Canon’s autofocus system has been a long time in the making and is pretty accurate.
I would go as far as to say that modern autofocus cameras almost never fail to nail the focus. At least for me, that was the case in proly 500 or more photography gigs.
Therefore, it never crossed my mind that I would ever resort to manual focusing.
All that changed when back in 2016 I got my first mirrorless camera and I bought my first manual lens without autofocus.
At first, it was a bit of a pain for me not to have autofocus. But with the tools offered by mirrorless cameras such as focus peaking and magnification, I quickly got the hang of focusing manually.
During last year I started to use besides my trusted Canon DSLR gear also occasionally a manual focusing lens. I was a bit hesitant to do so because at weddings things happen rather quickly and I would not want to do anything that slows me down.
So why adding manual focus to the list of things I need to pay attention to… ?
Acquiring more and more manual and vintage lenses I got good at focusing manually. And more importantly, I became quicker. Over time and with lots of practice manual focusing became second nature to me.
Shall we see some more photographs ?

even a 35 mm lens can get some pretty decent background blur. Kerlee 35 mm / f 1.2

The unique character of a Helios 44-2

pure ‘bokeh-licious-ness’ with Helios 85/1.5

and another one with ‘bokeh-monster’

works also brilliantly for B&W

missed focus…

Sigma 20mm / f 1.8 – circular lens flare
So, for my last engagement / pre-wedding project I decided to only use vintage glass, which of course is all manual focus.
To be perfectly honest two among the 4 lenses I used were not strictly vintage lenses.
One being a new Kerlee 35mm / f1.2 and a semi-vintage Sigma 20mm / f1.8 The Sigma is actually an autofocus lens but I used a cheap non-electronic EF to NEX mount adapter and therefore focused manually with it.
However, the most prominently used lenses were the two Helios – the 85mm / f1.5 and the 58mm / f2.0. Both mounted on Sony a7 rII cameras. Both truly vintage lenses.
Especially the 85 mm / f1.5 Helios. I am lucky to have a shiny silver version from the early1960ies. Proly older than myself.
So how did it all go ?
Before I give you my verdict may I invite you to see some more of the resulting photographs.
Yours Truly in action…

and the resulting picture
One more of Yours Truly…
The Helios 44-2 and the Helios 40-2 are perfect lenses for that vintage look and feel
I wont go into how fantastic the bokeh of those 2 lenses is. Many other have sung their songs of praise before.
Suffice to say that those lenses are perfect for that particular vintage look.
For me look & feel are certainly the main drivers for using vintage glass. However, using such lenses for commercial photography introduces some challanges. Challanges of practicality and usability.
The Helios 44-2 is just a breeze to use. No issues at all.
It is much easier to handle compared to the 40-2. The Helios 40-2 is a bit awkward to use and very unforgiving when it comes of nailing the focus. I had my fair share of missed shots with the 40-2 – but no major dramas.
I learned that the longer the focal length of a manual focus lens the harder it gets to nail the focus.
I also brought a 500 mm vintage lens to this project but failed completely getting any useable photographs with it. But that will be subject to another story.
With the 44-2 I would say I can meanwhile nail the focus in 90% or more of all shots. With the 85 mm lens and especially when its wide open I still misfocus quite a lot.
Part of the reason being that I do a lot of into the light shots to get this ‘killer bokeh’ . But photographing into the light in bright mid-day conditions is challenging – to say the least. It’s hard to describe – try for yourself and you will know what I am talking about.
I use both Helios lenses most of time wide open. But not necessarily always at their maximum aperture, but close to. With the 85 mm / 2 Helios lens I sometimes stop the lens down to f22 when I want to get sun stars.
One issue I face with the 40-2 wide open is that in Bali’s strong daylight, even at ISO 50 the maximum shutter speed of 1/8000 can result in overexposed photographs.
Yes, I know… Use a ND… I will, it’s on order.
Post processing in film-look
All the photos were edited and enhanced in Adobe Lightroom only. I used a very limited set of 3 different looks as the basis.
In case you ask which presets I used I am sorry to disappoint you – I am not using presets. At least not in the classical sense. What do I mean by that?
Of course, I apply one look / preset to all the photos at first, but then I further tweak the settings to my liking. Which means I always further adjust the settings and never leave them as they are from the applied preset.
Most significantly I tweak the white balance which alters the look quite a lot.
And most of the time I also adjust split toning settings and occasionally the settings in Lightroom’s H-S-L module.
Contrast adjustments are also often necessary. For this, I usually use the Black Point slider.
Because of all this tweaking I say I do not use presets. Because in my opinion a preset is no longer a preset when you make certain adjustments / tweaks to it. But I understand that not everyone will subscribe to that line of thought.
Here are a few more images:
Helio 85 mm – wide open
Helios 58 mm – as you can see perfectly good for ‘normal’ pix as well
The Helios 85 mm / f 1.5 with its best ‘trick’

85 Helios – bokeh smooth as silk…
with the 85 Helios the background just melts away.
I hope you have enjoyed my short BTS story about how my first commercial project with manual focus lenses and especially with the two Helios lenses – the 40-2 and the 44-2 went.
I would love to hear from you how you use vintage lenses in your commercial work and what are your experiences. Please leave a comment below.
Truly’ – DOMINIK
PS: All the photographs shown here were done under my pseudonym: MICHELLE PASTEL PHOTOGRAPHY
FOLLOW ME ON
Pasar Pagi – early morning in Bali
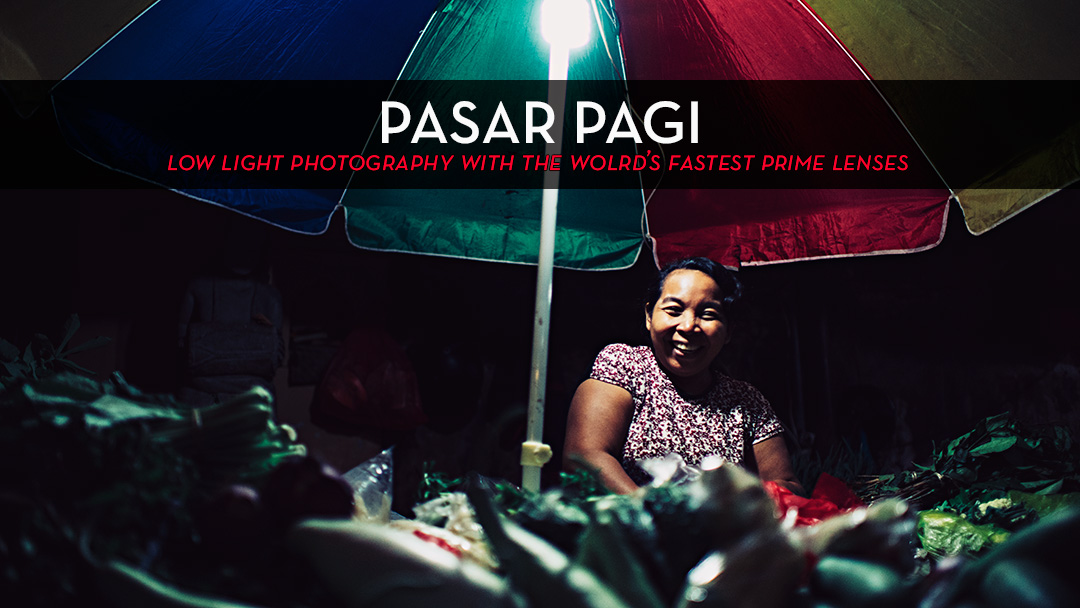
Low Light photography with the world’s fastest Prime Lenses
I proudly own 2 of the world’s fastest prime lenses. The Kerlee 35mm / f1.2 and a Mitakon (Zhongyi) 50mm / f0.95 (the ‘Dark Knight’).
But up until this shoot, I never had the opportunity to really put those lenses through the paces. And see what can be done with such fast glass.
Also, I do most of my photography with Sony mirrorless cameras, which are known for their exceptional low light performance with relatively noise-free picture well into the (very) high-ISO range.
So, I was wondering what to photograph under real ultra-low-light conditions.
If I were a ‘pixel-peeper’ I could easily set up some dimly lit scenario and do test shots. But that is not my thing. And there are many others out there who are very good at this pursuit.
My quest was to photograph something / somewhere with very little available light on one side but also something that would also yield somehow interesting photographs.
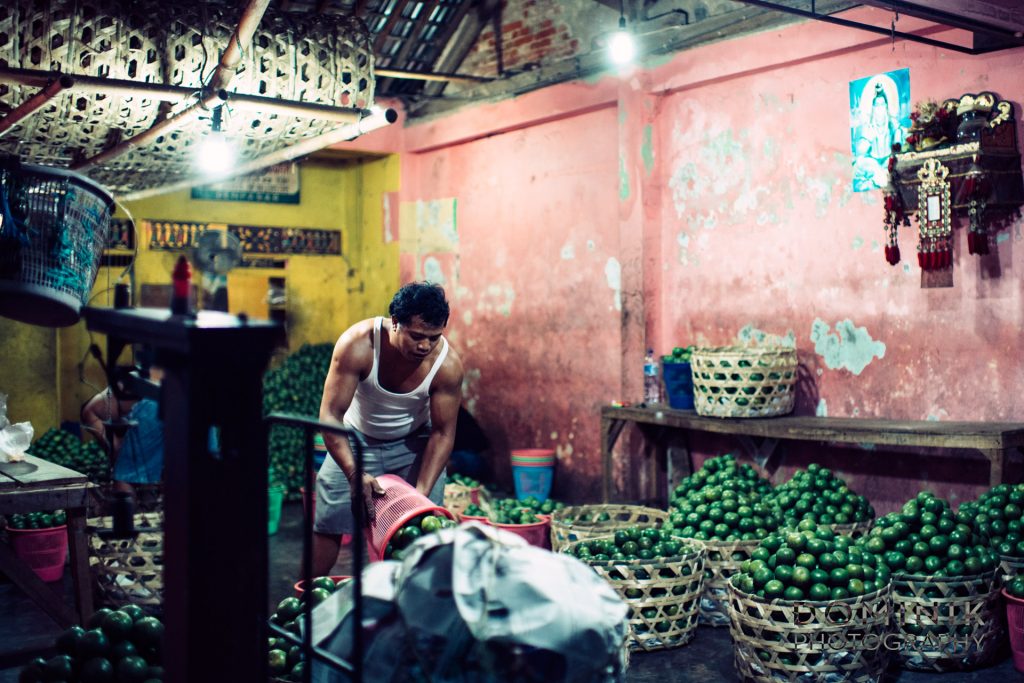
Being also a ‘borderline insomniac’ it was easy to get up very early in the morning and head on to Bali’s largest wet market. This market is outdoors and starts at around 3.30 h in the morning and closes before dawn. More about this market further down below.
Traditional wet markets in Asia are usually a feast for the eye and an ideal hunting ground for ‘human-affairs’ photographs.
So I was all set.
In the following a few photographs to set the stage.
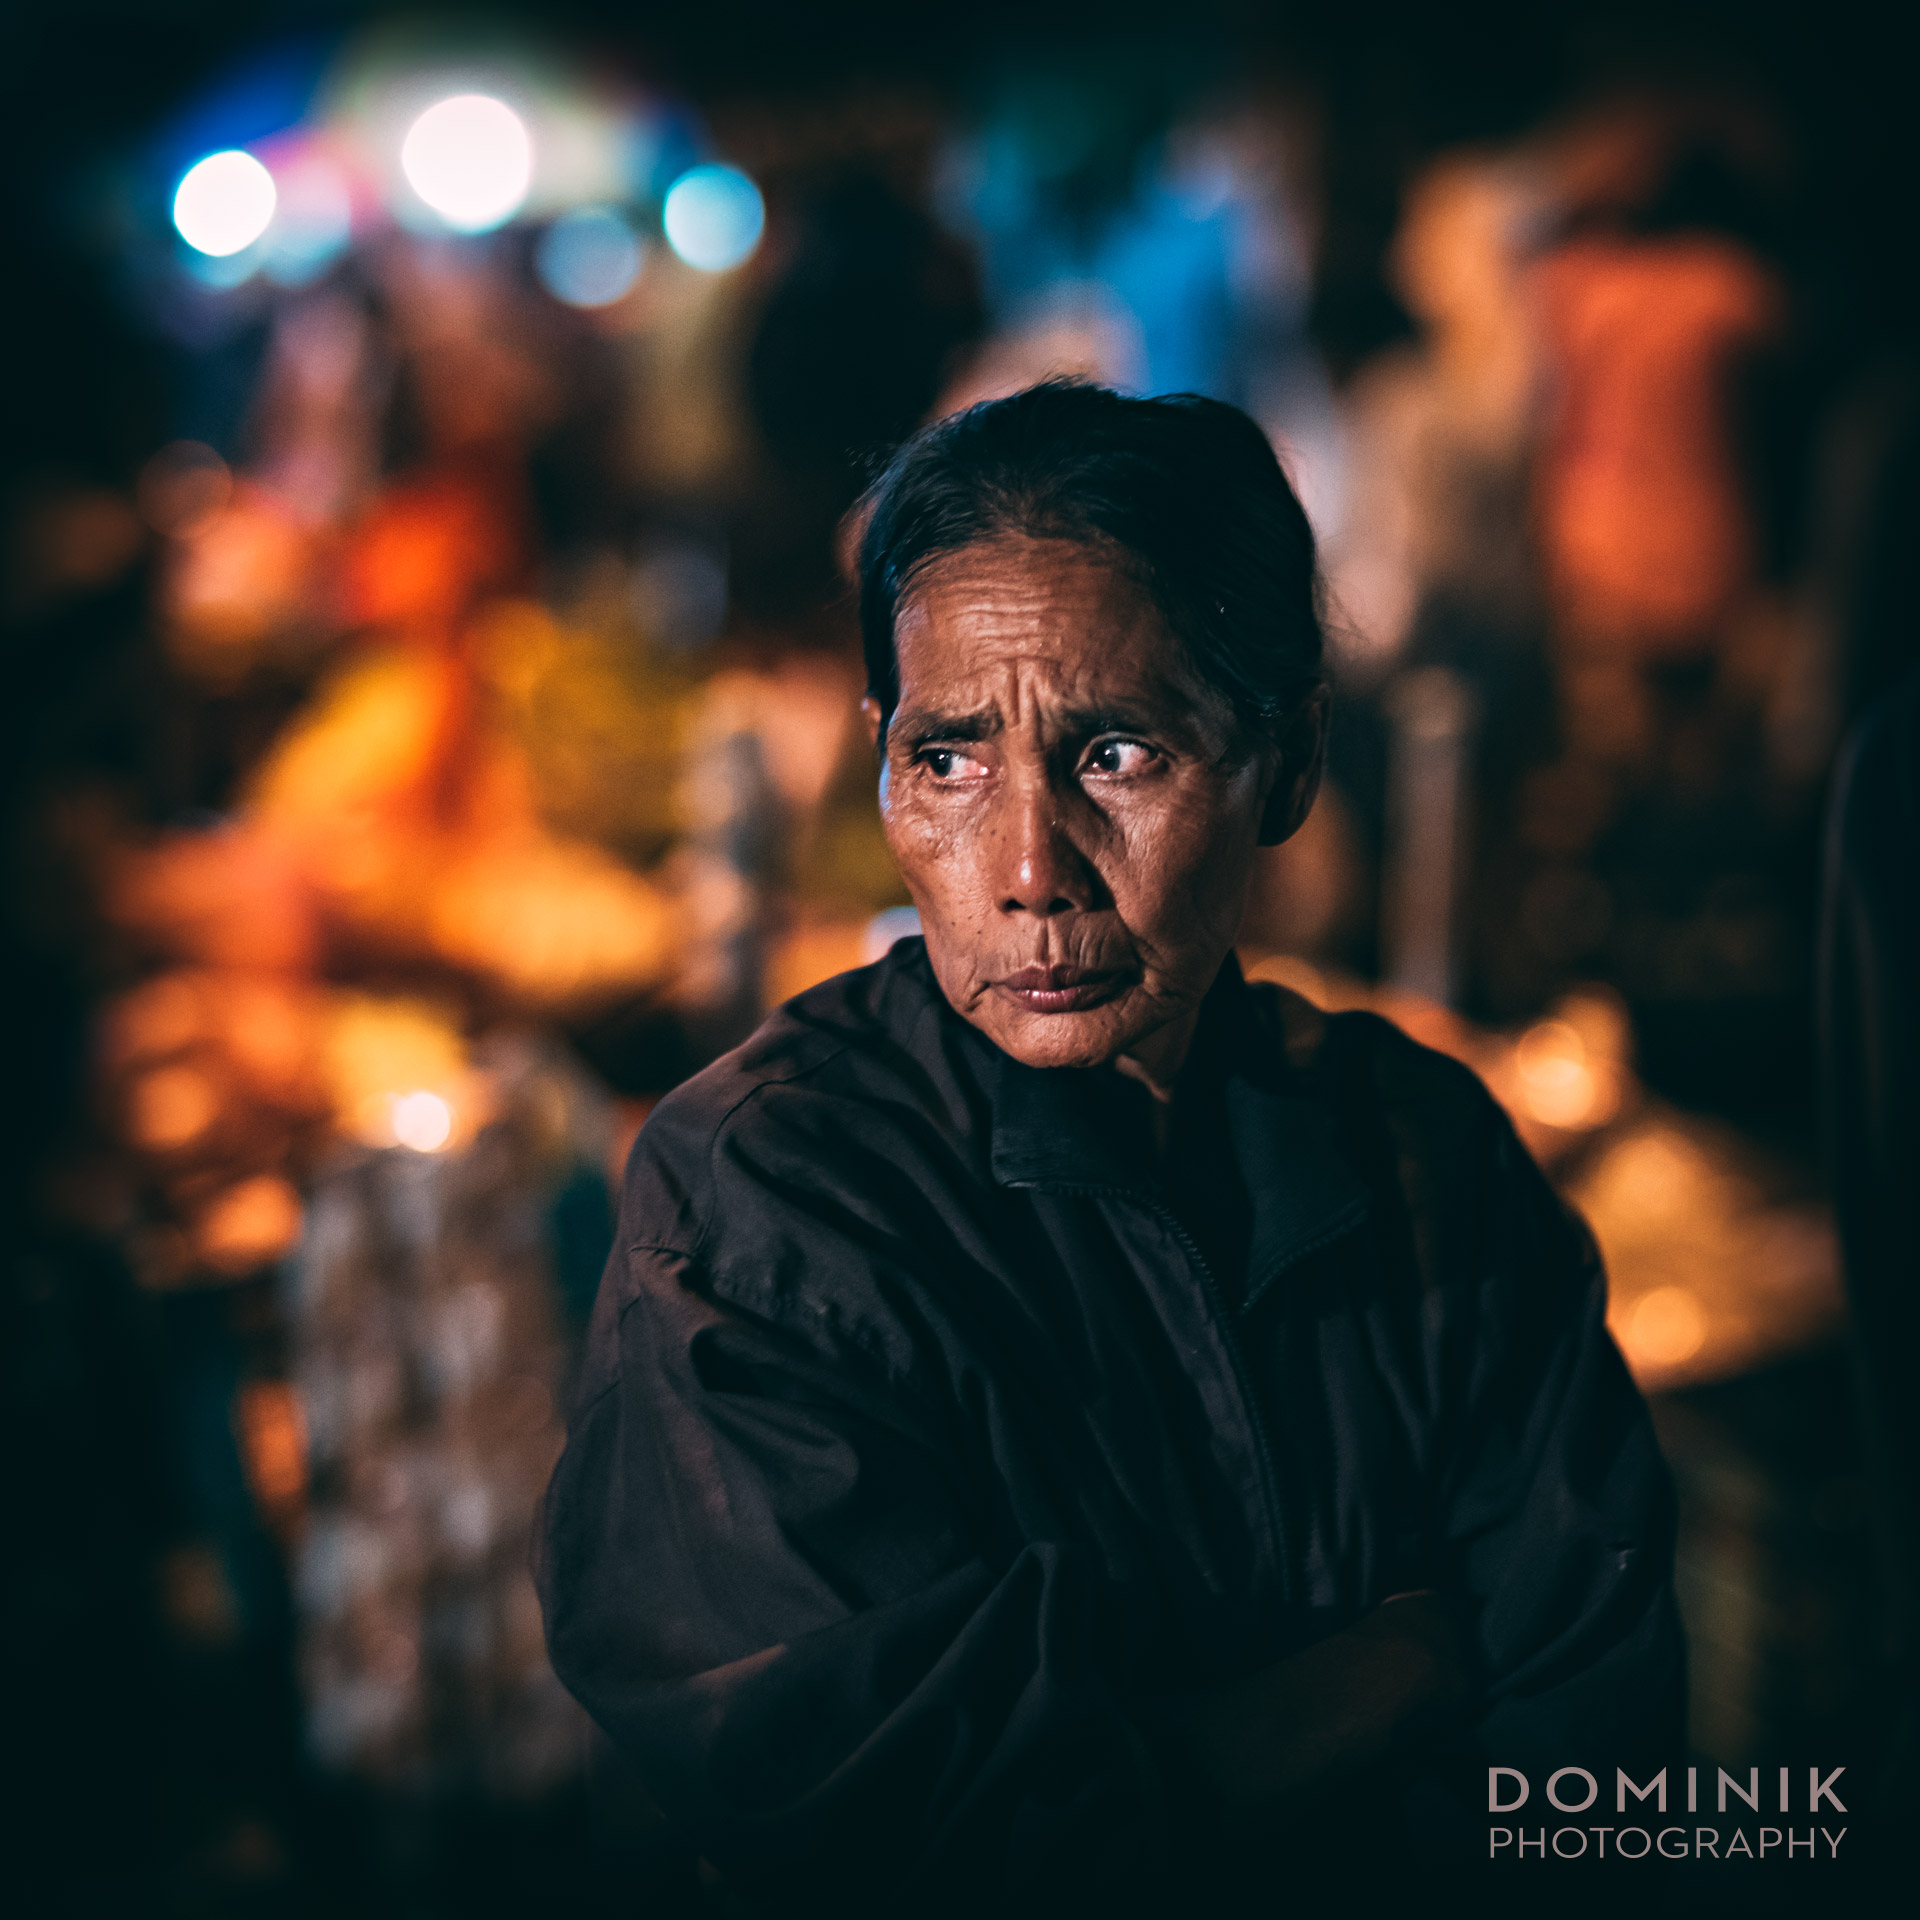
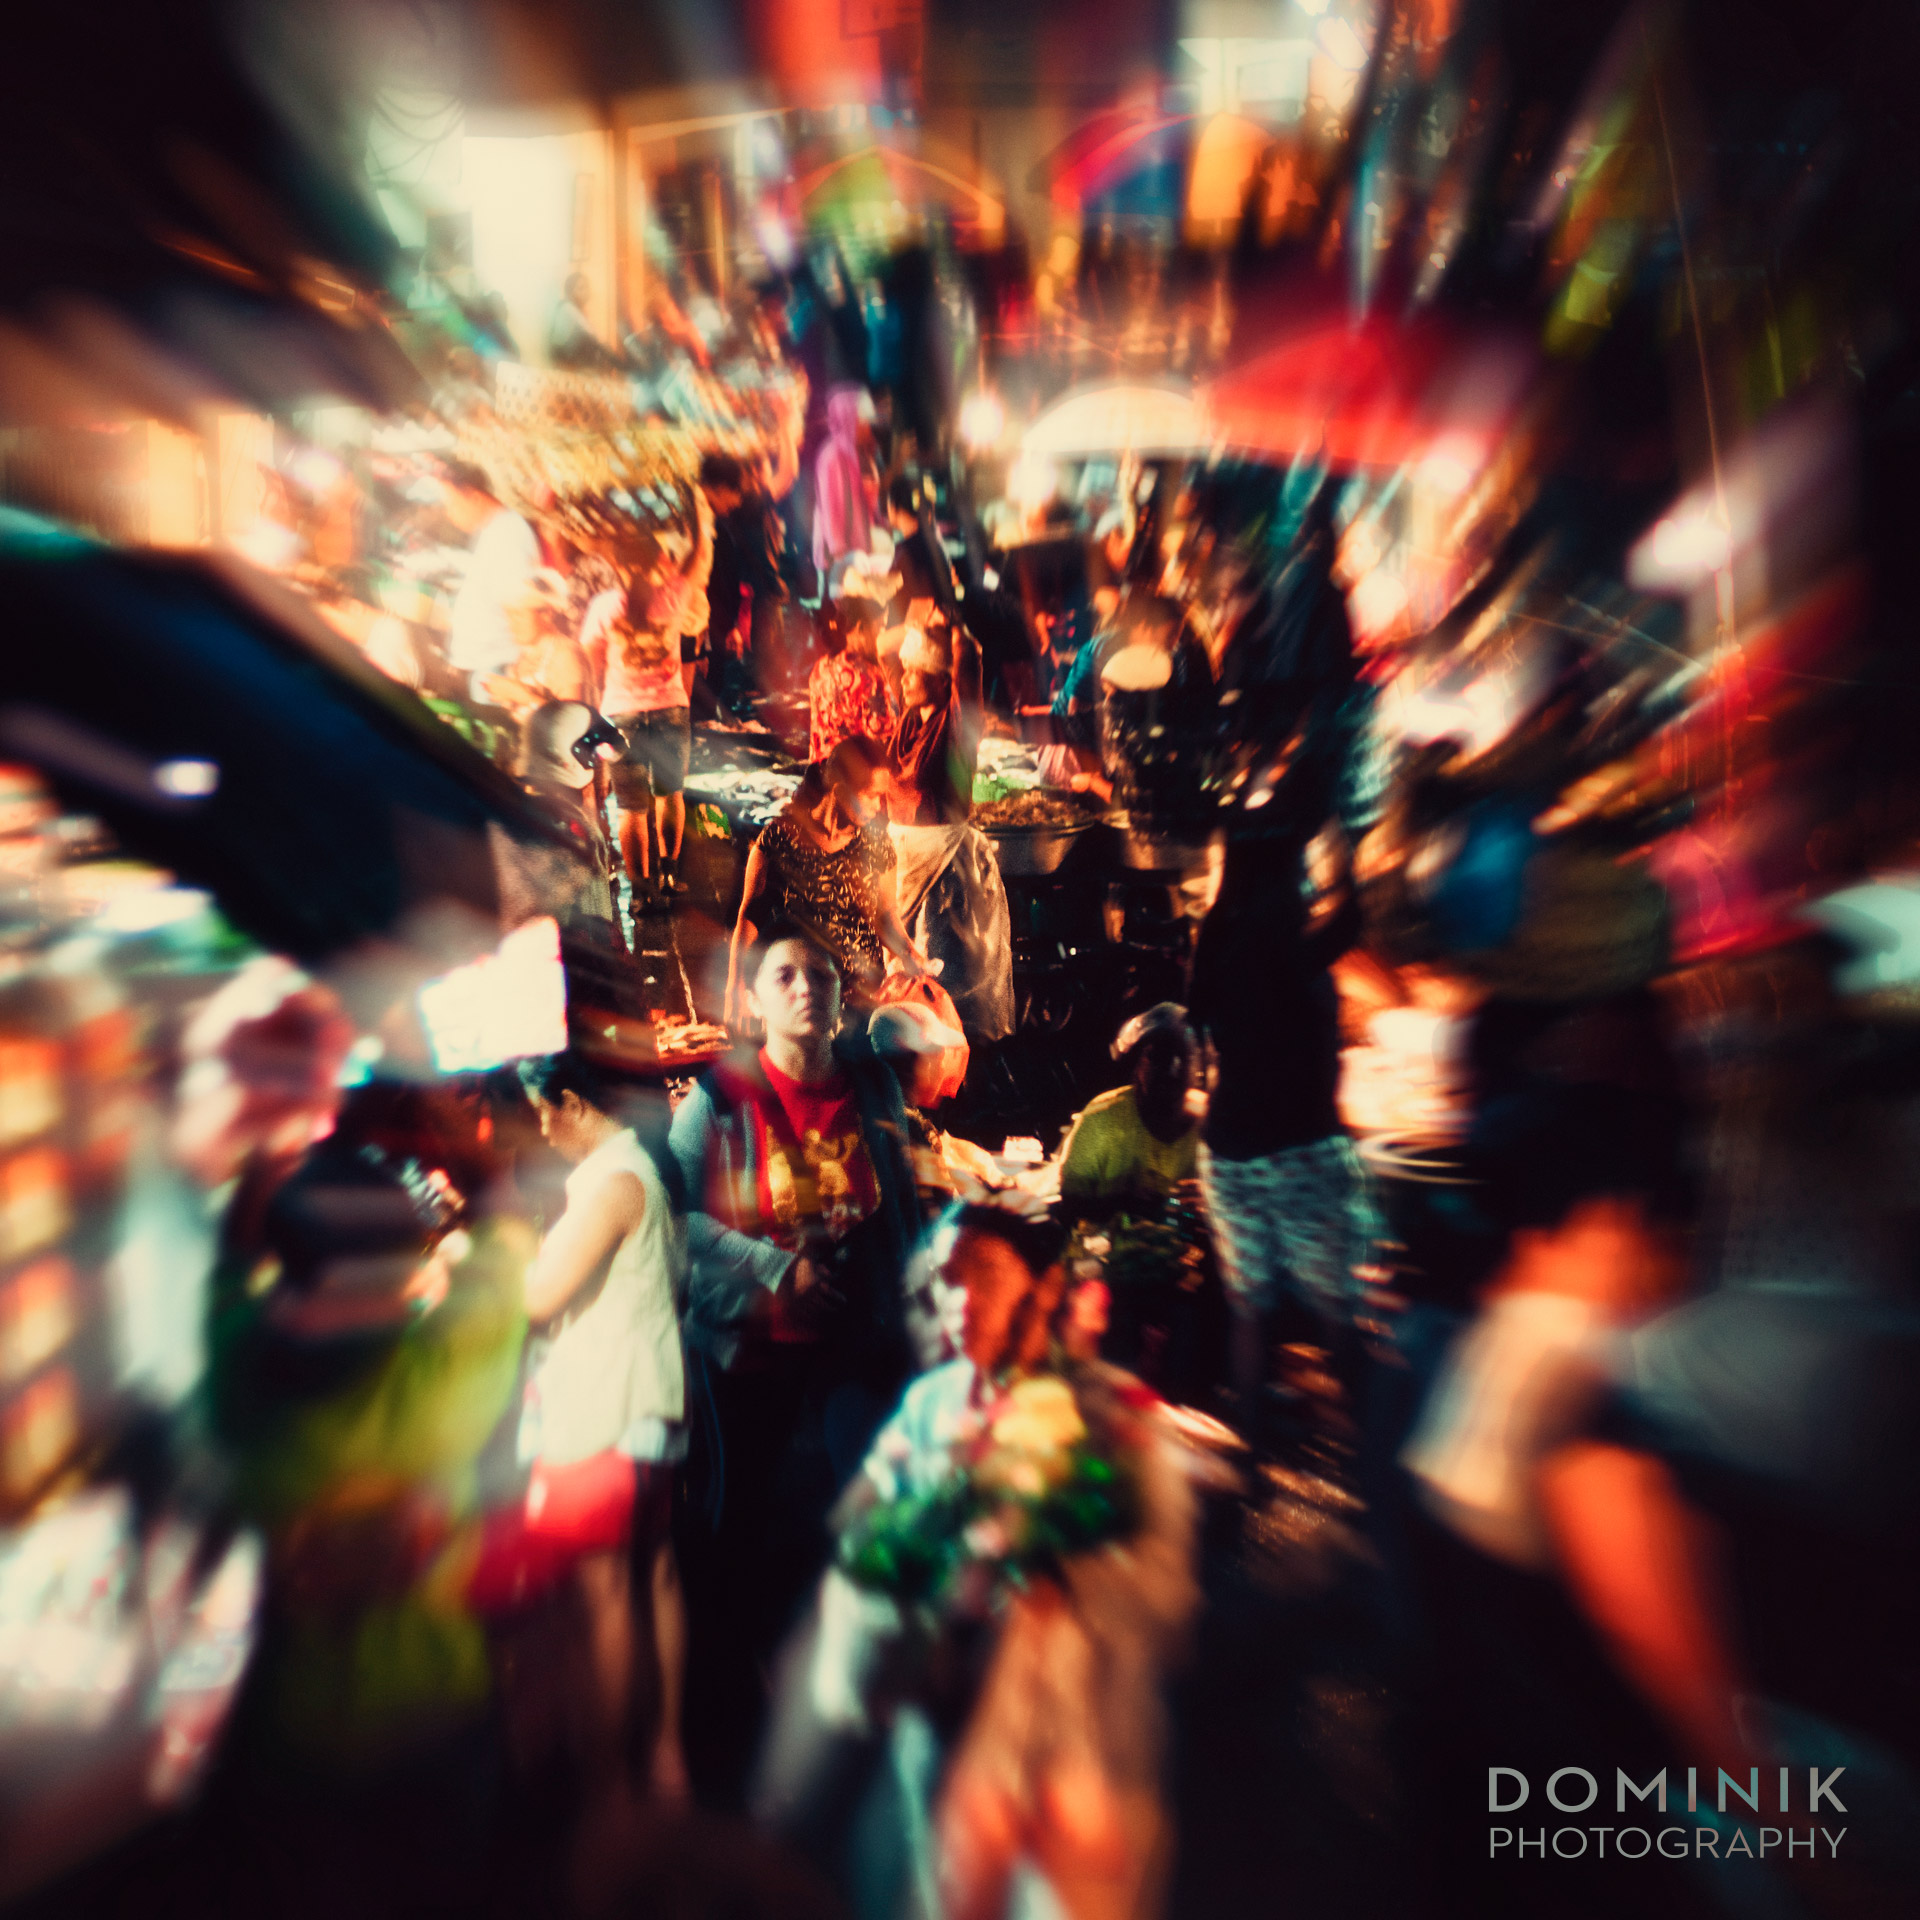
early morning market action – both with Helios 85mm / f1.5 vintage lens

What is on offer here ? – HELIOS 85 mm / f 1.5
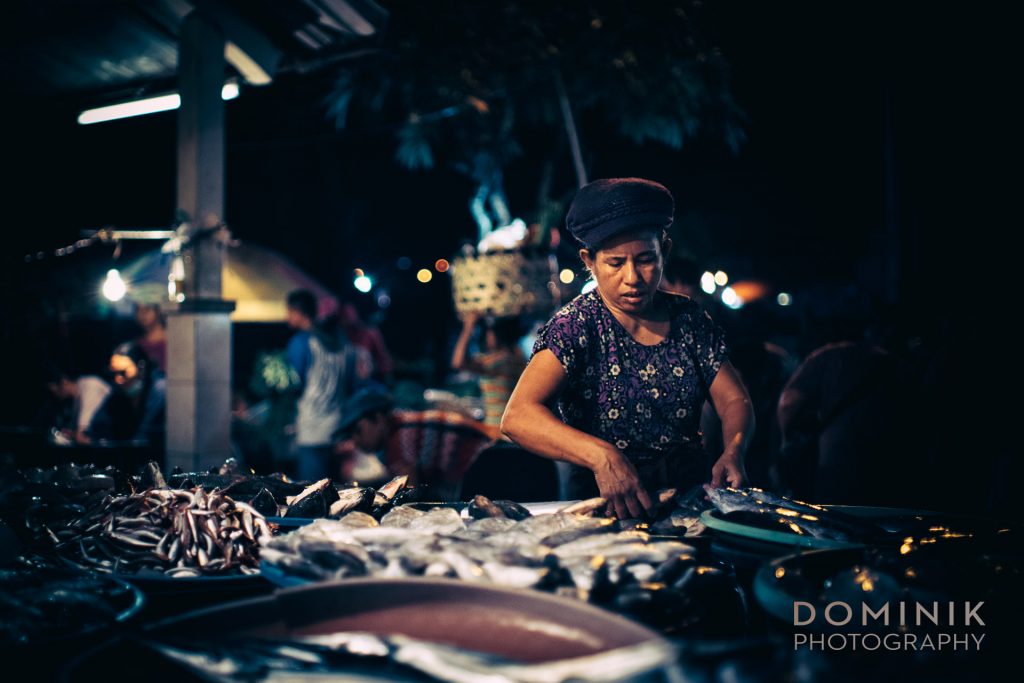
Fishmongers – Kerlee 35 mm / f 1.2
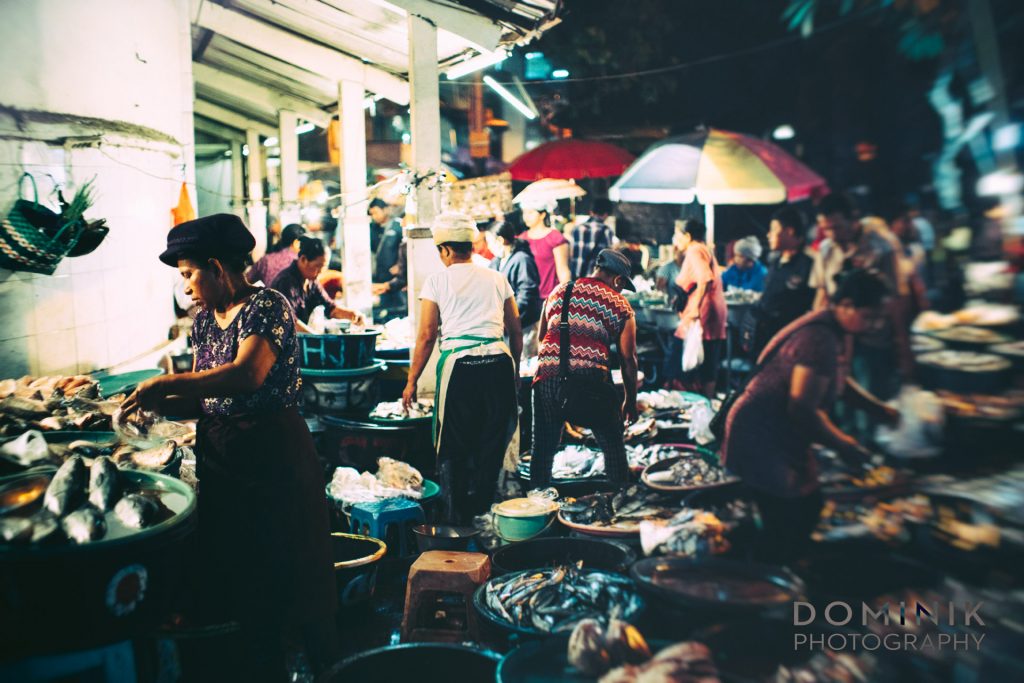
More fish ! Kerlee 35 mm / f 1.2

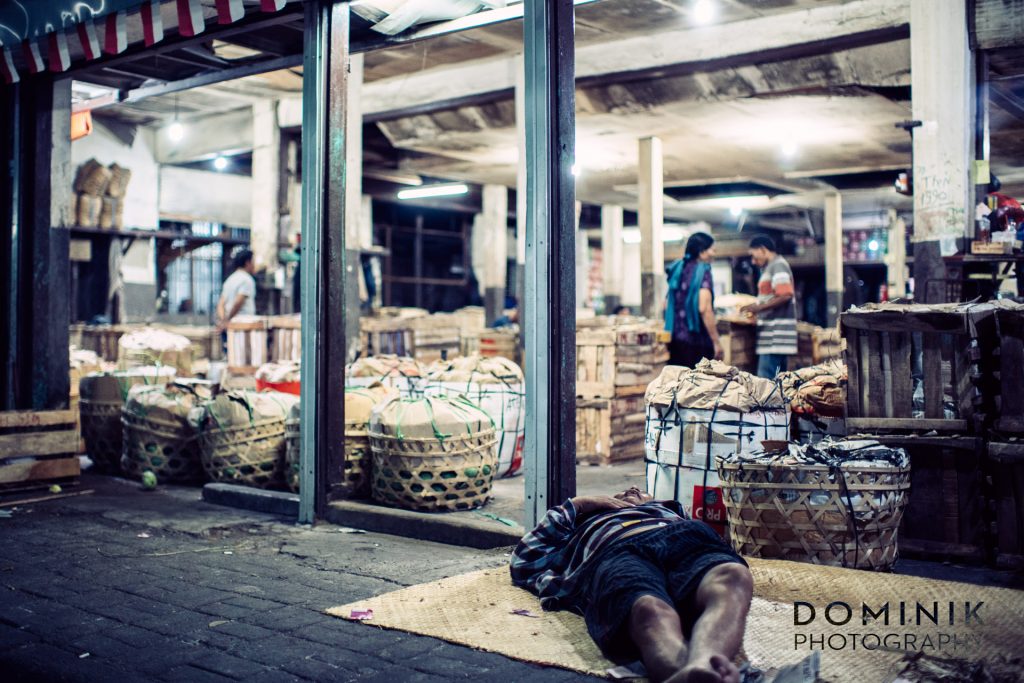
Selling and sleeping at the same time – Kerlee 35 mm / f 1.2
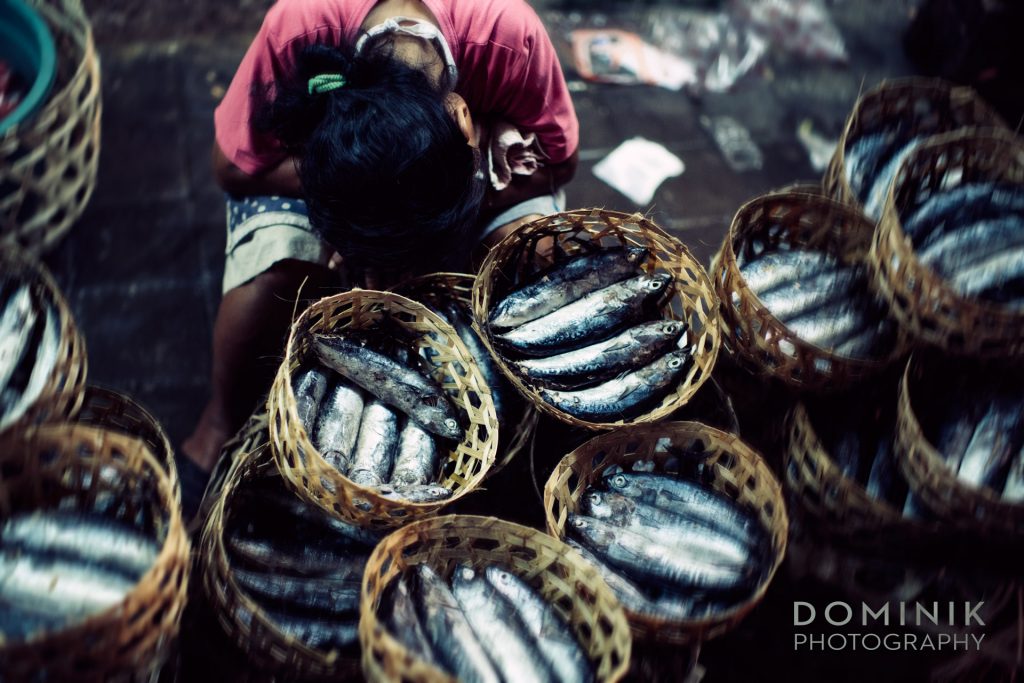
wake up n smell the… fish… – Kerlee 35 mm / f 1.2
Three visits with three different lenses
All together over the period of a few weeks, I went to that market 3 times. Each time with a different lens.
First time I went with the venerable Helios 85mmm / f1.5 – a vintage lens from the Soviet Union.
Second time with the Dark Knight (the Mitakon 50 mm / f0.95) and the third time with a Kerlee 35mm / f1.2
All three lenses performed remarkably well. The Mitakon 50mm / f0.95 continues to amaze me… In the range of f 0.95 – f 1.4 I would not even need to dial in very high ISO… I don’t remember my ISO settings but usually below 3200. Allowing for plenty of ‘headroom’ in post pro.
Focusing with the Mitakon is a bit challenging. And also it became apparent that the Mitakon is not the sharpest. Though if you see some unsharpness in my Mitakon pix it is more likely due to me not nailing the focus than because of the lens being unsharp…
With the Kerlee I often switched the camera into APS-C mode thus turning the lens into a 50 mm. Why ? Because in many situations 35mm was simply too wide.
Some more photographs ?

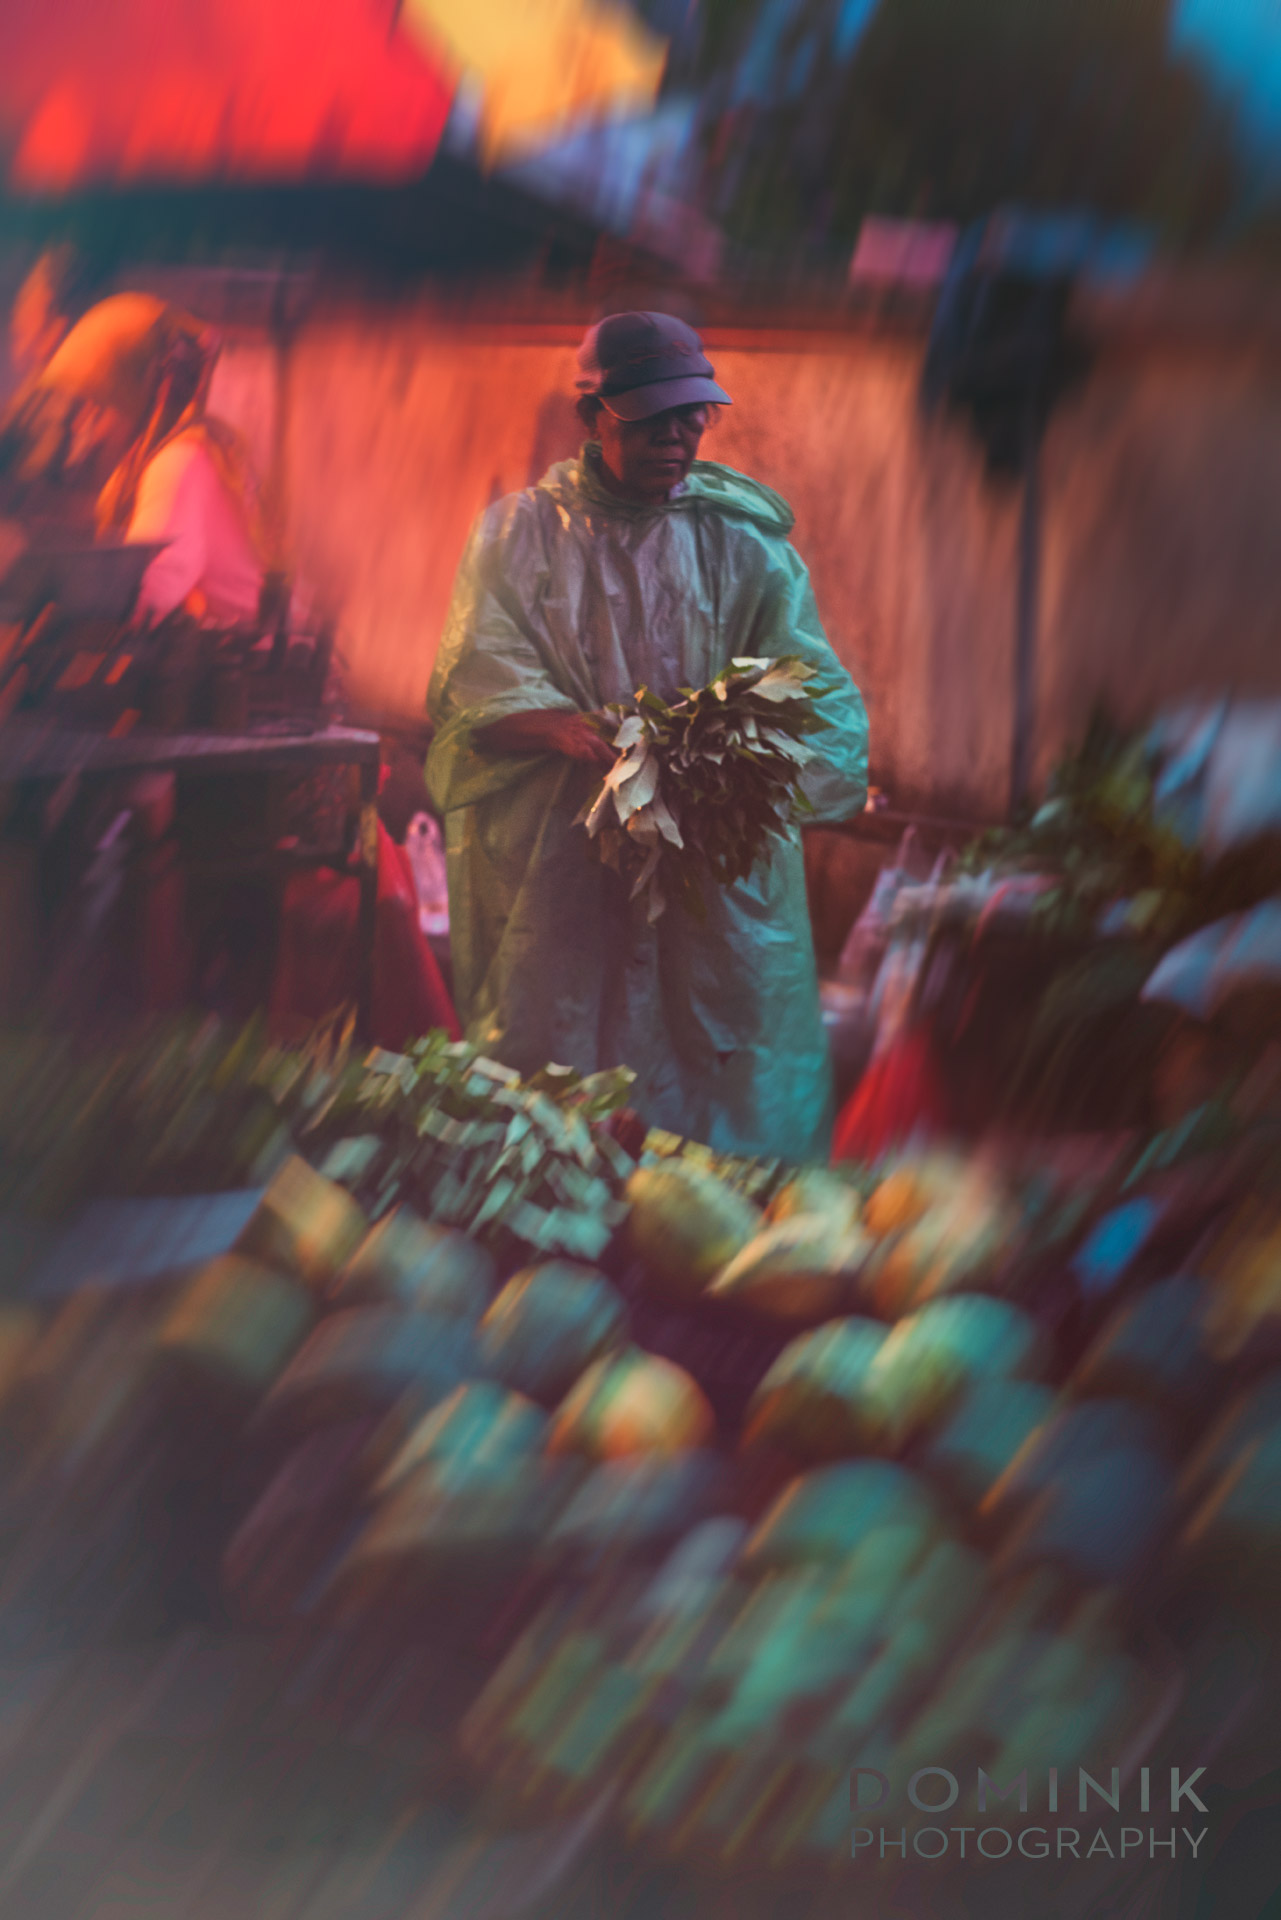
Fruitmongers – Kerlee 35 mm / f 1.2

Veggies anyone ? Kerlee 35 mm / f 1.2
Tangerines – Kerlee 35 mm / f 1.2

Sorting tangerines – Mitakon 50 mm / f 0.95
Business as usual – Kerlee 35 mm / f 1.2
Ok, I cheated (a bit)!
Photographers among you who may look at those pictures to evaluate the technical quality of the lenses, the bokeh, etc… I have a confession to make !
I cheated. Let me explain.
Most photographs I edit in Lightroom only. However, some of the photographs in this post underwent manipulations in Photoshop as well. Using the Nik Analog FX Photoshop plugin.
So the smear effect in the corners on some photographs, the light leaks, and other artifacts are not from the lenses used. I hope you don’t mind.
My approach is to do whatever it takes to achieve the look I want. After all manipulating photographs in post-pro is as old as photography itself. And not confined to the realm of digital.

Shop n home in one – Mitakon 50 mm / f 0.95

Discussing the sales – Mitakon 50 mm / f 0.95

What do you need ? – Mitakon 50 mm / f 0.95
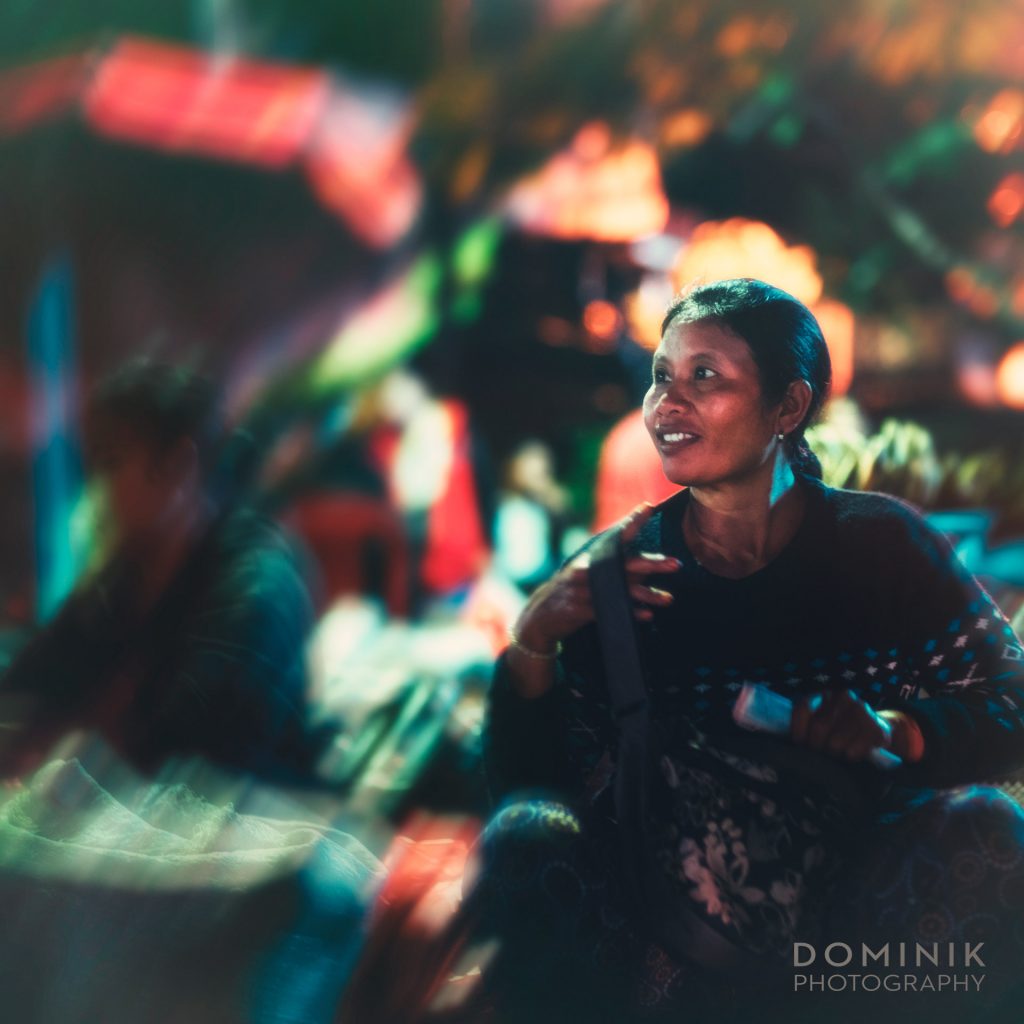
What is she seeing ? – Mitakon 50 mm / f 0.95

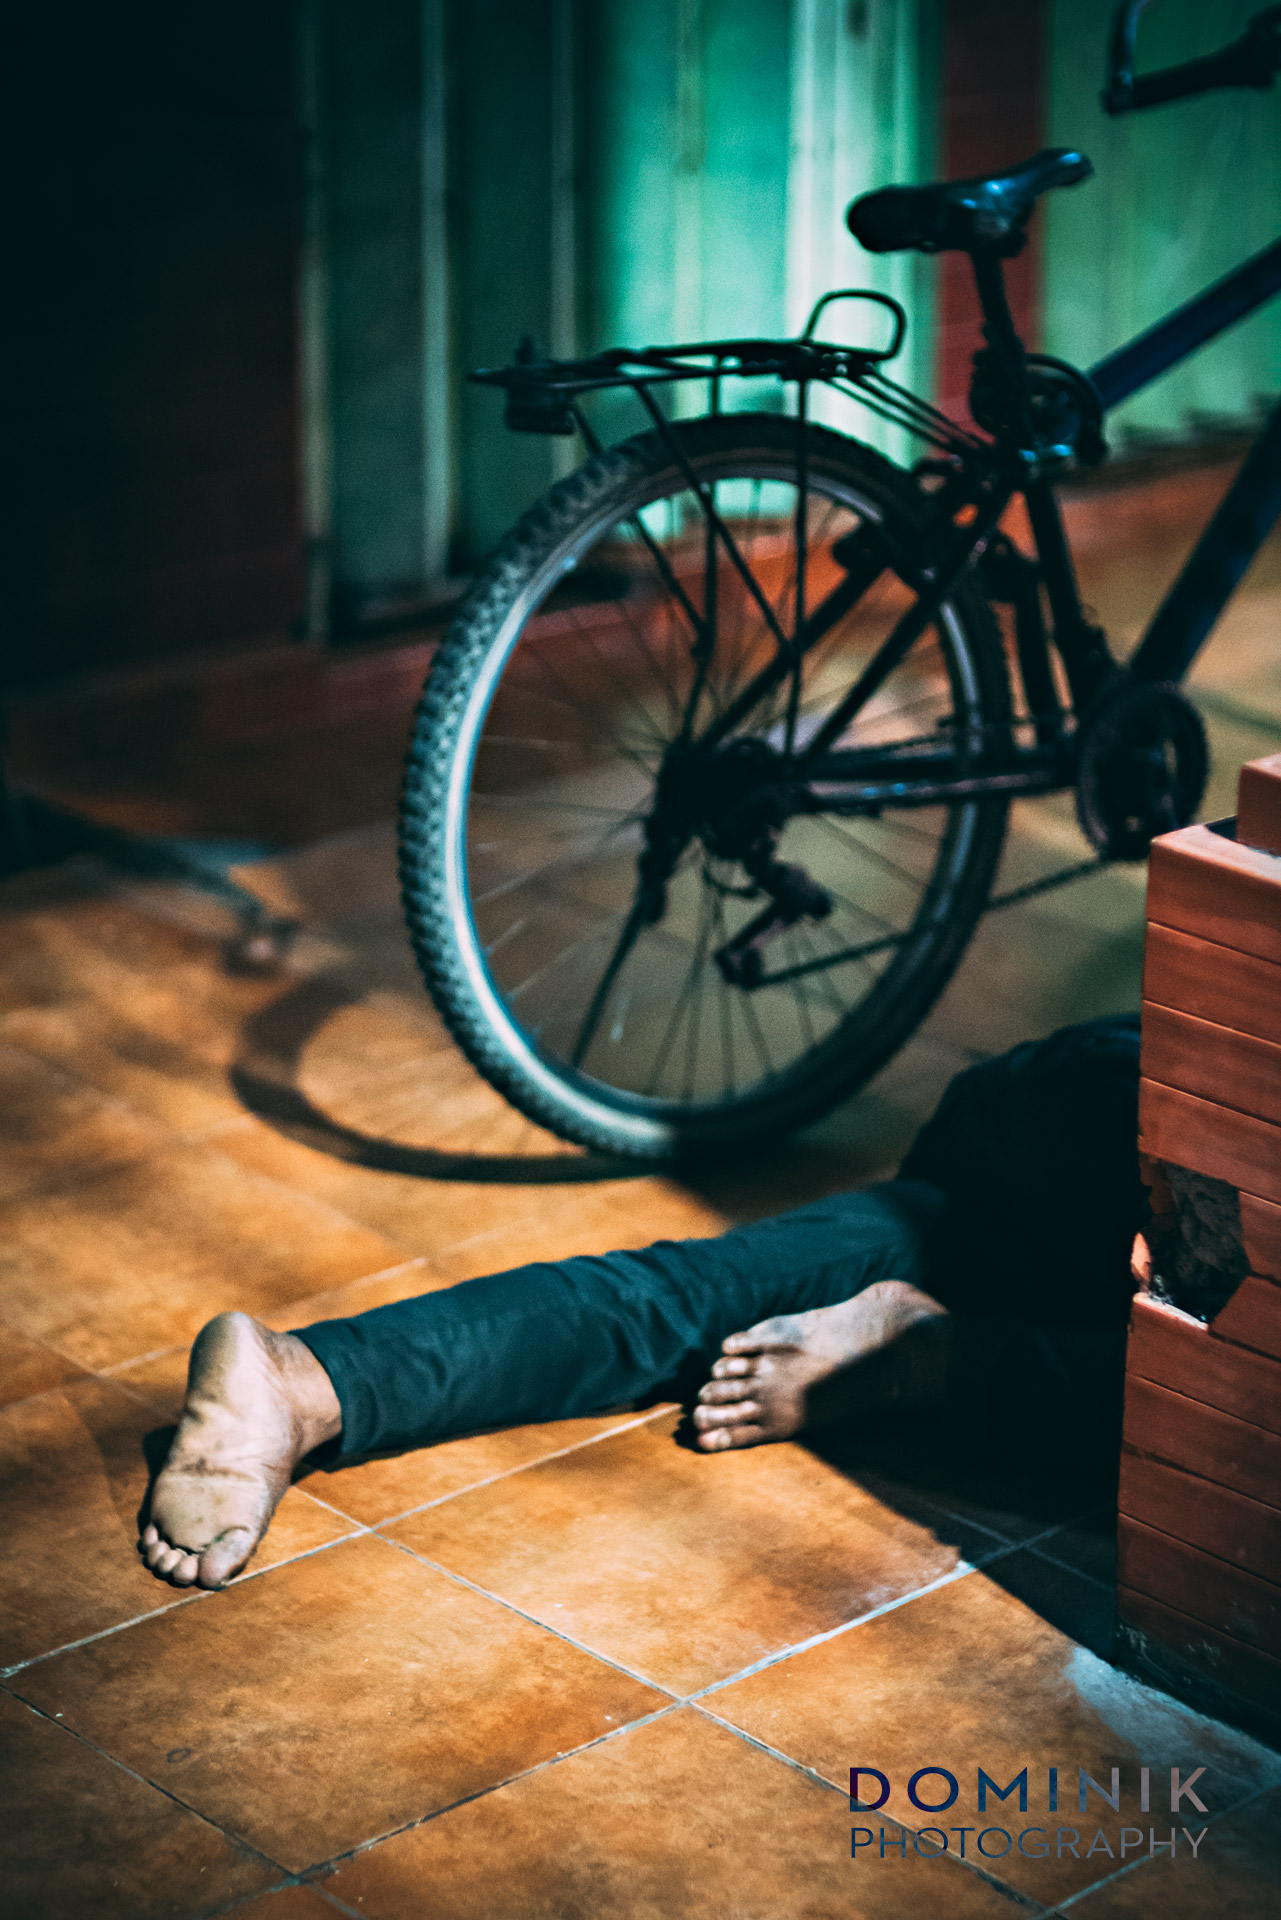
the aftermath… | Kerlee 35 mm / f 1.2
Kumbasari wet market Denpasar Bali
Bali’s capital city Denpasar is probably one of the least photographed places in Bali. And I can see why. It is indeed not a visually appealing place.
However, as you saw from the photos above there are some photographic gems to be had in Denpasar.
The photos here were taken at the Kumbasari market in Denpasar. This traditional market used to be housed in a large old building. It burned down in 2007. And slow as things are here in Bali the market has not been rebuilt yet or relocated.
Bad news for the vendors, but good news for me as a photographer. Why ?
Because all the vendors are forced to go about their business out in the streets.
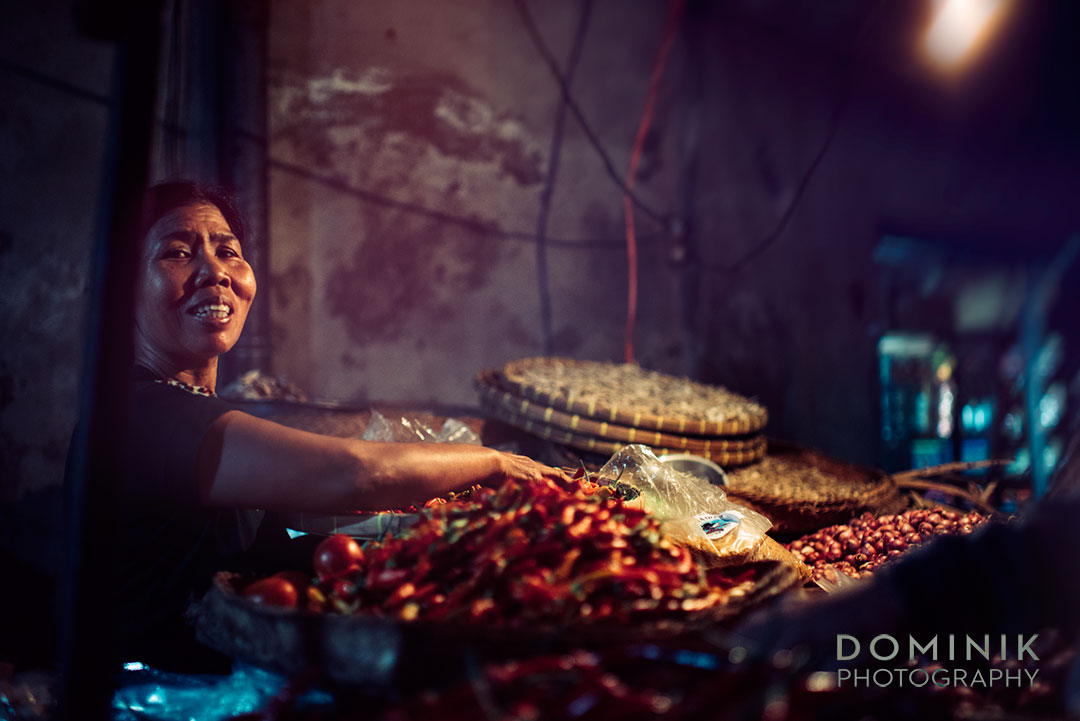
Chillies – the spice of life…
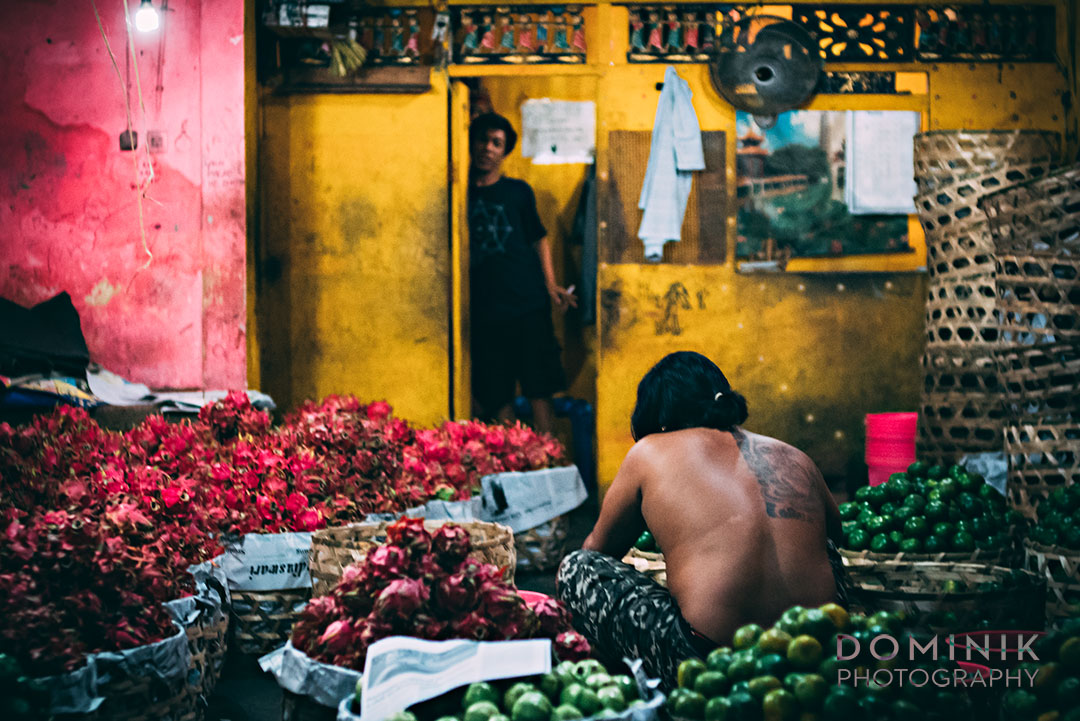
More fruit mongers
Well, so much from Denpasar Bali. I hope you have enjoyed the photographs.
As always, please be in touch or leave a comment below. I love to hear from you.
Truly’ DOMINIK
FOLLOW ME ON
Practicing with HELIOS 40-2 lens

PRACTICING WITH MY HELIOS 40-2 VINTAGE LENS
At this moment the HELIOS 40-2, manual-focusing lens with 85 mm focal length and a max aperture of f 1.5 is probably my favorite vintage lens. And an ideal companion for slow photography (the lens is somewhat cumbersome to use and thus slows you down, whether you want it or not.
For me, the pictures it produces are nothing short of ‘magical. Most people love this lens for its bokeh/background blur. However, I am particularly fond of its lens flare and how it handles backlit photographic situations.
However, this lens requires practice and experiementing., In particular, if you want to master the ability to get those beautiful lens-flare effects.
Let me show you first what I am talking about here:


Taming the beast…
Yes, a strong expression indeed.
Deliberately chosen. Because as much as I love the photographs this Soviet Union vintage lens produces I found it particularly odd and somewhat cumbersome to operate.
I won’t go into details here. The ins and outs of this lens will be subject to an upcoming article.
Suffice to say that some learning and getting used to is necessary with this lens.
But I have no problem with that because slow photography as I practice it is a never-ending learning process. And playing, whilst learning is one of the things that have made me fall in love with photography.
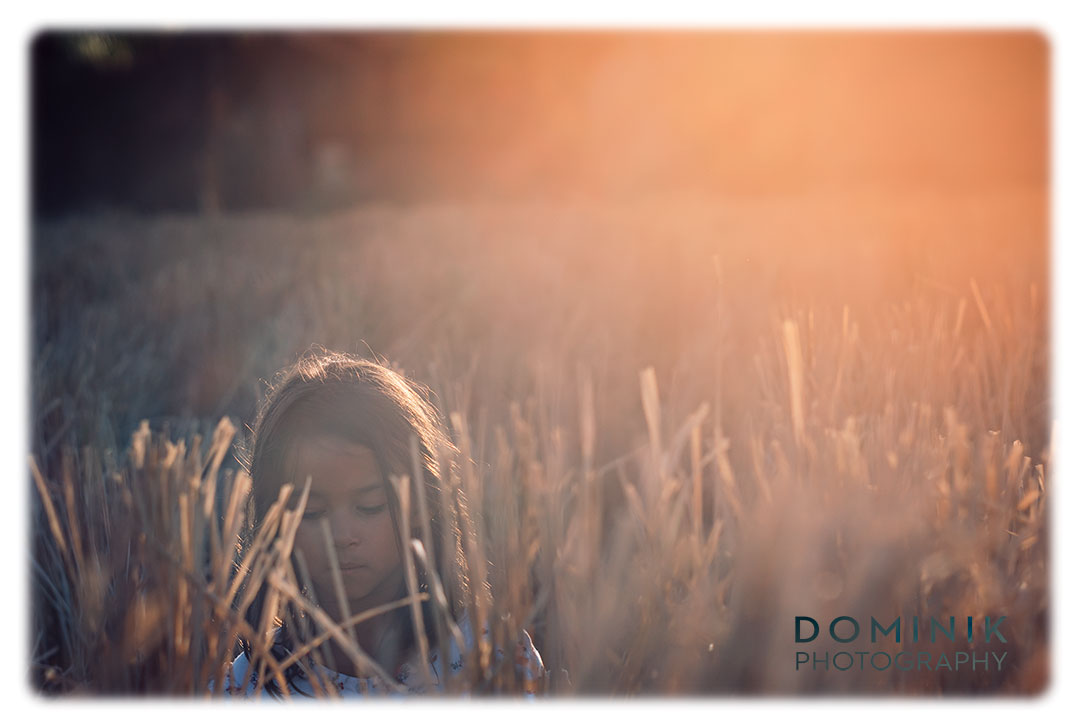
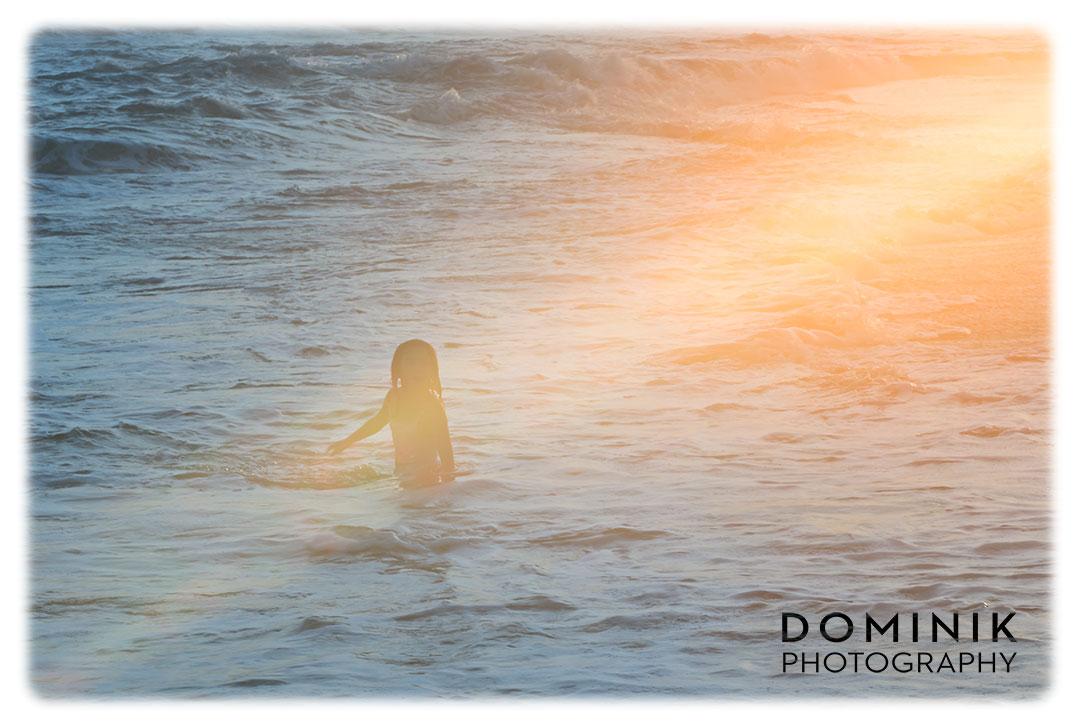
So, one afternoon my daughter and favorite model Kika asked me to go to a nearby beach as she wanted to play.
Father playing with photo equipment whilst daughter having fun in the water… sounds like a great deal to me.
So we headed off to the beach, quite late in the afternoon. A few of the photos were taken on the way to the beach. But the majority was captured in the last 30 minutes before sunset.
More photographs ?


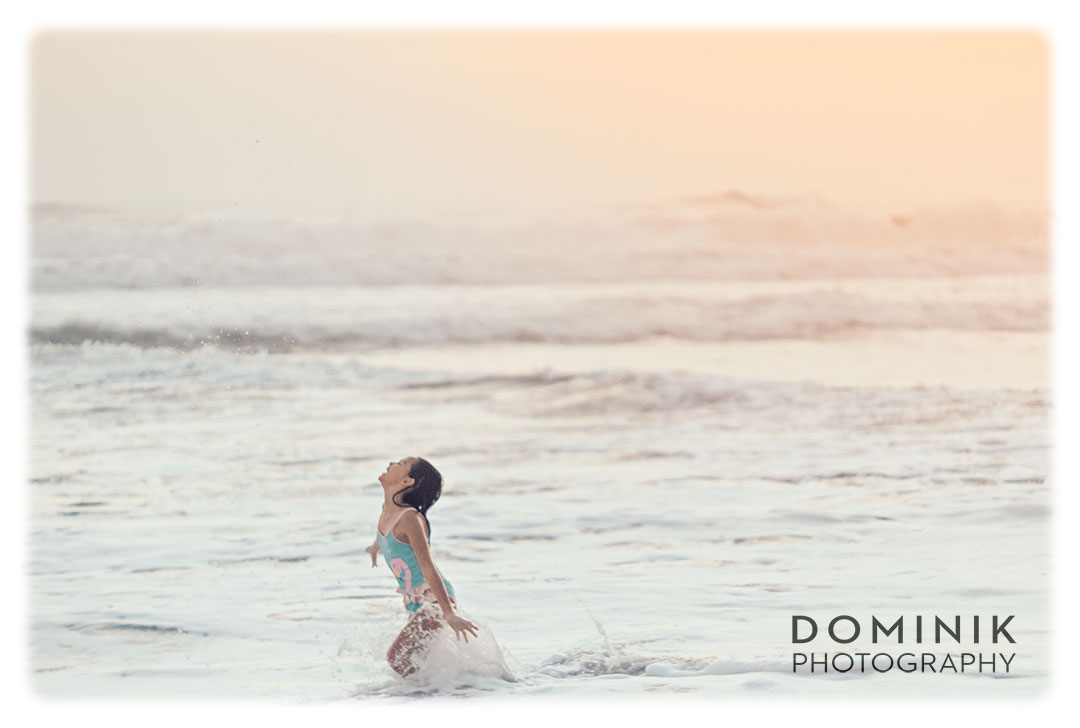

I hope you have enjoyed those photographs. Do you also have a Helios 40-2 ? What are your experiences ? Do you also find it hard to work with ?
Please drop me a line. I would love to hear from you.
Truly’ – DOMINIK
P.S: VERY SPECIAL THANKS to Kika for being such an amazing and patient model.
FOLLOW ME ON
Bali Photos with a Modified Helios 44-2 vintage lens
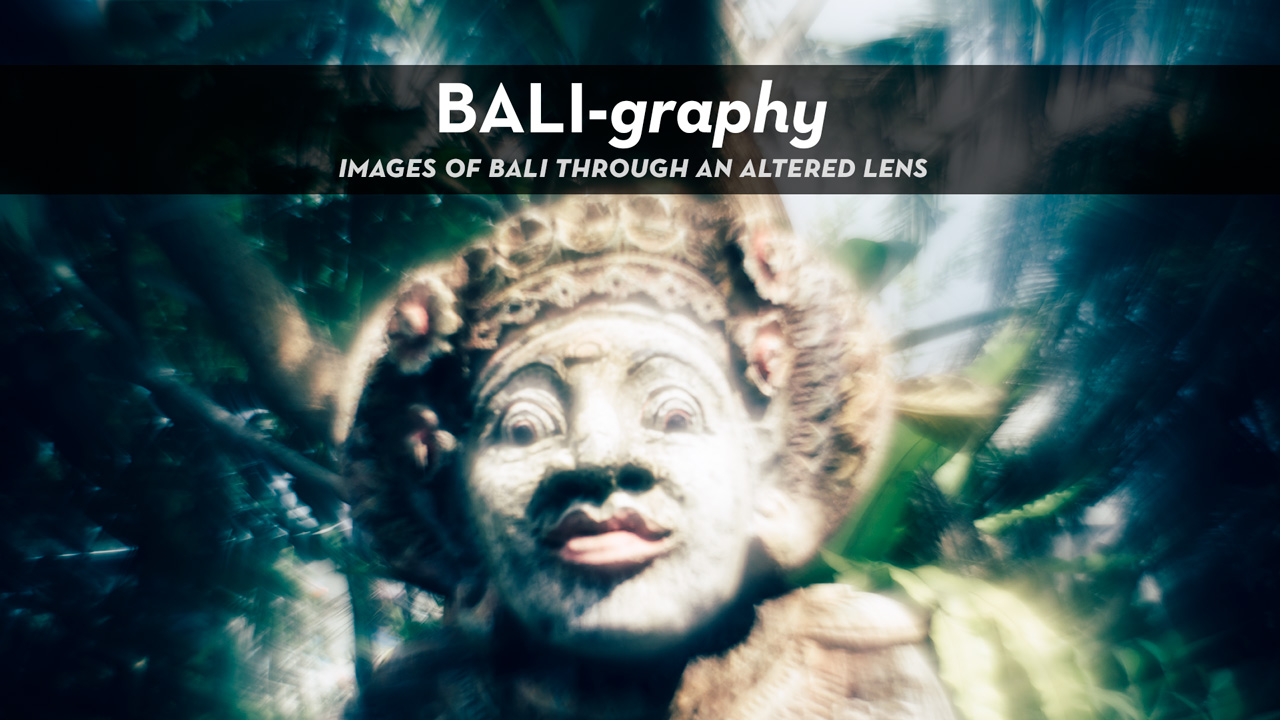
Some sort of a DISCLAIMER: If you are not a photographer or a vintage lens enthusiast you may find this story rather boring and uninteresting…
Bringing SLOW PHOTOGRAPHY to the next level
Part of what I consider to be true SLOW PHOTOGRAPHY is experimentation. Trying out new things – new gear – new techniques, etc…
I own over 15 different lenses and I love to play with them and use each of them for what they are good at.
But this time I wanted to bring the ‘lens play game’ to a new level. And do so by modifying a lens and thus repurposing it.
(Very) Swirly Bokeh with modified Helios 44-2 lens
After the complete success with my first Helios 44-2 lens shoot in Harbin, I had to have a second copy of that lens. Because I wanted one where I could do a lens modification with the front element of the lens reversed.
This lens can be had very inexpensively on ebay. There is even a business in Russia that exclusively sells that lens. Therefore, it was a no-brainer to get another one. And modify it to have its front element reversed.
What that means is: To take the lens apart and take out the front glass / front element and put it back in after turning it around. To be more specific: The side of the glass that was facing outwards is now facing inwards towards the sensor. And the side was facing inside towards the sensor is now facing outwards.
In case you are asking: No, I did not do this lens modification myself. I am not versed in tinkering with photographic equipment. But the good news is here in Bali, where I live, I found a specialist who has mastered the skill of taking lenses apart and back together.
After he performed his ‘magic’ I was pretty excited that I finally had my Helios 44-2 ‘modif’ and wanted to straight head out to take this puppy for a spin.
It was late afternoon the light was bad. Completely overcast sky with a slight drizzle – that kinda light.
But hey, I was not planning on taking ‘mastershots’ – I simply wanted to see what can be done with that modified Helios 44-2 lens. I did not mind the adverse conditions at all.
So here are the first captures I took with my modified Helios 44-2 lens:

sort of a landscape shot

and another attempt at creating sort of a semi-abstract Bali landscape shot

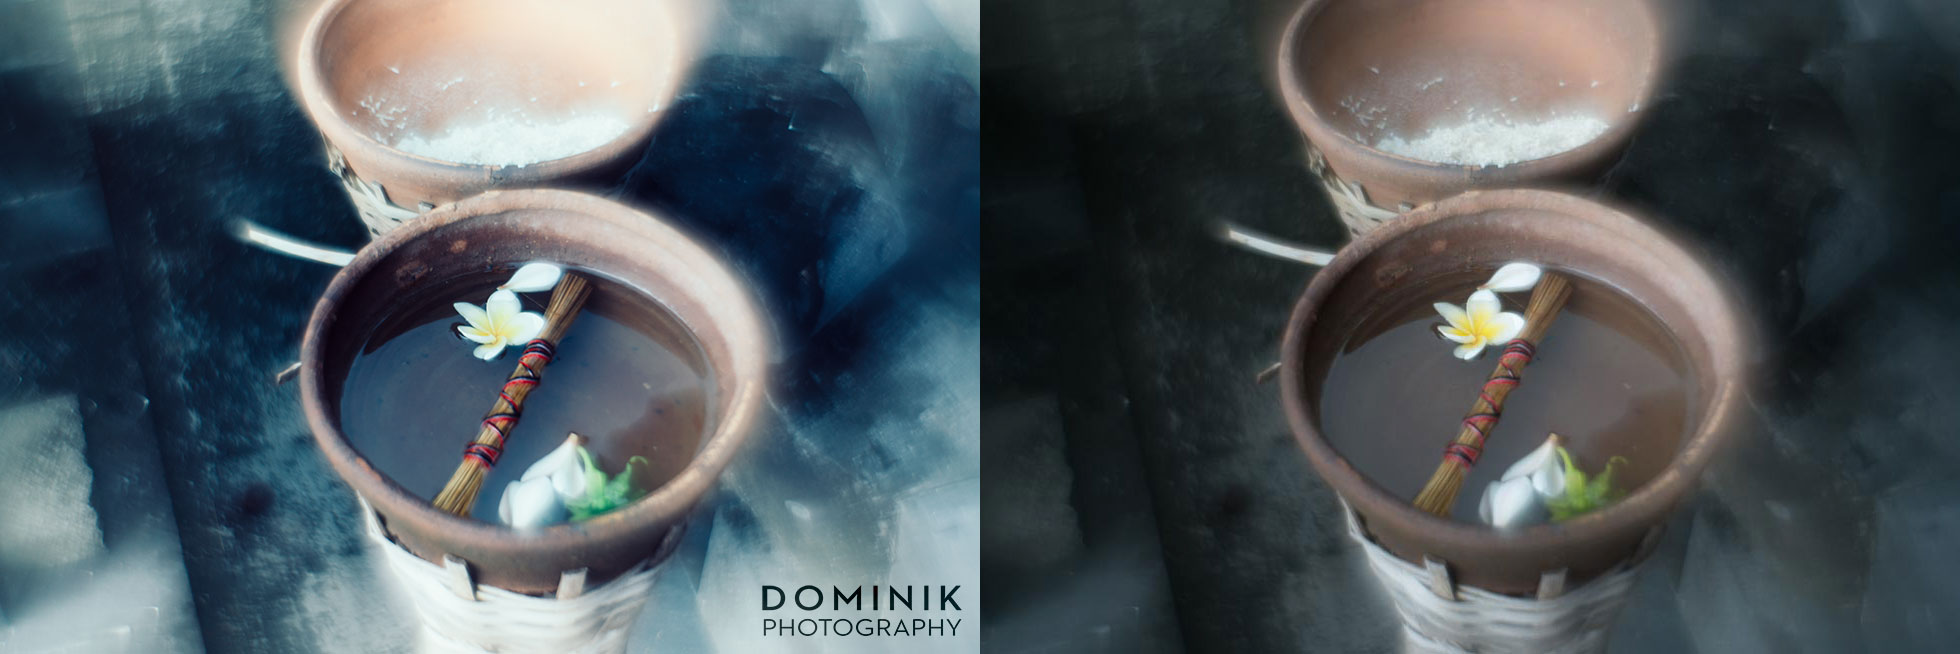
Balinese offering utensils

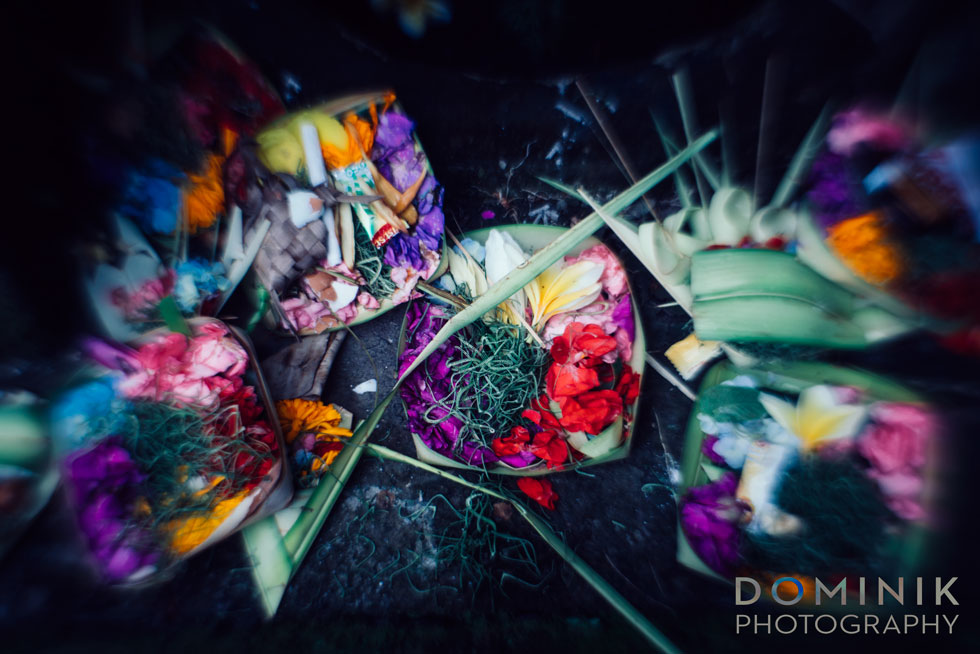
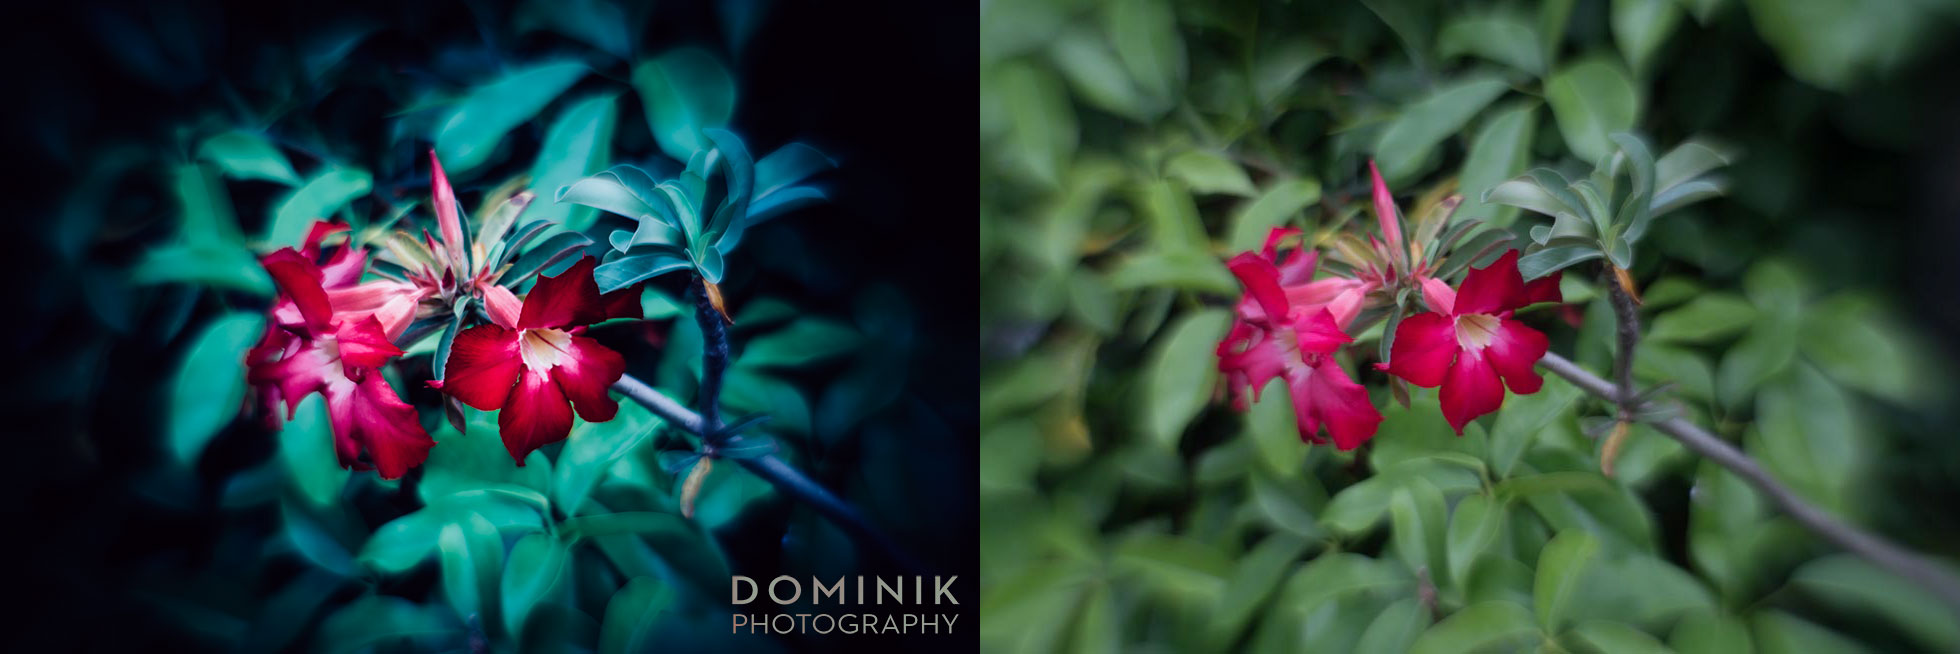
Flowers with a swirly bokeh background
Unpredictable, ‘artistic’ results
After only a few shots I got really excited with what this little lens could do. In the following days, I ventured out again a few times to put it further through the paces.
So what’s the big deal about this lens?
Some may say: I can do all this blurring, haze, glowing, etc… in Photoshop. My answer to this argument is a resounding YES. Indeed 90% or more of what this modified lens produces can be also achieved in Photoshop.
Though I have two strong arguments against producing such effects in Photoshop. Time & fun factor !
If a skilled Photoshop editor was supposed to do an edit with all the haziness, glow, blurriness and what have you… it’ll take 5, 10 more minutes of time per photograph.
Whereas with a modified lens it’s instantaneous.
What is even more important is that the results you get tend to be unpredictable.
And this unpredictability is very inspiring.
For me, photography has a huge element of play. Play in the sense as a child plays or as a musician plays an instrument. I prefer to play with photographic equipment rather than with my mouse in Photoshop. But that is of course just my preference.
It continues to amaze me what can be done with that lens. A few more examples:

another ‘flower power’ photograph

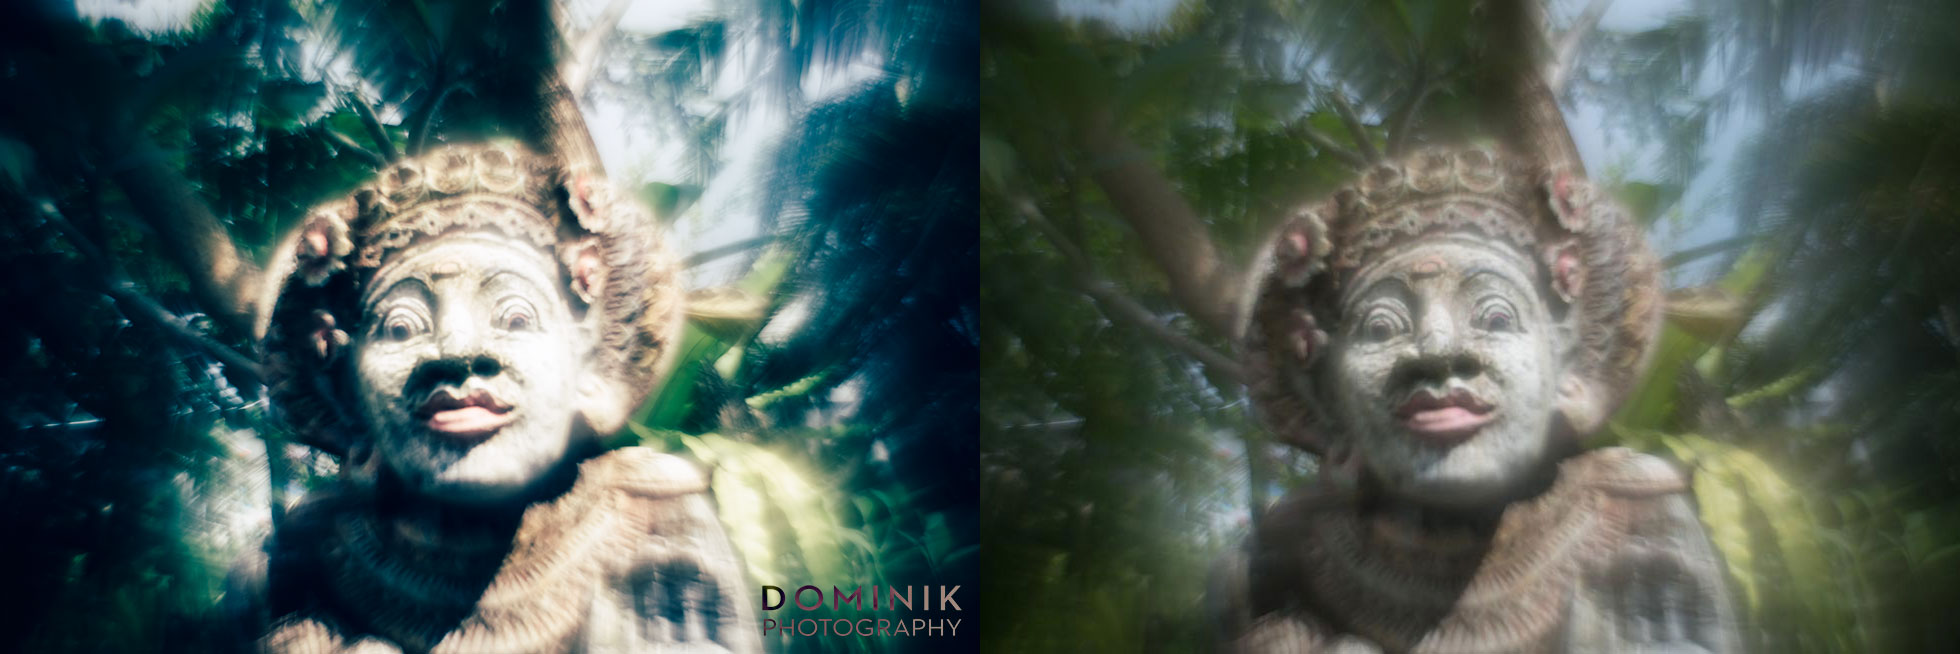
Balinese figurines

another Balinese figurine

Beauty in simplicity
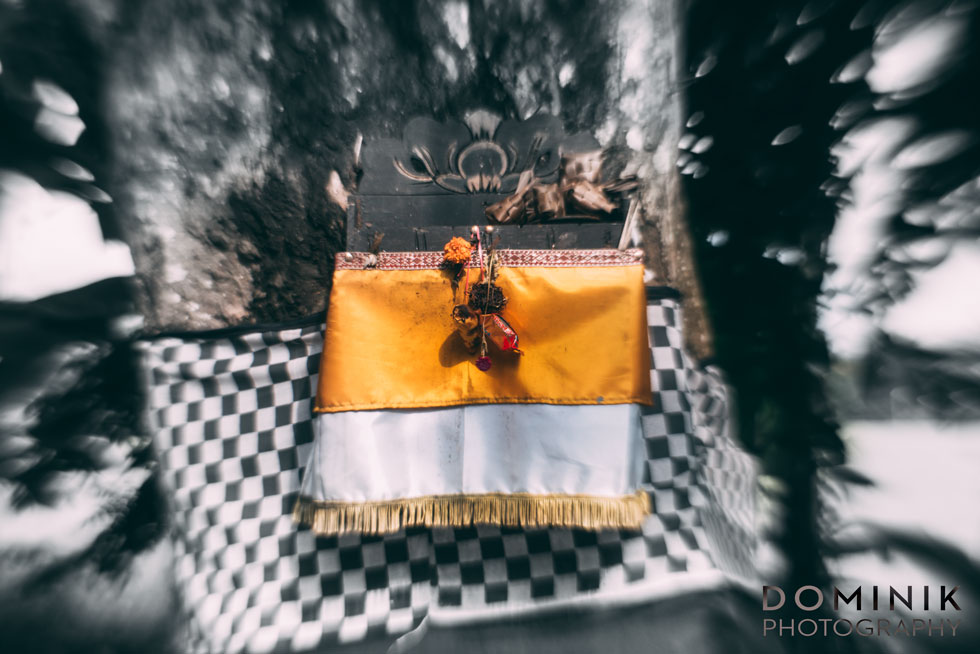
a place for offerings in Bali

for the gods…
Balinese offerings to appease the gods
So why then would you want to have such a modified lens? I tell ya why: Because the images it produces are unique. It’s great fun to take photographs with such a modified Helios 44-2 lens.
I understand that some photographers prefer to take completely uninspiring photographs of flowers or other items in their backyard to measure how many percent sharpness falls off towards the corner of the frame. My obsession is not measuring chromatic aberration and other technicalities.
I make photographs because I enjoy the proses of taking photographs.
For this reasons, I find this lens very inspiring.
Though I admit a modified Helios 44-2 is in a way a one-trick-pony. On the other side as you can see from the photographs I showed you this one trick can be applied in 1000 different ways. Only one’s creativity is the limit.
Also, that very trick as you saw from the photographs above can be used in many photographic situations and to create a great variety of images.
What & Who is such a lens NOT for?
Portraits: A lens with a reversed front element does not at all work as a portrait lens. I tried a couple of times and failed miserably.
I also doubt that I would ever use that lens in a professional way. But you never know.
Pixel-peepers, stay away! Let’s make it clear: You cannot make really sharp and technically correct pictures with such a lens. But therein lays its appeal.
A few more things worth remarking about the photos you have just seen.
No Photoshop involved. No artificial blurring, adding haze, glow or whatever… Just color temperature adjustments, tinkering with colors and tones and a few other things that can be done in Lightroom quickly. Don’t believe me ?
See the following BEFORE / AFTER comparisons of some of the photos:


If you want to do such a lens modification yourself here is a link to a tutorial that explains how to do such a lens modification on a Helios 44-2 lens.
It seems not to be rocket-science to take a lens apart and reverse its front element. Because the guy who did it for me took only around 5 minutes.
There you have it. My story and my adventures with a modified Helios 44-2 . I love this lens to bits and look forward to more photos with this ‘bugga’.
In fact, I love the effect of what a lens with a reversed front element can do so much that I will soon take another lens – from a different manufacturer and try out the same modification.
If anyone has suggestions on which lens would also lend itself well to such a modification please leave a comment below. I’d love to hear from you.
If you also like to ‘play’ and experiment with your photographic gear you may want to join the SLOW PHOTOGRAPHY movement – a group of like-minded photographers:
SLOW PHOTOGRAPHYBe a member of the movement
Truly’ DOMINIK

Other articles that will interest you
ICONS of BALI
This is a series of fine-art photographs depicting Bali’s rich culture of statues & figures. SLOW PHOTOGRAPHY with a modified HELIOS 44-2 vintage lens.

Ogoh Ogoh in Bali
In this article, you can some great examples of Balinese Ogoh-Ogoh figures. As well as some background information about the origin and purpose of this wonderful Balinese tradition.
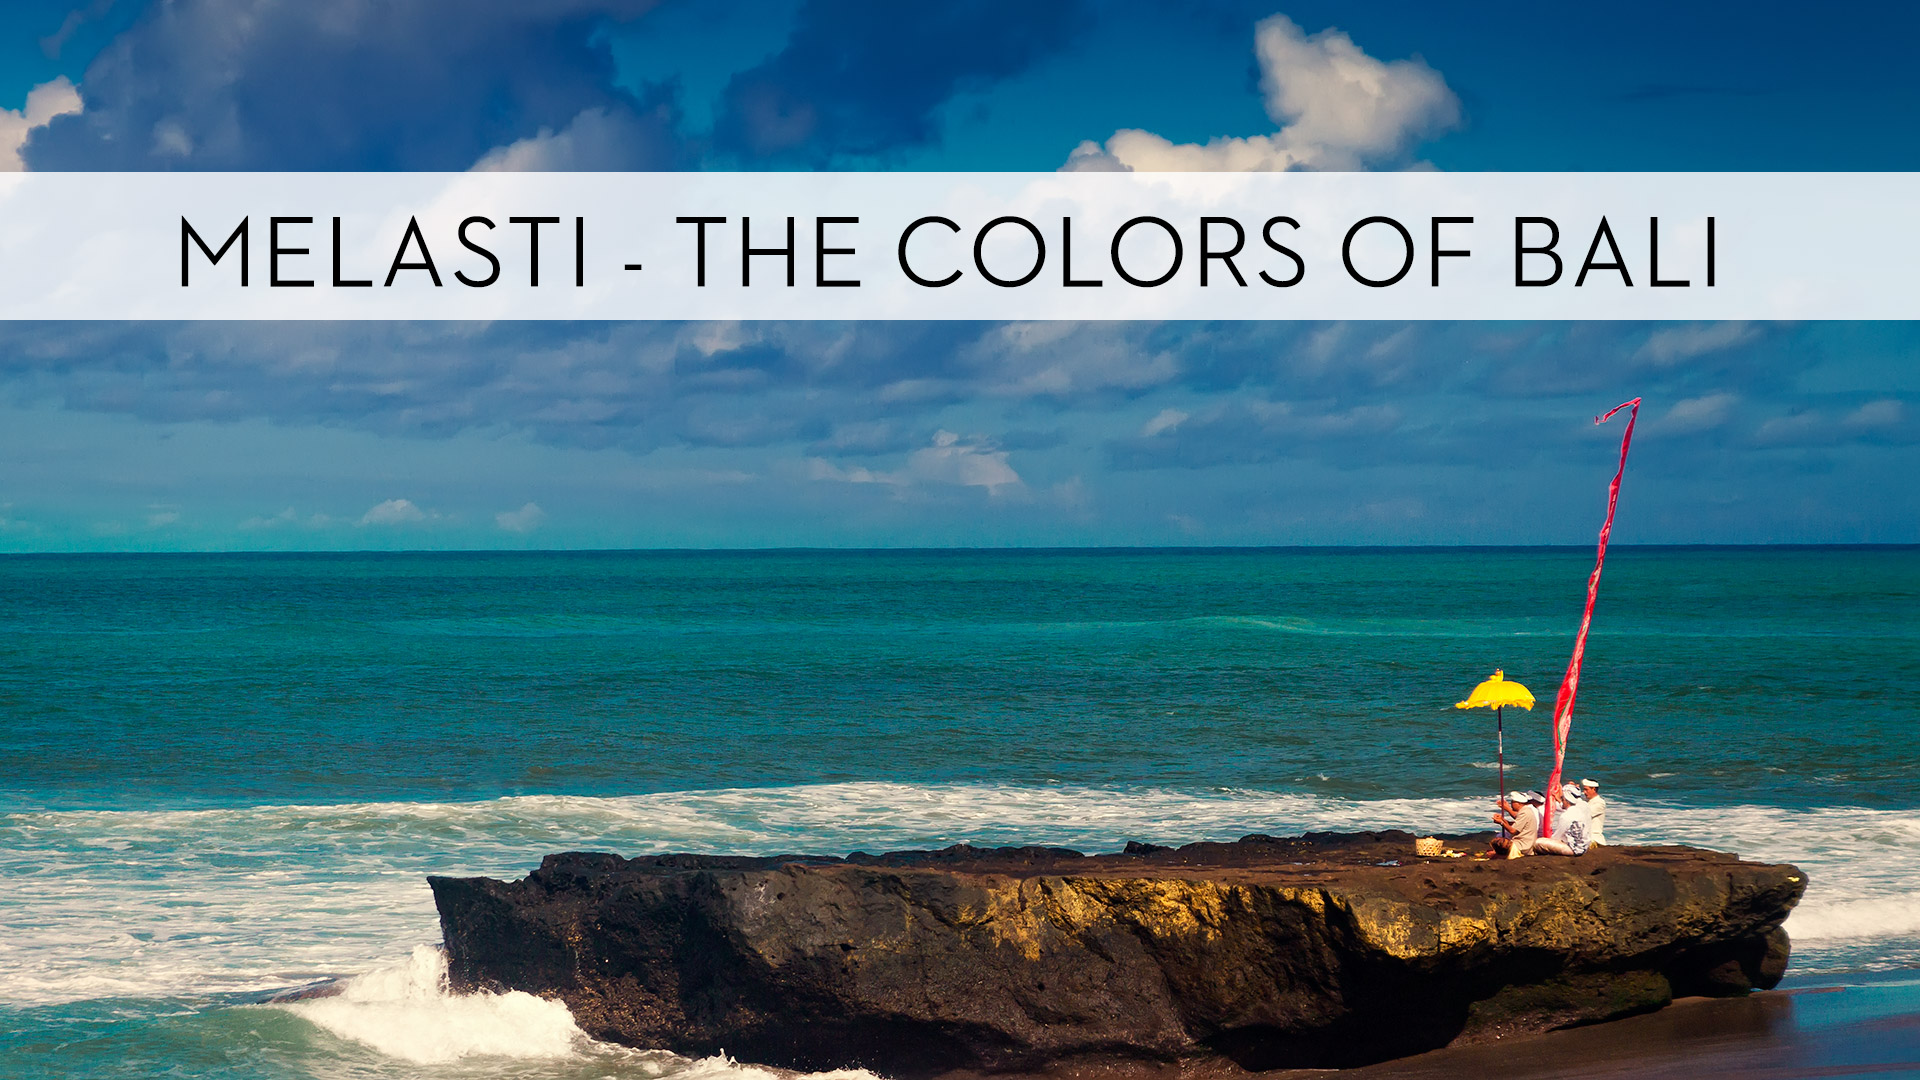
MELASTI – Bali’s most holy ceremony
MELASTI is the most significant day in the calendar of the Balinese people. The purification ceremony is a must for every devout Hindu. See the pictures here.
Harbin old city Helios 44-2
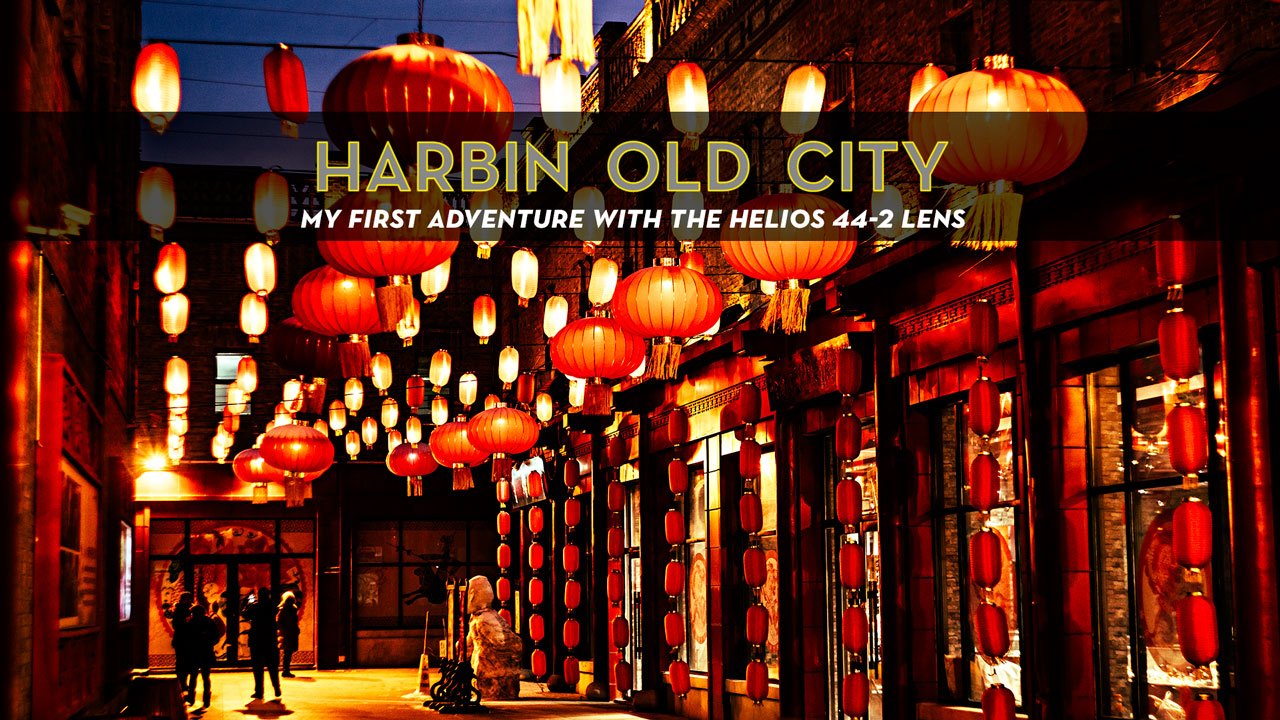
Harbin Old city & my first adventures with a vintage Helios 44-2 lens
This visit to Harbin coincided with me finally being able to try out my Helios 44-2 lens, which I acquired over 8 months earlier. More about this a bit further down.
I spend over a week in Harbin, together with my daughter and wife. We came to see the magnificent ice snow & festival there. And to chill a bit from the tropical heat of Bali. Temperatures that never rise above minus 15 degrees Celsius (and which can go as low as – 30) are indeed perfect to ‘chill’.
You can see my personal family & holiday pictures from this trip here.
To see the snow and ice festival and to chill a bit 2,3 days would be enough. We, however, decided to stay a week. So, I was looking something else to do while in Harbin. And my good friend and fellow photographer Win, suggested we visit Harbin’s old town.
Sure, why not. And I decided to try out my Russian vintage lens – the Helios 44-2 there.
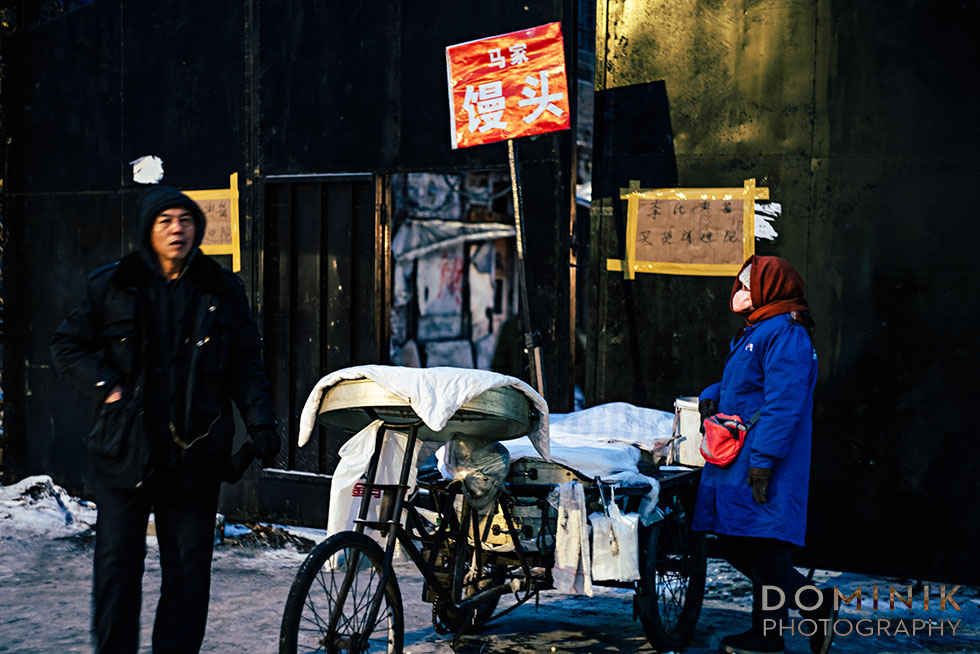
Let’s see some photographs first (all done with the Helios 44-2):

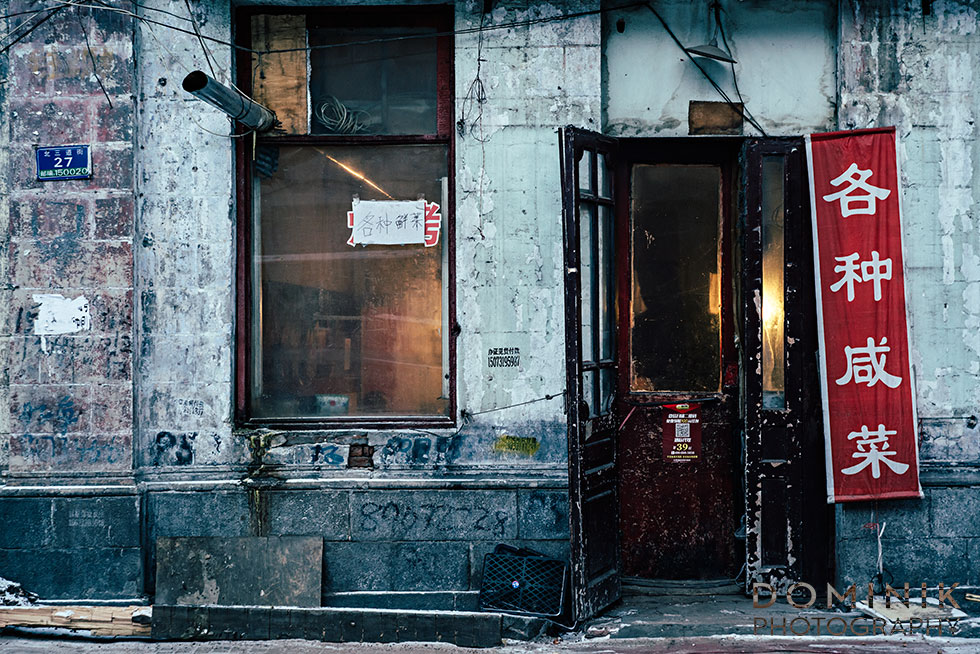
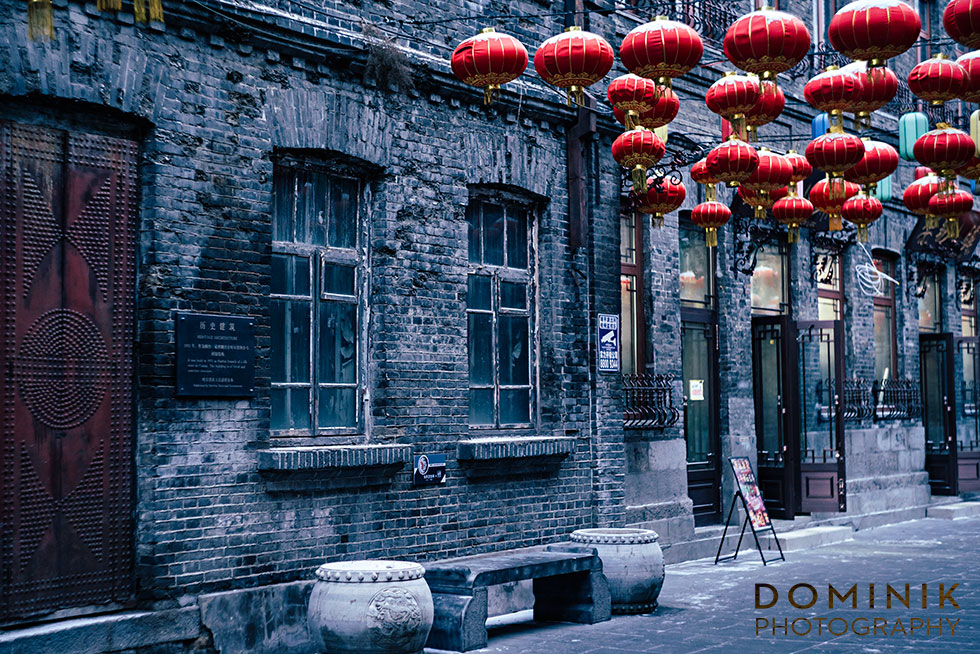
Most of Harbin’s old city has already been abandoned

Those houses are left to decay

and it is that decay that gives them a certain ‘charm’

Everything is in disrepair
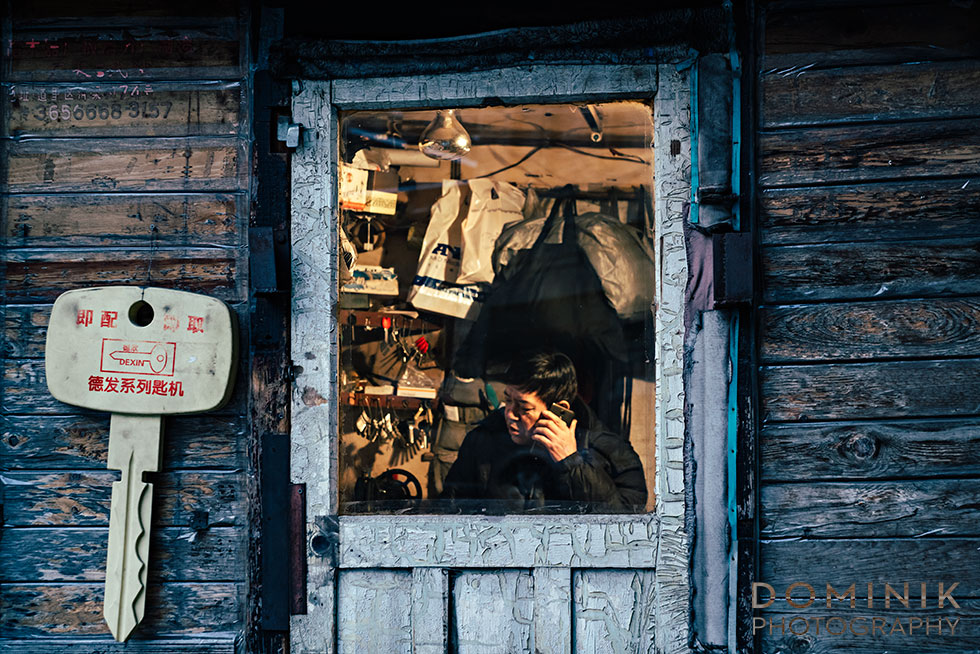
But there are still traces of ‘life’…
The following is more a for-photographers story. If you are not into photography you may want to skip this chapter and move on to a bit background about Harbin’s old city – or simply enjoy the photographs.
The Helios 44-2 lens — the start of a love affair
My love affair with vintage lenses started when I saw on the 500px website a photo that caught my attention due to its very interesting and captivating bokeh.
(Intended rant: I wanted to show you the photograph on 500px where I saw the Helios 44-2 for the first time. I knew it was a photo I for sure liked on 500px. But those ‘lovely people’ from 500px want to force me to upgrade to a paid account to see photos I liked in the past. Shame on them… It confirms my decision abandon their platform long ago…)
Anyway, after encountering this lovely photo that caught my attention I contacted the photographer and asked her what lens she was using. She replied to me that it was a Helios 44-2 lens.
I had to have a Helios 44-2 vintage lens.
I was very pleasantly surprised when I learned that this lens can be had for as little as 30 – 35 USD.
Can a 30 USD lens be worth something?
Having worked as a professional photographer in Bali for over 15 years with ‘conventional glass’ that often costs as much as 1000 USD and more I was skeptical what a lens costing ‘peanuts’ could do.
My photographer-brain was conditioned that for ‘good glass’ one has to pay ‘good money’.
But I thought even if it would be complete crap it was worth trying out. And soon after some ‘googling’ I quickly found out that this lens is actually pretty popular and widely available.
And, boy was I in for a surprise regarding the quality of this lens and the pictures it can produce.
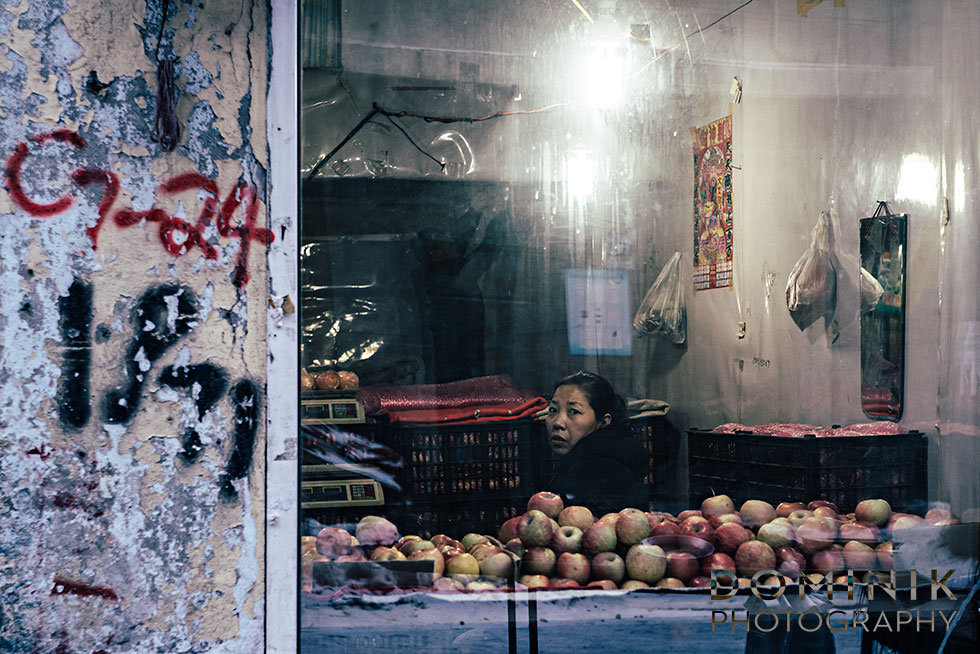
Some more photos, if I may:


Why did it take 8 long months for me to try out this lens for the first time ?
I found a website of Russian business that only sold Helios 44-2 and I ordered it. First time for me to buy photographic gear from halfway across the world.
A nightmare ensued!! I was prepared to wait a few weeks until the lens from Russia would arrive here in Bali – Indonesia. But weeks turned into months and the lens did not show up. After 4 months or so I contacted the seller and asked for a refund. Without hesitation they refunded me.
Then a few weeks later the lens arrived in Bali. Of course, I sent refunded payment back to the seller. But the nightmare was not to end yet. They messed up my order and put in a wrong adapter. Even though my order was to include a SONY NEX adapter they sent me some other adapter.
I am a persistent person. So did not want to give up yet. I asked the seller to resend me the correct adapter. This time I had it shipped to friends back in Europe, whom I was about to visit. Coz sending the adapter to Bali I feared it could take again months and months. But by sheer coincidence the adapter arrived 2 days after I had left Europe again for Bali.
Was I ever to try out this lens that was meanwhile collecting dust ?
Finally, I ended up with the correct adapter, during this trip to Harbin – China. An M42 to Sony NEX adapter. Those puppies can be had for less than 10 USD and are easily available on ebay and from other sources.
So from the day, I ordered my Helios 44-2 until I could finally put it to use 8-9 months had passed. And it was during a trip to Harbin North-East China when I could for the first time put this lens through the paces. I was VERY PLEASANTLY surprised.
Some more photographs ?


The Helios 44-2 – an ideal travel companion ?
Most folks who buy a Helios 44-2 do this because of the ‘legendary’ bokeh this lens produces. And that was also my impetus at first.
However, I quickly found out that this lens is not just good for odd-looking bokeh. The Helios 44-2 is also a very nice piece of gear, which due to its ultra-small size and light-weight is also a great lens for traveling.
Enough gear talk ! For those who want to see how this lens can become a remarkable super-creative ultra-weird photographic tool please see the following article: (Very) Swirly Bokeh with modified Helios 44-2 lens .
Harbin – old city
I won’t go deep into describing Harbin. Suffice to say that due to its very northern location and relative proximity to Russia it is not your average Chinese metropolis.
Part of its uniqueness is its old city. Not as old as to qualify as ancient, but interesting nevertheless. It has a very unique architecture strongly influenced by Russian and even Jewish style elements. Most of Harbin’s remaining old city is in a very dilapidated state and falling apart… In fact some parts of it are actually closed off. However, there were still a few residents living there and even some shops and other economic activity.
For me, it was exactly that state of decay that was very appealing. And interesting photograph.
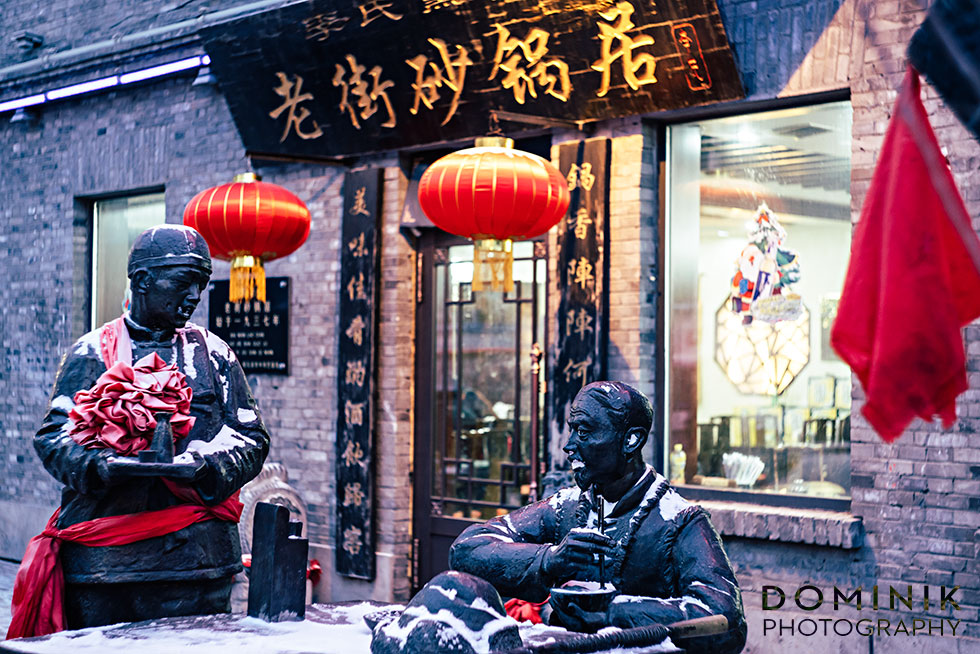
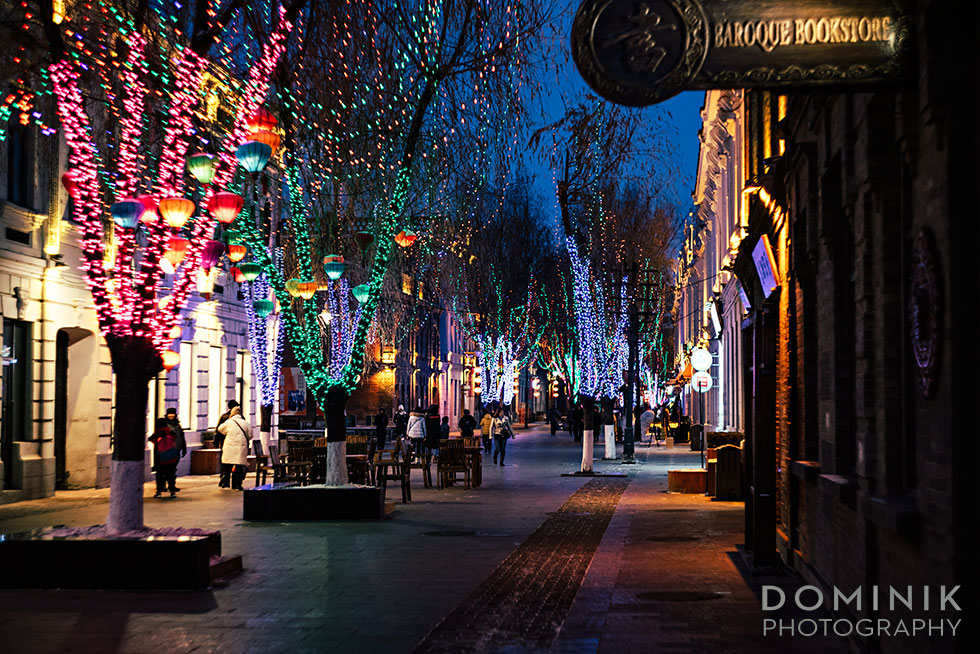
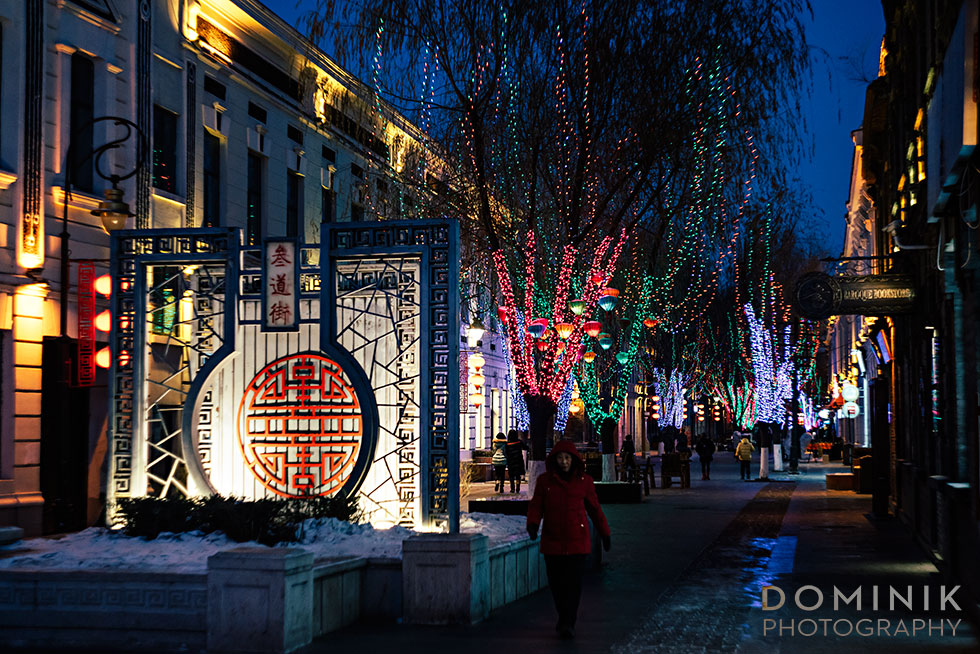
And the good news is that at least parts of Harbin’s old city are being refurbished and re-vitalized and repurposed.
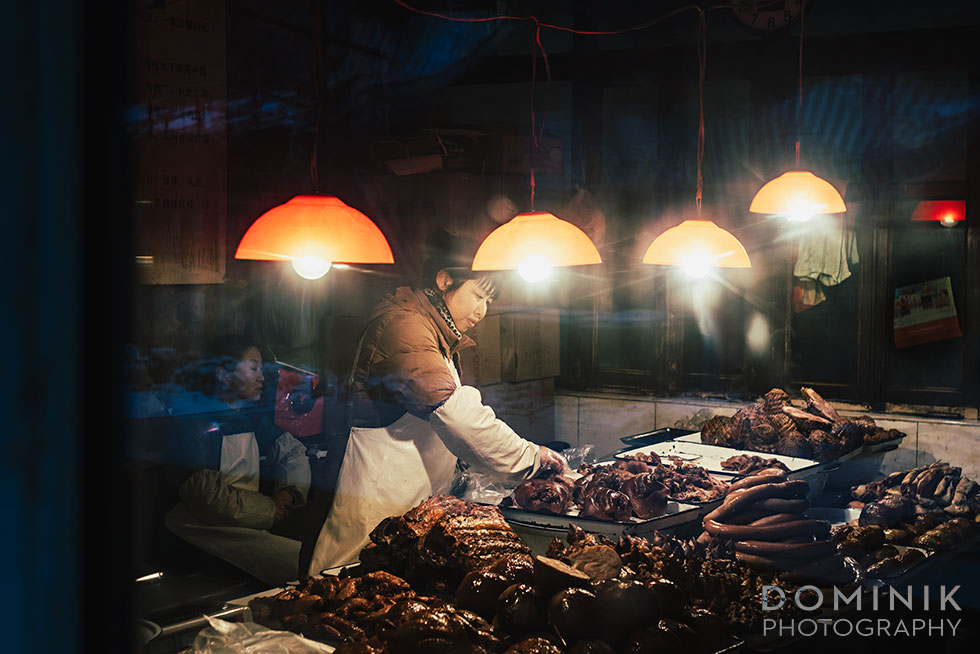
So I leave you with some more photographs of the part that has already been refurbished and repopulated with restaurants, cafes.
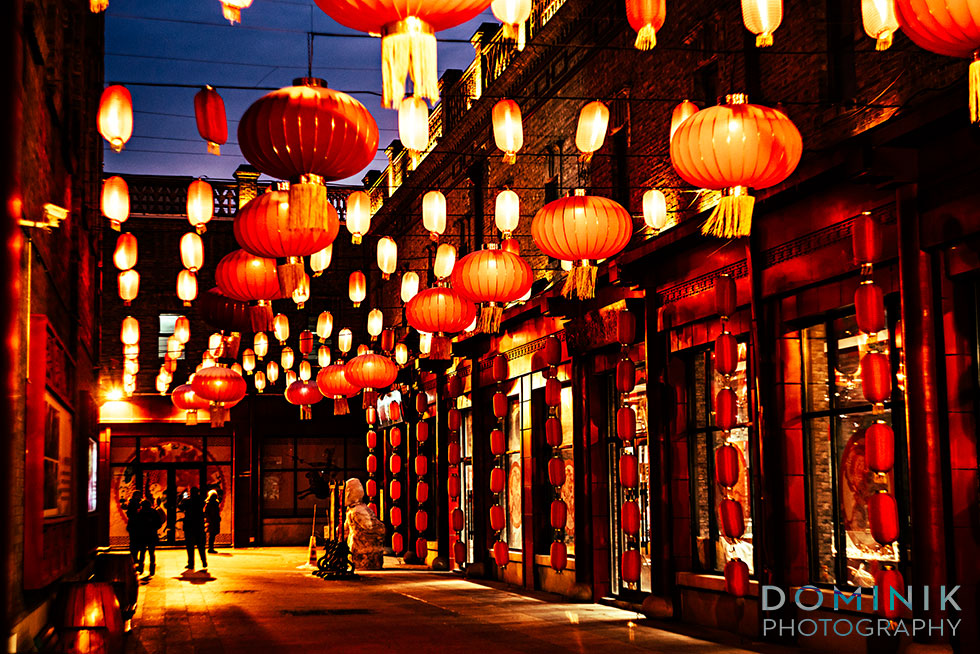
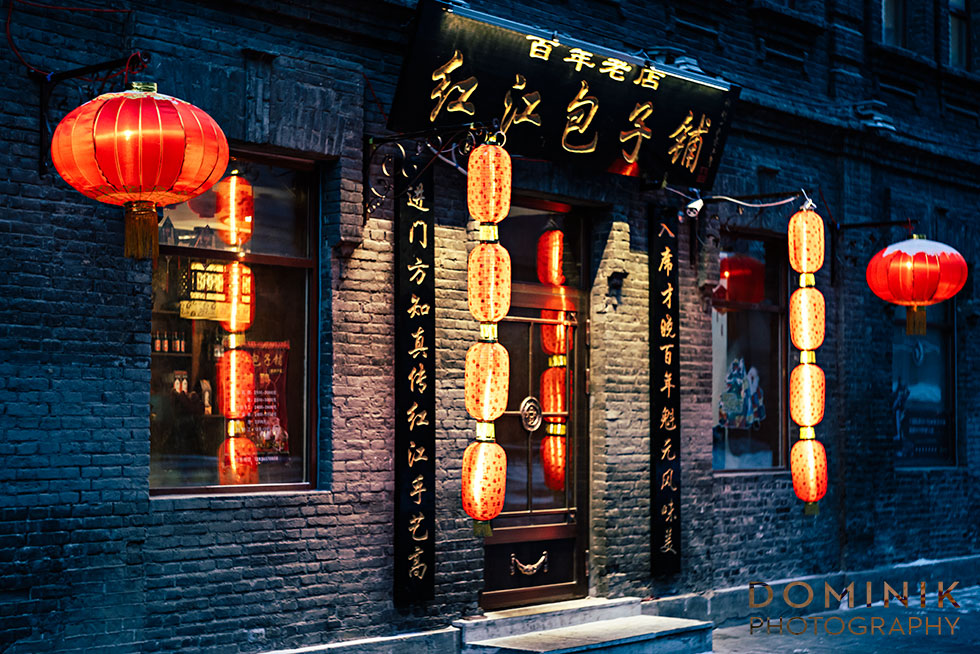
I hope you have enjoyed the pictures from Harbin’s old city. If you want to see more Harbin photos and in particular photos of the legendary snow & ice festival please follow this link.
As always, I would love to hear from you – regardless what you have to say…
Truly’ – DOMINIK
FOLLOW ME ON
THAIPUSAM SINGAPORE

Thaipusam – Singapore Singapore’s most interesting festival
For me going to Singapore is a bit like just going into town. It is something that I do quite frequently. In fact, Singapore is the place that I most frequently traveled to. Not out of a burning desire to go there. But for reasons of necessity, practicality, and convenience.
Visiting Singapore is something that is no big deal for me. Yet I enjoy it and usually look forward to it.
But this visit was somewhat special. Firstly, it was one of those rare trips with my ‘missis’ only. Secondly, I wanted to purchase a camera which at that time I could not find in Indonesia – namely the Panasonic LX10.
But the main thing was THAIPUSAM, the largest yearly Indian religious ‘festival’ in Singapore. In my opinion, a ‘cultural pearl’ that brilliantly epitomizes the ‘vibrancy of Singapore’.
I had witnessed Thaipusam over 20 years ago in Kuala Lumpur and it was quite an experience. I had to see it again. And this time with a camera.
To set the stage let me show you some photographs first:

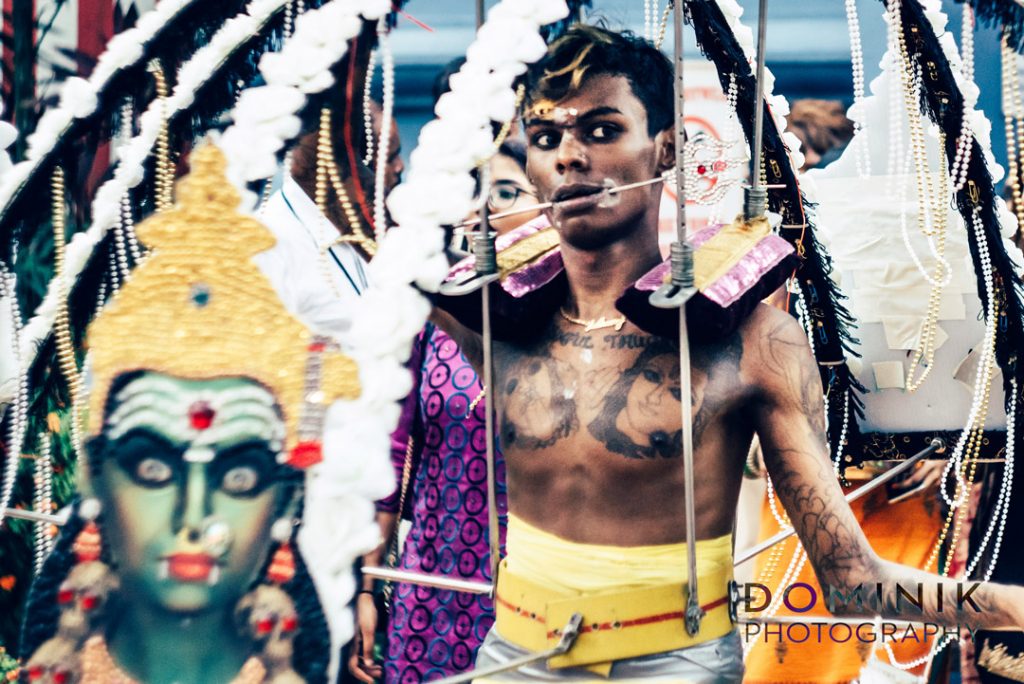
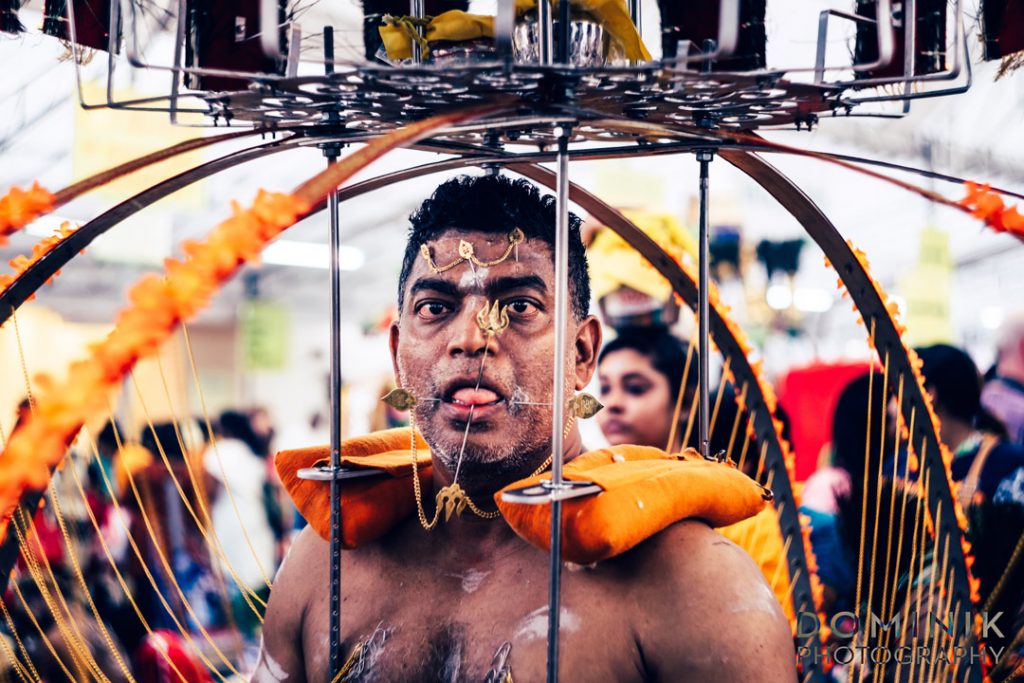
Why are you looking at me like that ?
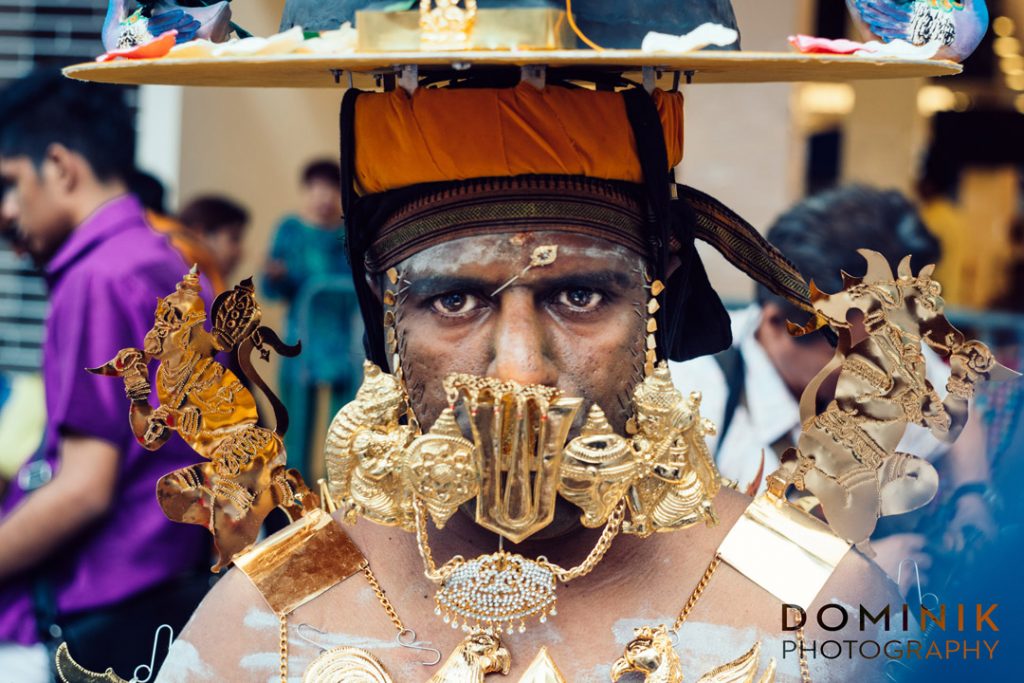
A devotee with interesting ‘facial decor’…

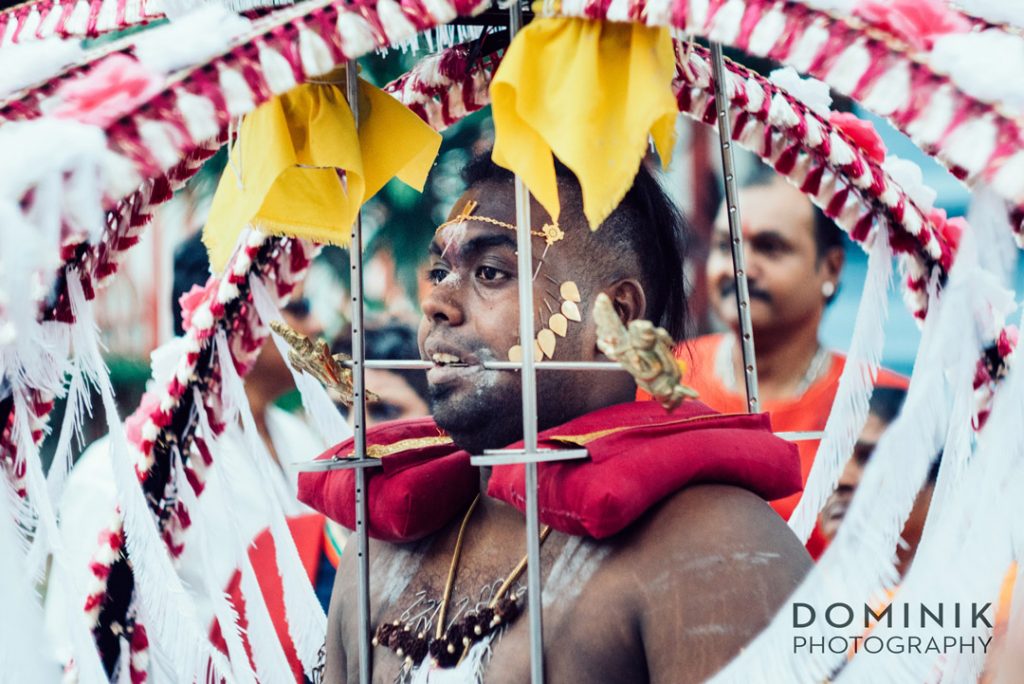
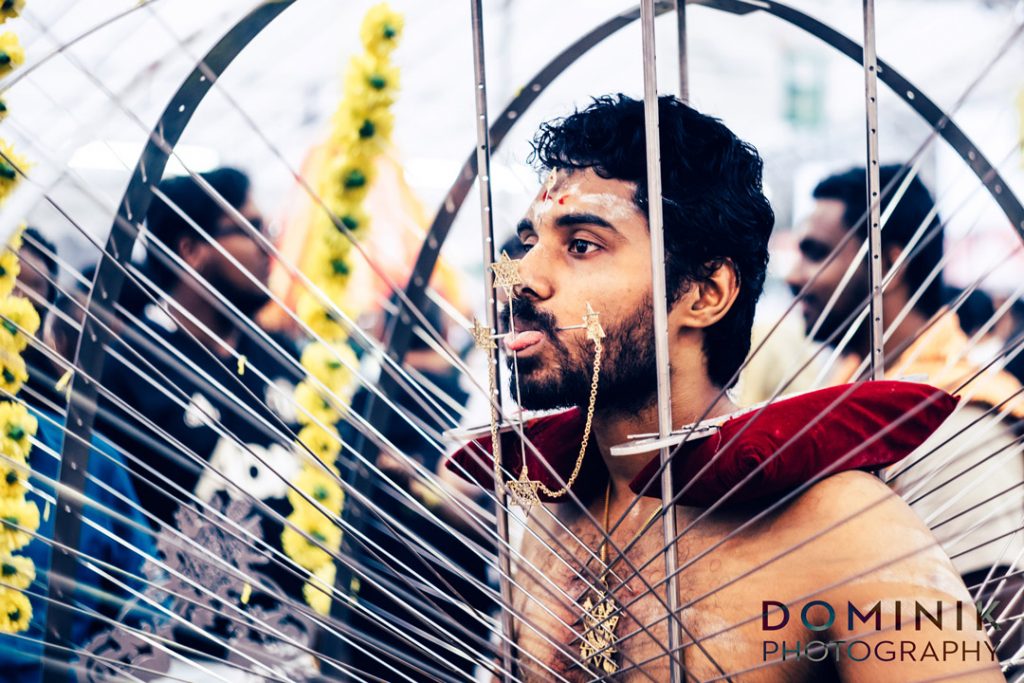
A proud devotee

Leaving the temple.

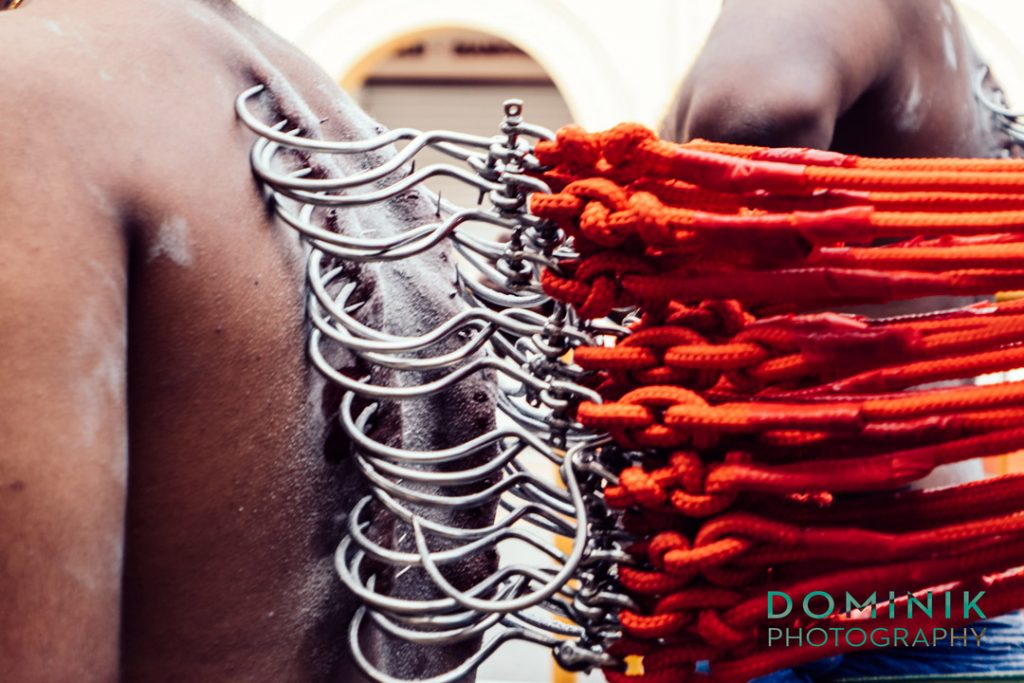
all the hooks are in place…
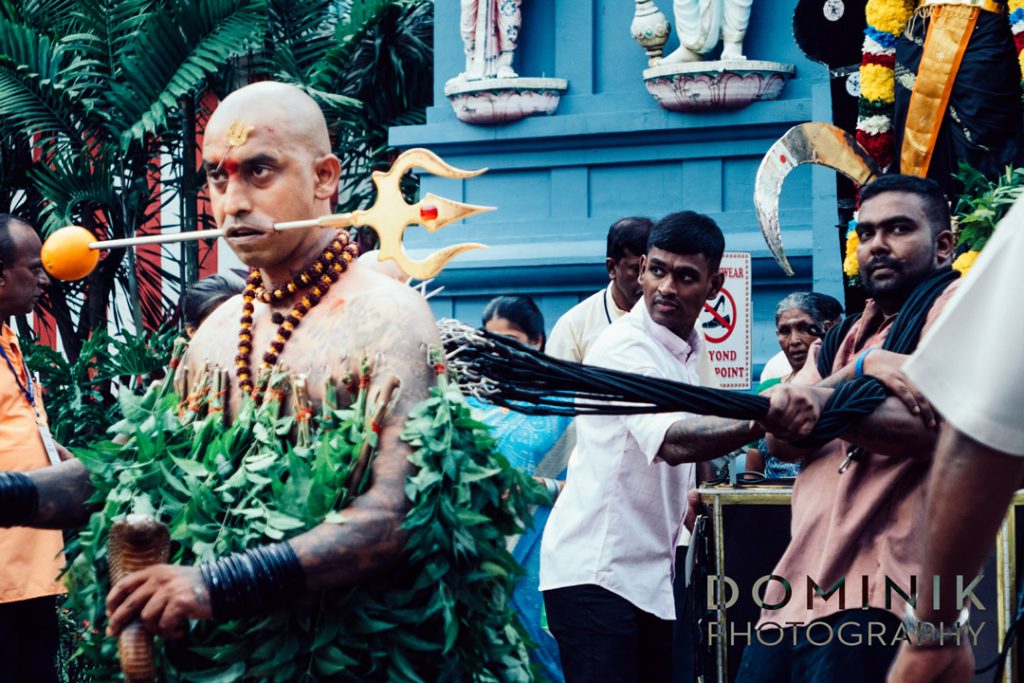
a little pulling action for added pain…
hooked up.
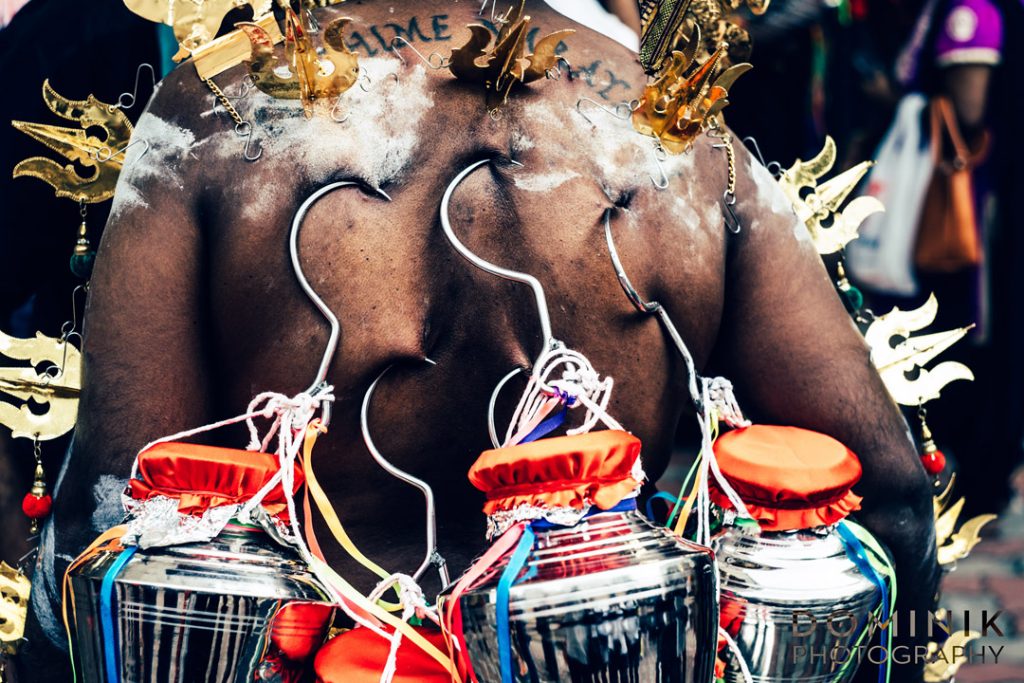
an interesting way to carry the milk cans…

Another proud devotee at Thaipusam festival – Singapore
What is Thaipusam
I won’t go into explaining what Thaipusam exactly is and what is its religious significance. If you want to delve deeper you may want to check out the following Wikipedia article about Thaipusam.
What is pretty obvious is that some sort of ‘masochism’ is involved here. Some ‘self-torture’ or testing one’s tolerance to pain. All in an effort to appease the gods.
Surprisingly those guys do not seem to be in pain. And sticking needles through one’s cheeks and putting gigantic hooks into the skin seems to be the most natural thing for them. This ritual is not restricted to men. There are quite a few women who also take part in and perform these rituals. Even a few children practice some form of piercing for Thaipusam.
One thing I can assure you is that there is no ‘trickery’ involved. And the folks are not sedated by any substances nor are they in a state of trance.
How exactly they do it I dunno. And to be honest I am not keen on finding out. Coz even if I would know how it’s done I won’t try for myself. However, one thing that I take away from witnessing what those guys do to their bodies is that our bodies are amazing ‘machines’ and knowing how to control the body and mind can yield amazing results.
Some more pictures ?
Double gaze…
Pain and pride and pleasure – you choose.

Those guys don’t look too happy to me.

a close-up of the ‘action’…

Neat & tidy
FOR PHOTOGRAPHERS
I think it is self-evident that Thaipusam is a great opportunity to take pictures. Here are a few things I recommend photographers consider.
The devotees are pretty relaxed when it comes to photographing them. It goes without saying that you should pay respect and be at all times aware that this is not a carnival of some sort, but a religious pursuit.
The authorities who manage the proceedings can be less tolerant as I experienced when they at several occasions hindered me from getting close to the action. Hardly surprising. After all this is Singapore… Pun intended !
That prompts me to recommend that part of your arsenal should be at least one long lens. 70 – 200 mm or even a longer focal length.
I used during this trip my newly acquired Lumix LX 10 a lot . And this little pocket camera mastered all the challenges I threw at it remarkably.
The other camera I used was my Sony a7 r II. Onto which I had mounted the ‘dark knight’ – the venerable Mitakon 50 / 0.95. Using a lens that fast was a good choice for the low-light situations.
The other wonder-weapon I used was my Tokina 500 mm / f8 mirror lens. I missed quite a lot of shots because people move a lot and manual focusing at 500 mm can be challenging to put it mildly. But I was still able to get a few keepers. I love this lens to bits in spite it being a hard-to-handle bugger.
The best photographs of Thaipusam are to be had during the twilight hours in the morning and in the evening.
Be prepared that there will be quite a lot of fellow photographers. All competing for the best spot. And as we know photographers can be a ruthless bunch.
If you happen to visit Singapore especially for Thaipusam I encourage you to wander about all over Little India. Because this part of Singapore lends itsel very well for photography. And most certainly has the best Indian food on offer. But I am digressing here.
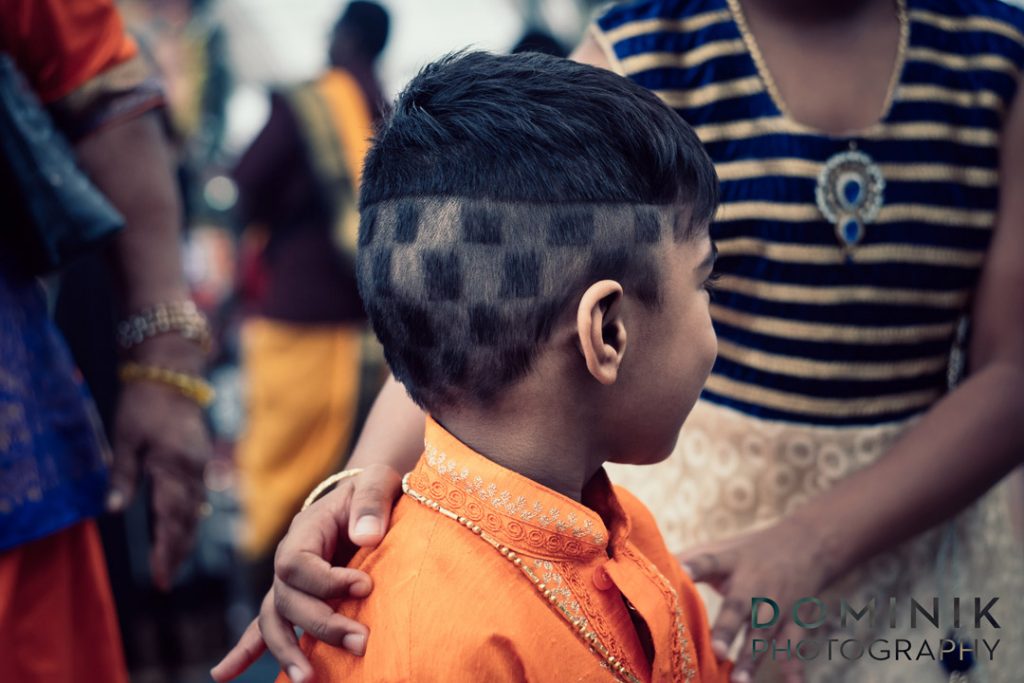
a really cool hair style !
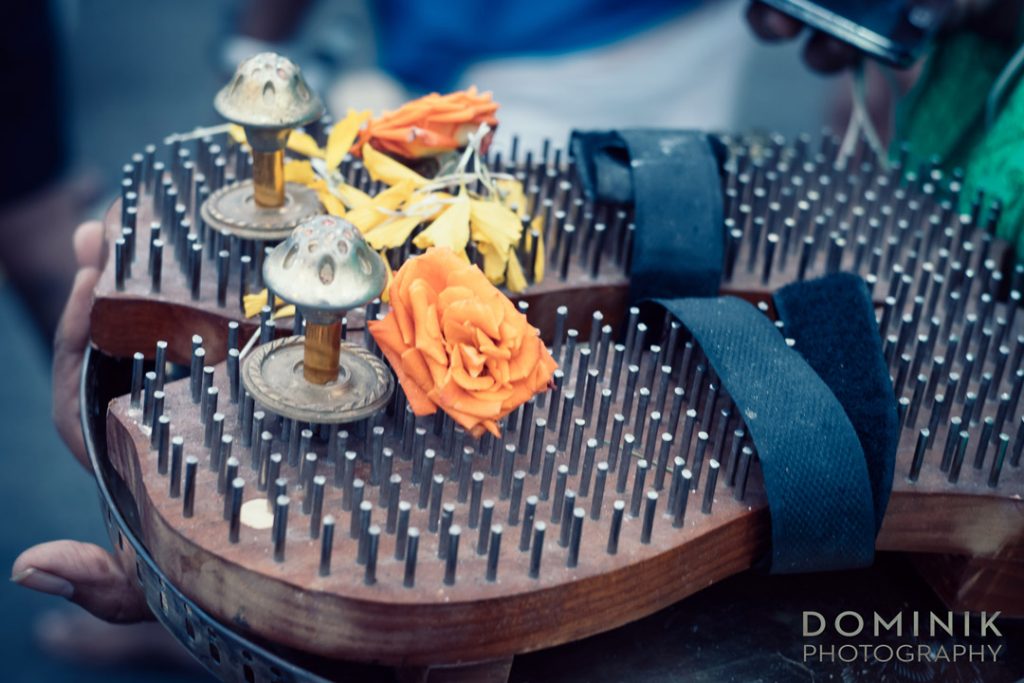
Love ’em – but they did not have them in my size…
what is he feeling at that moment ?
he seems pretty relaxed.
I hope you have enjoyed those photographs of Thaipusam in Singapore. As always I encourage you to leave comment below.
Truly’ DOMINIK
P.S.:This time no selfie, but something much more interesting. A photo of my misses… who continues to a great inspiration for my work and an excellent travel companion. Diah, we should hit the road again soon…

My missis…
FOLLOW ME ON
Dalian – your not so typical China
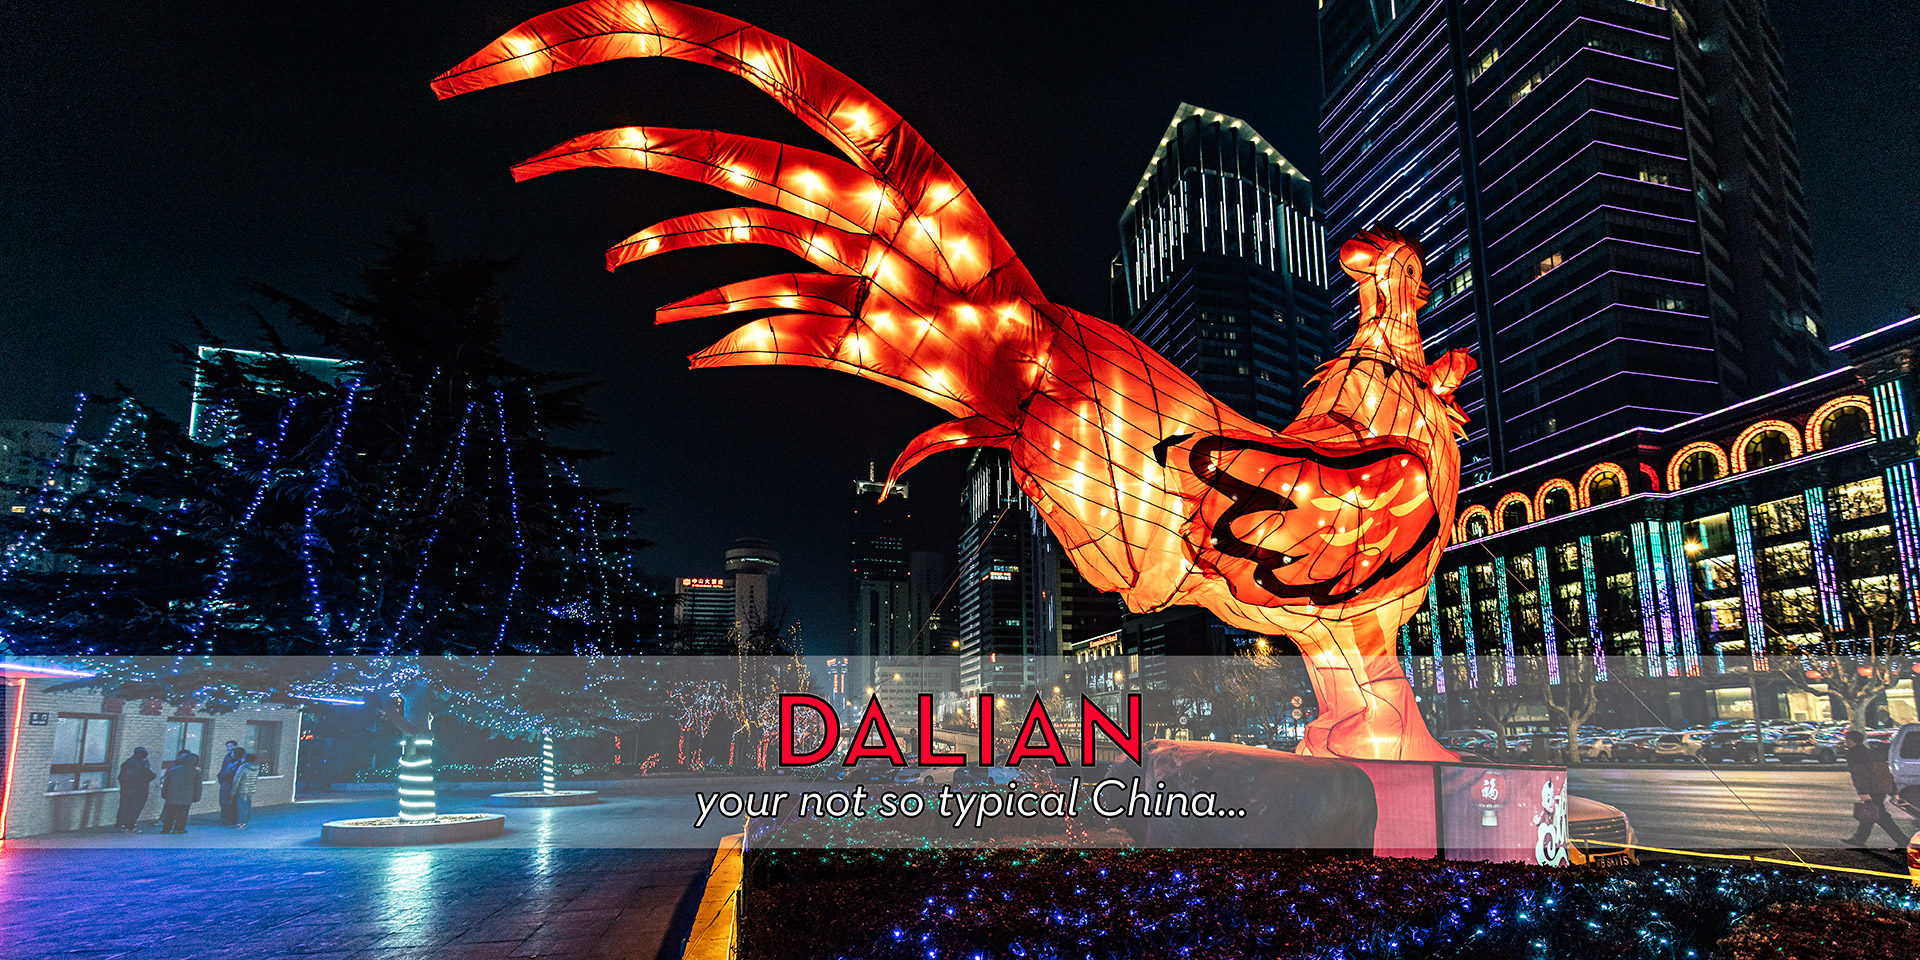
DALIAN is different !
December and January usually coincide with a larger holiday for my daughter Kika. So I always try to line up a trip that is fun for her and fun for me. And fun for mom as well.
Not an easy feat to align the interests of a 9-year-old girl, my wife’s who is rather used to tropical conditions & climate and a 50 something-year-old (ad)venture – that is me. But it usually works out.
This time the plan was to go somewhere cold and interesting. Escape from the tropical heat that is Bali. So, we set our eyes on North East China and in particular Harbin – where a huge ice & snow festival is usually taking place.
But to fly all the way to China only to visit Harbin would not be worth. So we needed at least one more place.
So we decided on Dalian as the other destination.
Never heard of Dalian ? Don’t worry it is not necessarily a place you need to have on your bucket list.
Lets’ see some pictures first:

Welcome to Dalian

foggy winter atmosphere in a park in Dalian

the modern Dalian.
A typical China motive…

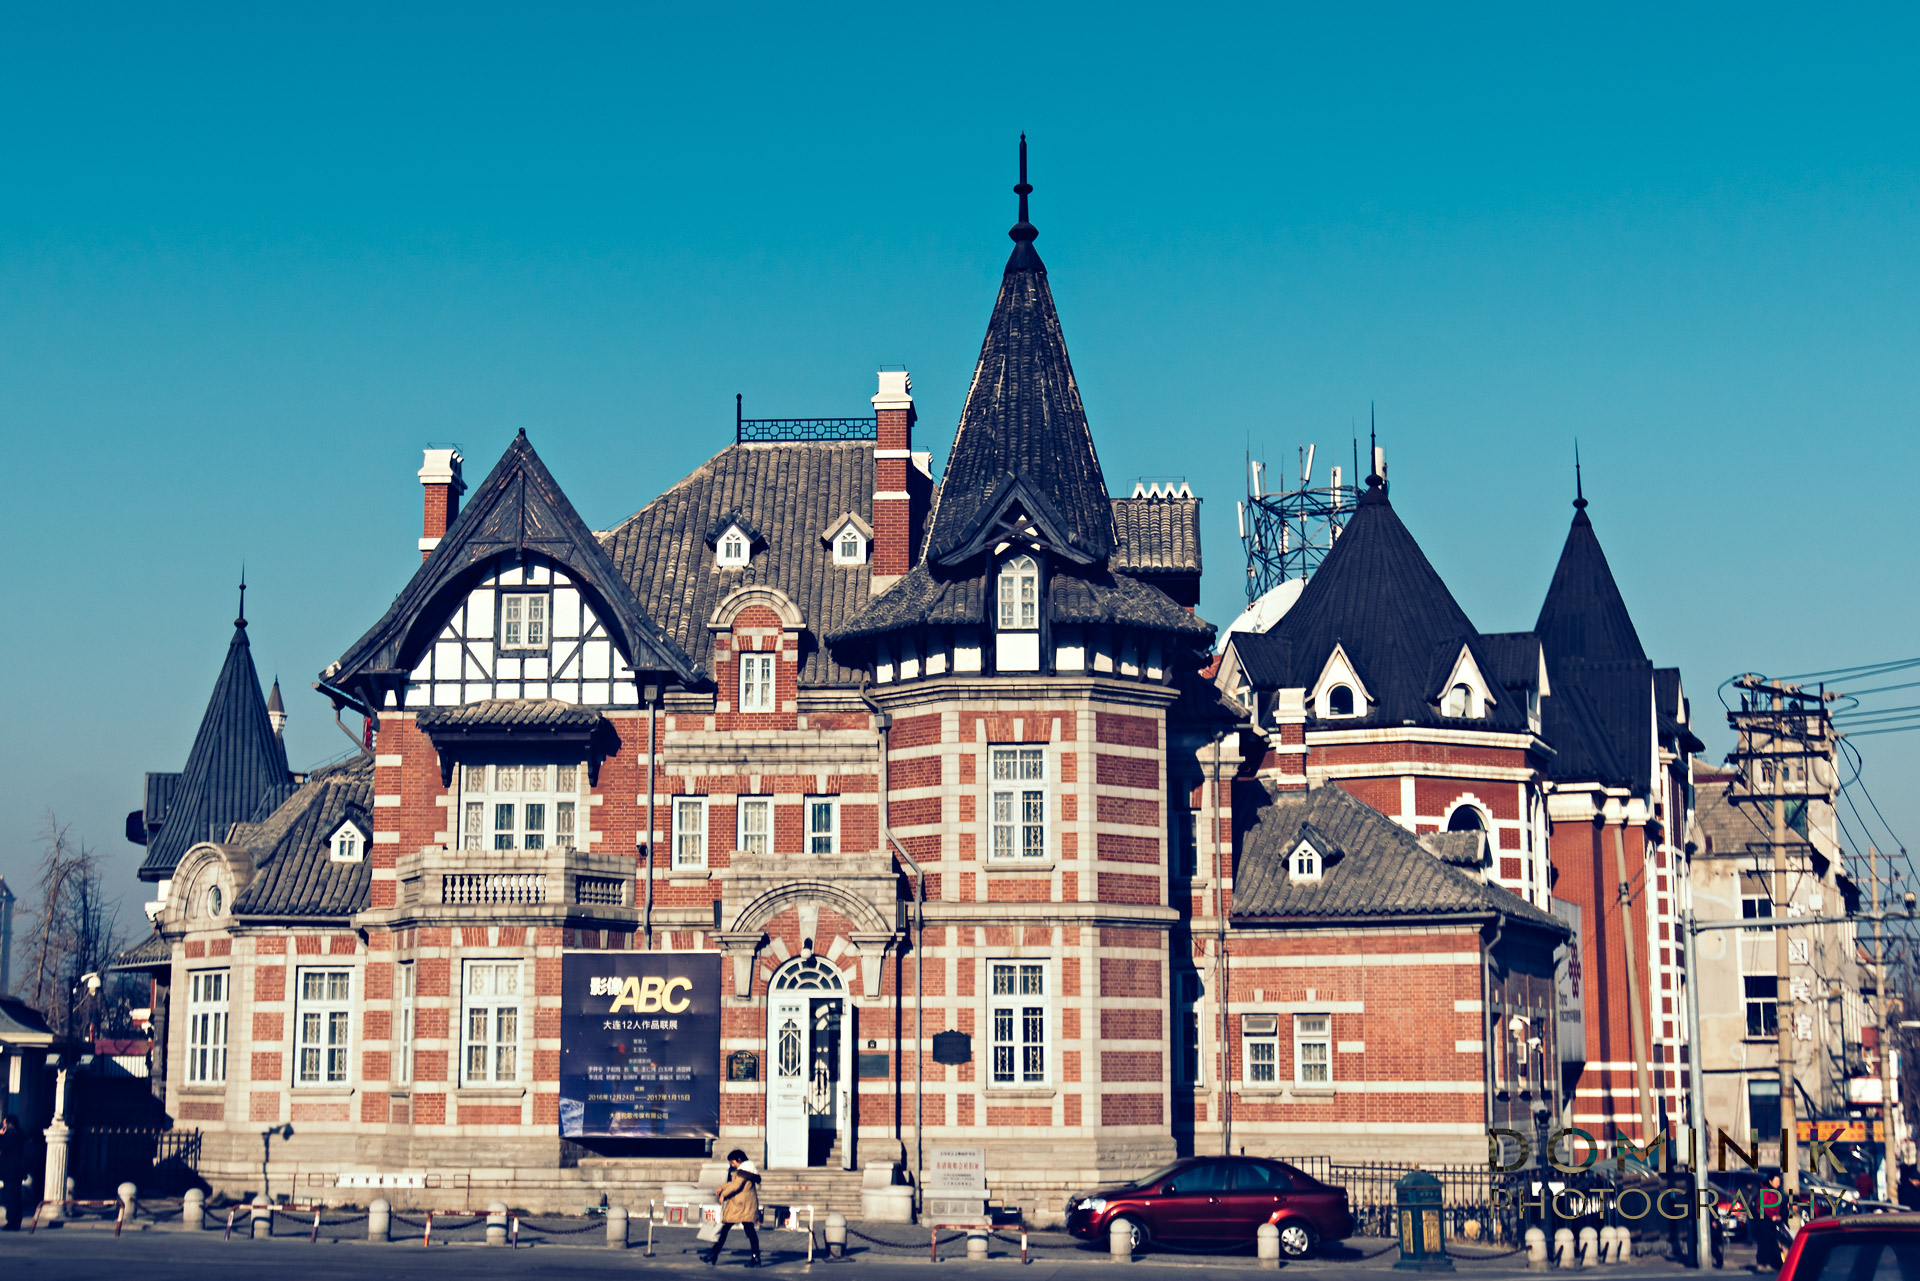
New & old architecture of Dalian
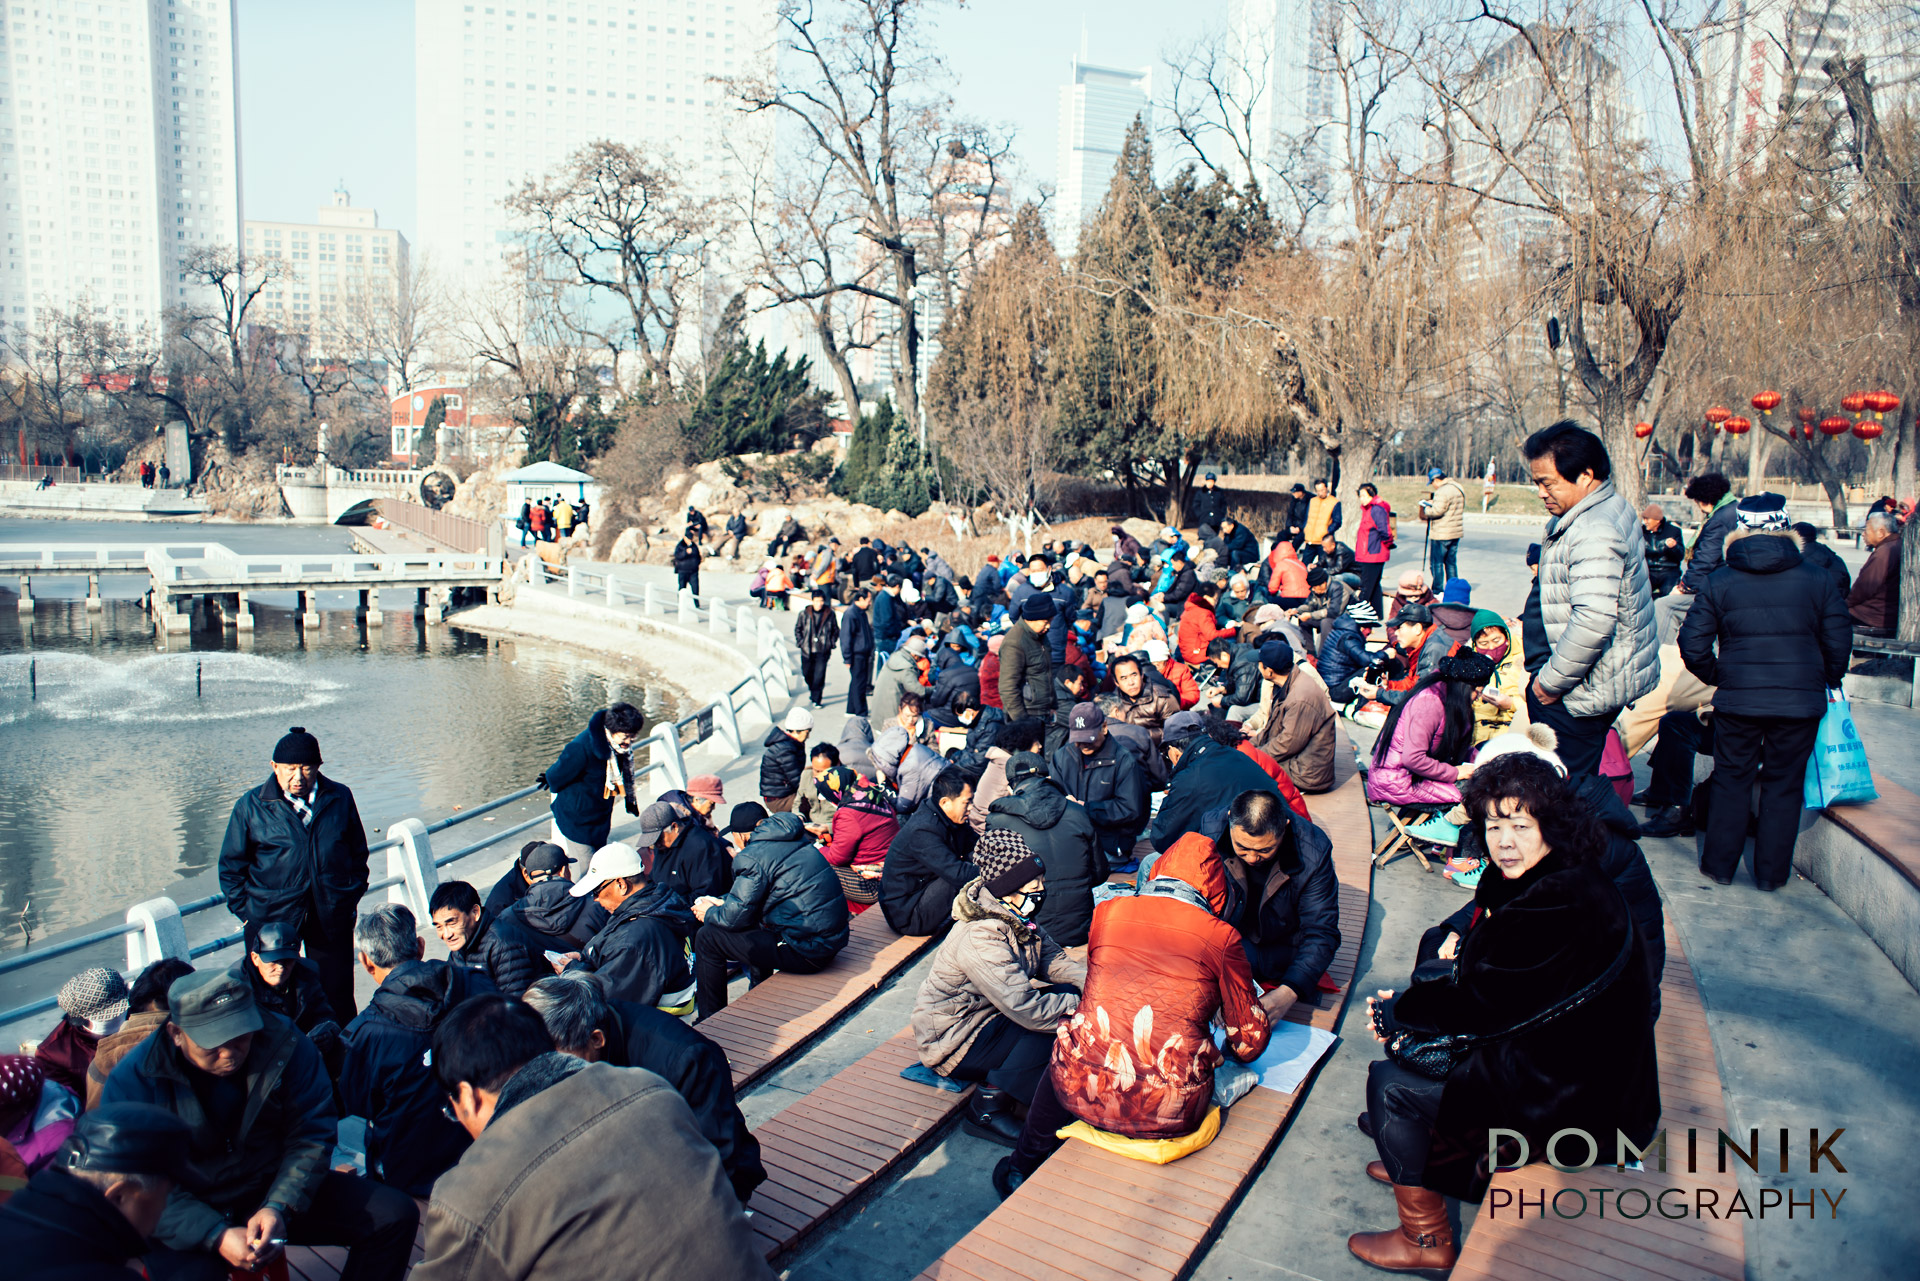
Cold or hot… there are always folks in the park

who is wearing the nicer dress ? You decide.

The main city park in central Dalian
Why visit Dalian ?
Well, firstly it is relatively close to Harbin, which was our primary destination. A mere 3-hours train ride on China’s super convenient high-speed trains.
But the main reason was: I was curious! Curious why Dalian ranks as China’s most livable city.
I enjoy visiting the big cities of China. Though I would not consider any of China’s big cities to be particularly livable for longer periods. Let alone raise children there.
Chinese cities tend to be very convenient – all facilities within reach. But on the other side, Chinese cities are rather polluted, congested, crowded, loud and with few green spaces.
But Dalian is indeed different.
Firstly, Dalian’s traffic is bearable and there are hardly any traffic jams. Pollution seems to be also much less of a problem when compared to other big cities in China. Which has also to do with Dalian being a coastal city where the wind helps to blow the pollution away.
During my research, I also read that Dalian has also lot’s of parks and green spaces. And lastly flying to Dalian was also convenient for me coming from Bali. We could fly there with only one short stop-over in Seoul.
Enough reasons to pay a visit to Dalian. We stayed there for a week.
Some more impressions from Dalian:

Beijing duck place with sleeping cooks…

would you have guessed this to be China ?

or this one ?

This can also be China.
Looks more like Amsterdam… yet it’s China.
A little bit of Japan, a little bit of Russia & Europe in China
Geographically Dalian is the city in China which is closest to Japan.
Ever since China’s opening-up, many Japanese companies have set up shop in Dalian. Consequently, there is a large Japanese expat population in Dalian. Which is very good news. Why ?
Because there are many excellent Japanese restaurants that cater for Japanese expats.
Also, during the last century when Japan occupied parts of China, Dalian played an important role for the Japanese and that influence is still felt in many parts of Dalian in terms of architectural heritage.
Nowhere in China have I seen streets being so neat and tidy. And with so many nice looking houses. In fact, in certain areas, Dailan does not feel like China at all.
There is the Russian / European and Japanese influence everywhere.
And then there is also some ‘Neo-European’ architecture visible in Dalian. But rather than me trying to describe it all let me show you the pictures:

I told you Dalian is different and sometimes does not look like China at all.

Could be Moscow or Paris.

Russian merchandise
A city of Lights
Before visiting Dalian I had asked a friend of mine to do some online shopping for me in China. Because China’s Taobao (the Chinese equivalent of ebay) is a paradise for ‘gear-lusty’ photographers.
Ever since I committed to slow-photography I got addicted to manual focusing, old vintage lenses. And China is a paradise for vintage photography gear.
Upon arriving in China I got a handful of those lenses, which I was naturally very eager to try out. In particular, I wanted to throw those lenses at low-light / night photography situations.
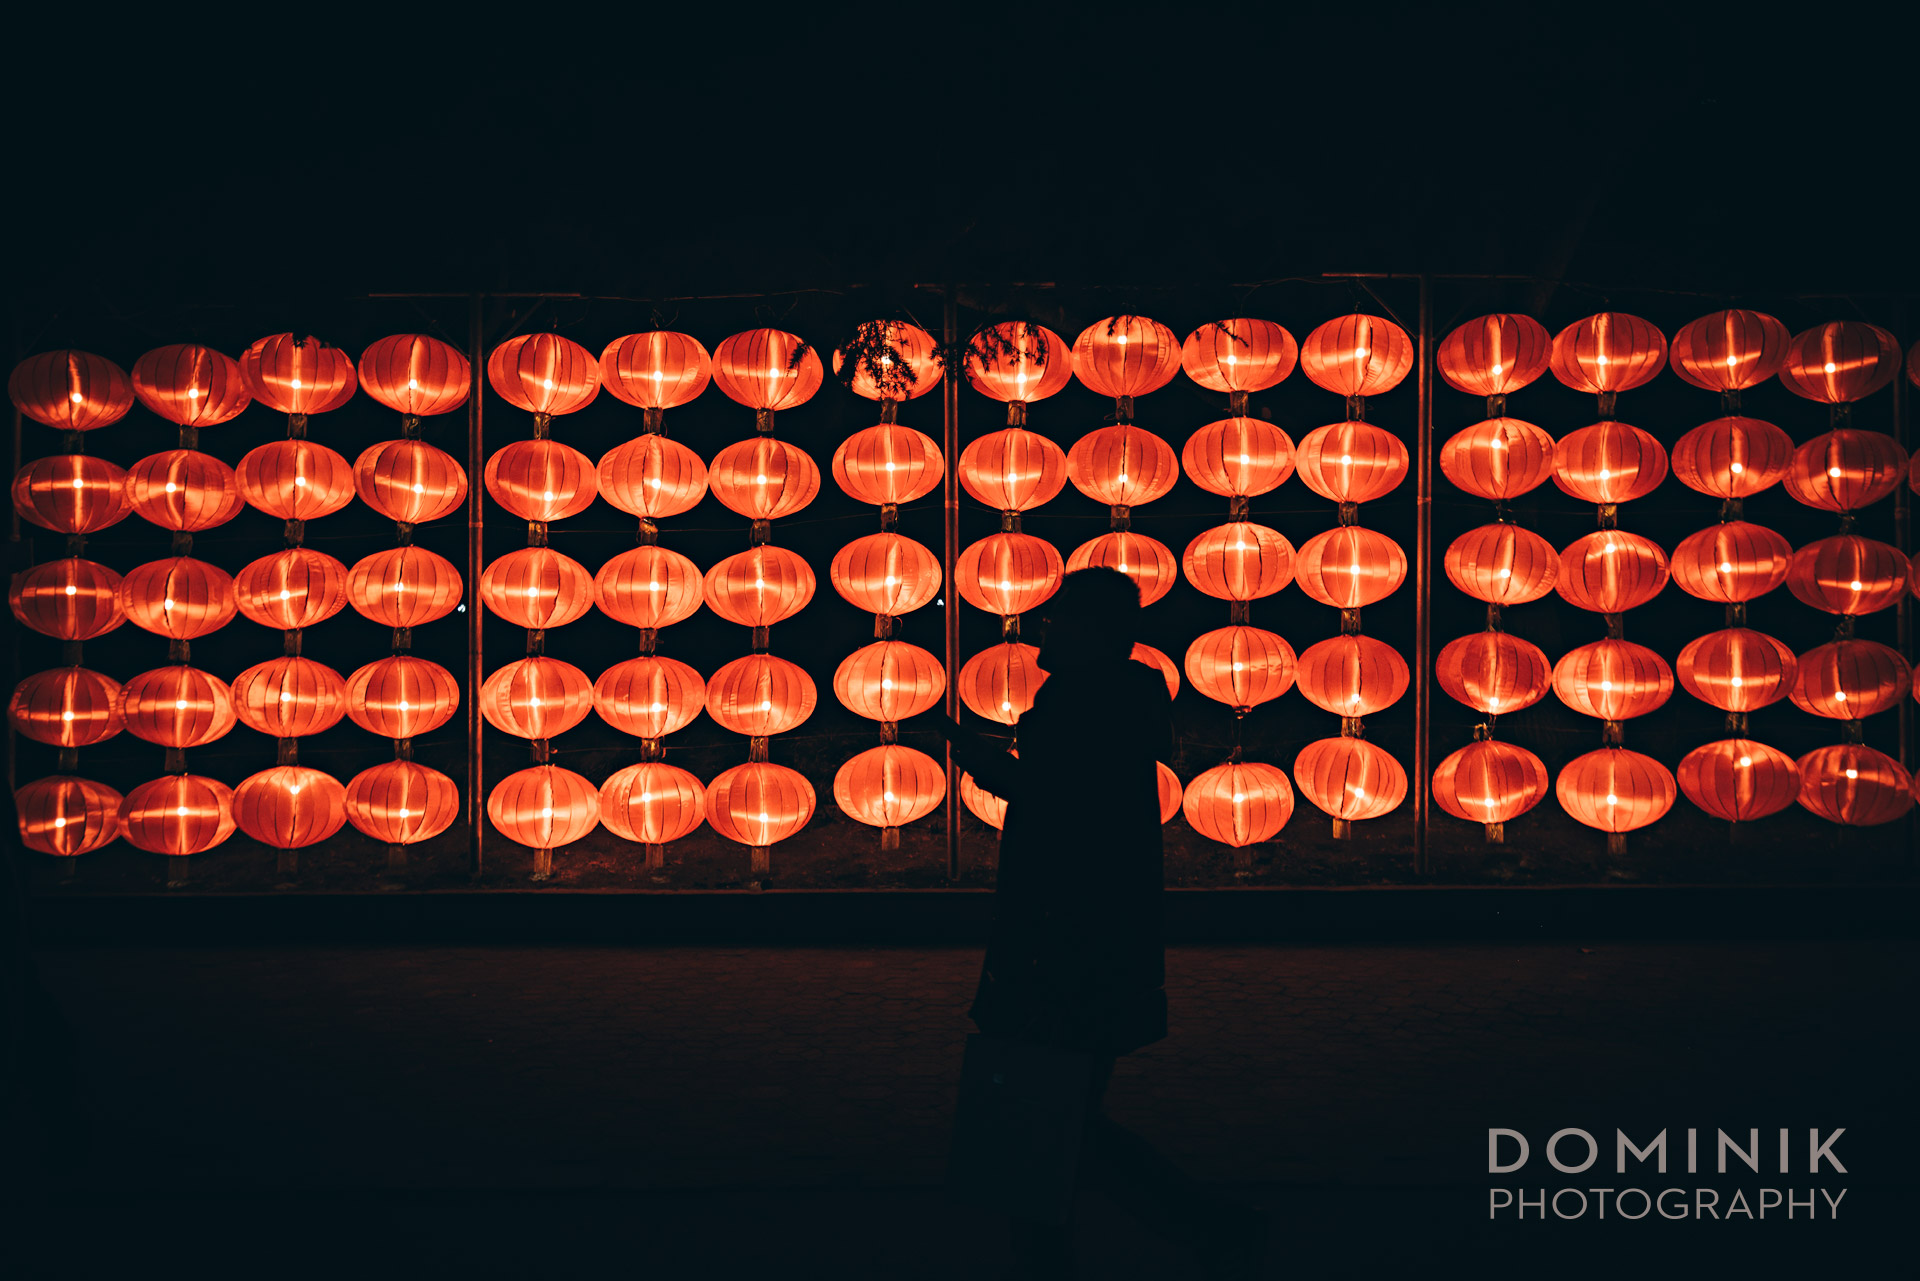
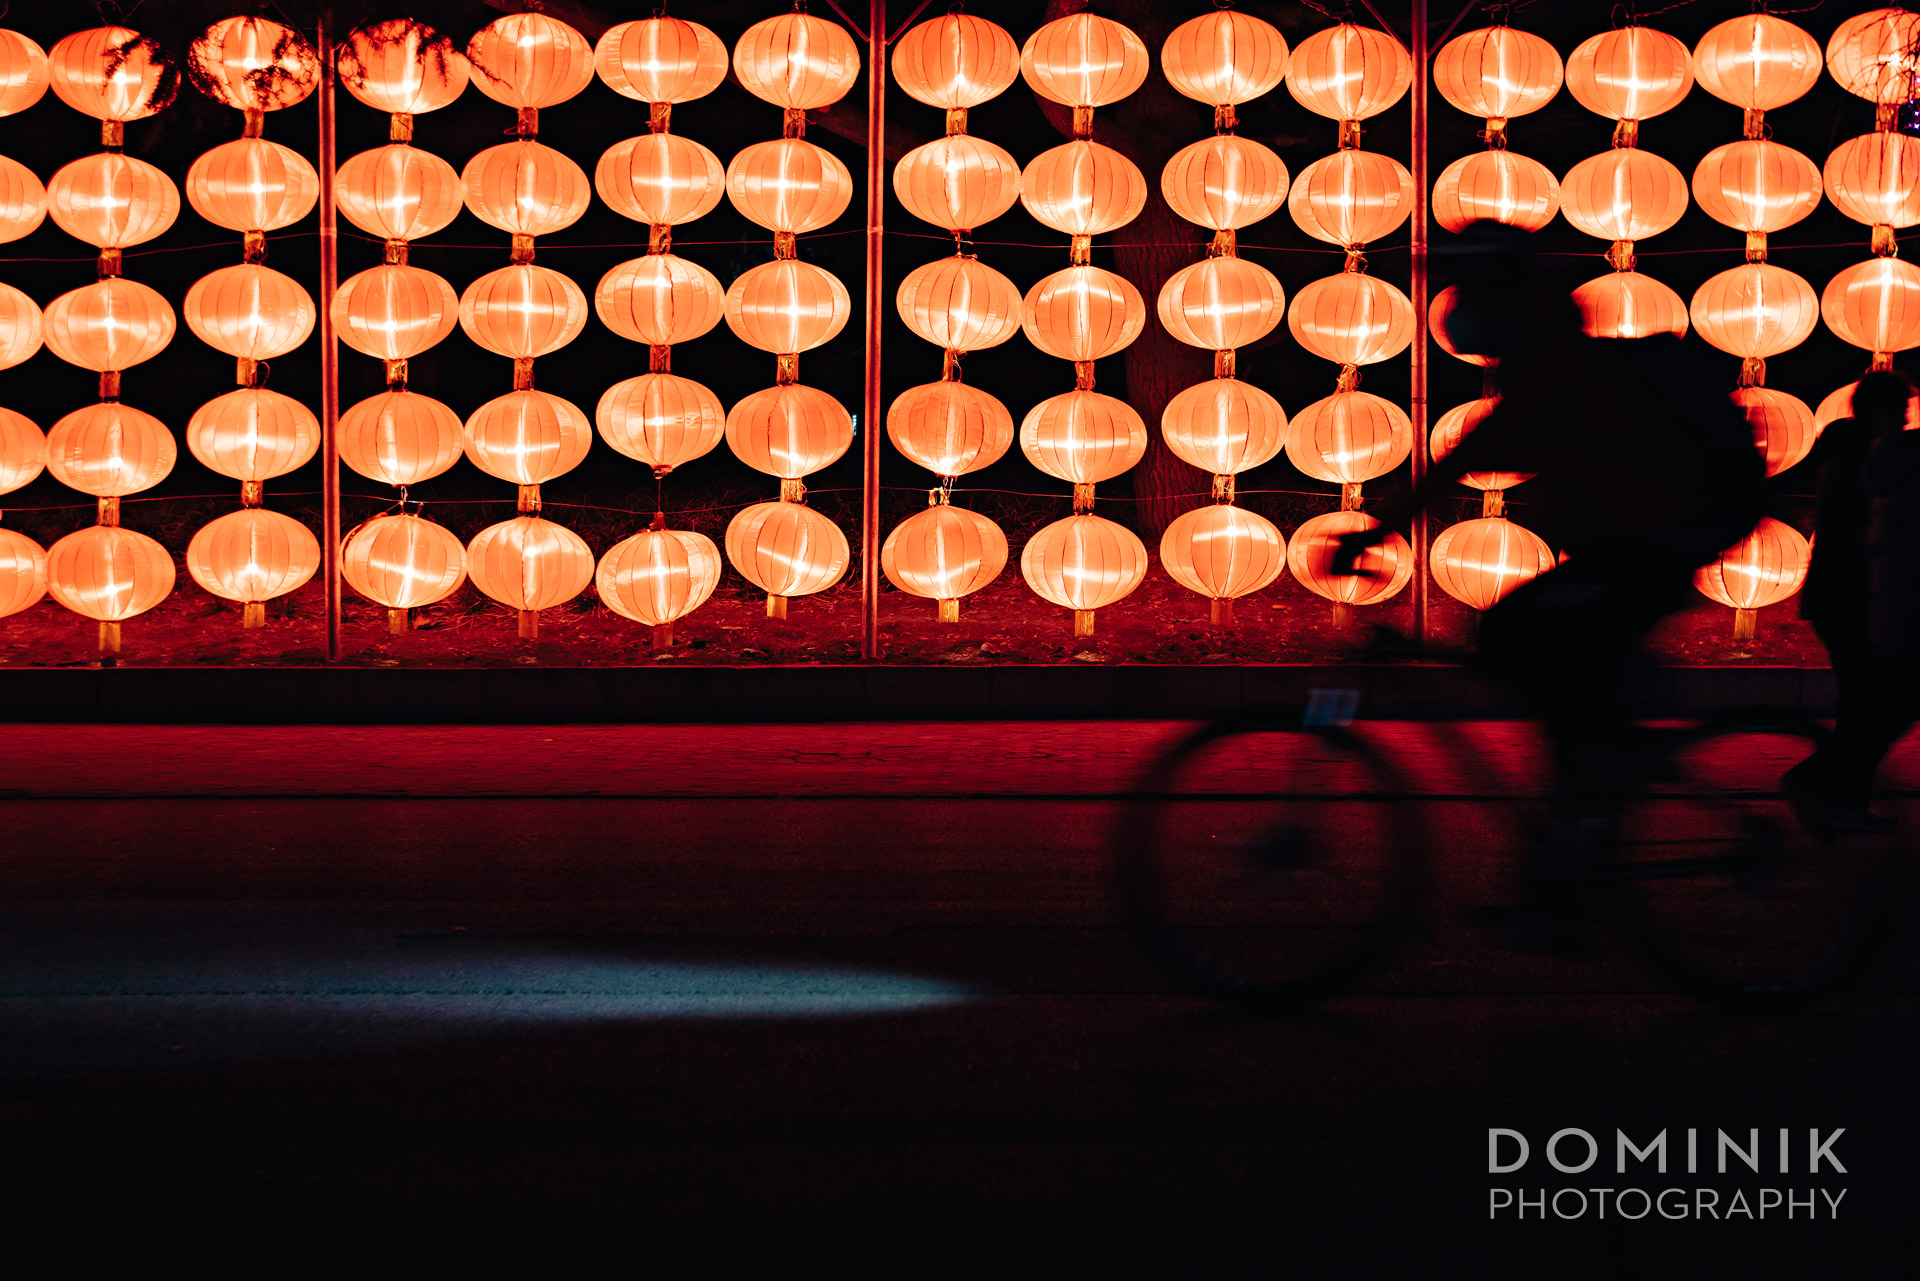
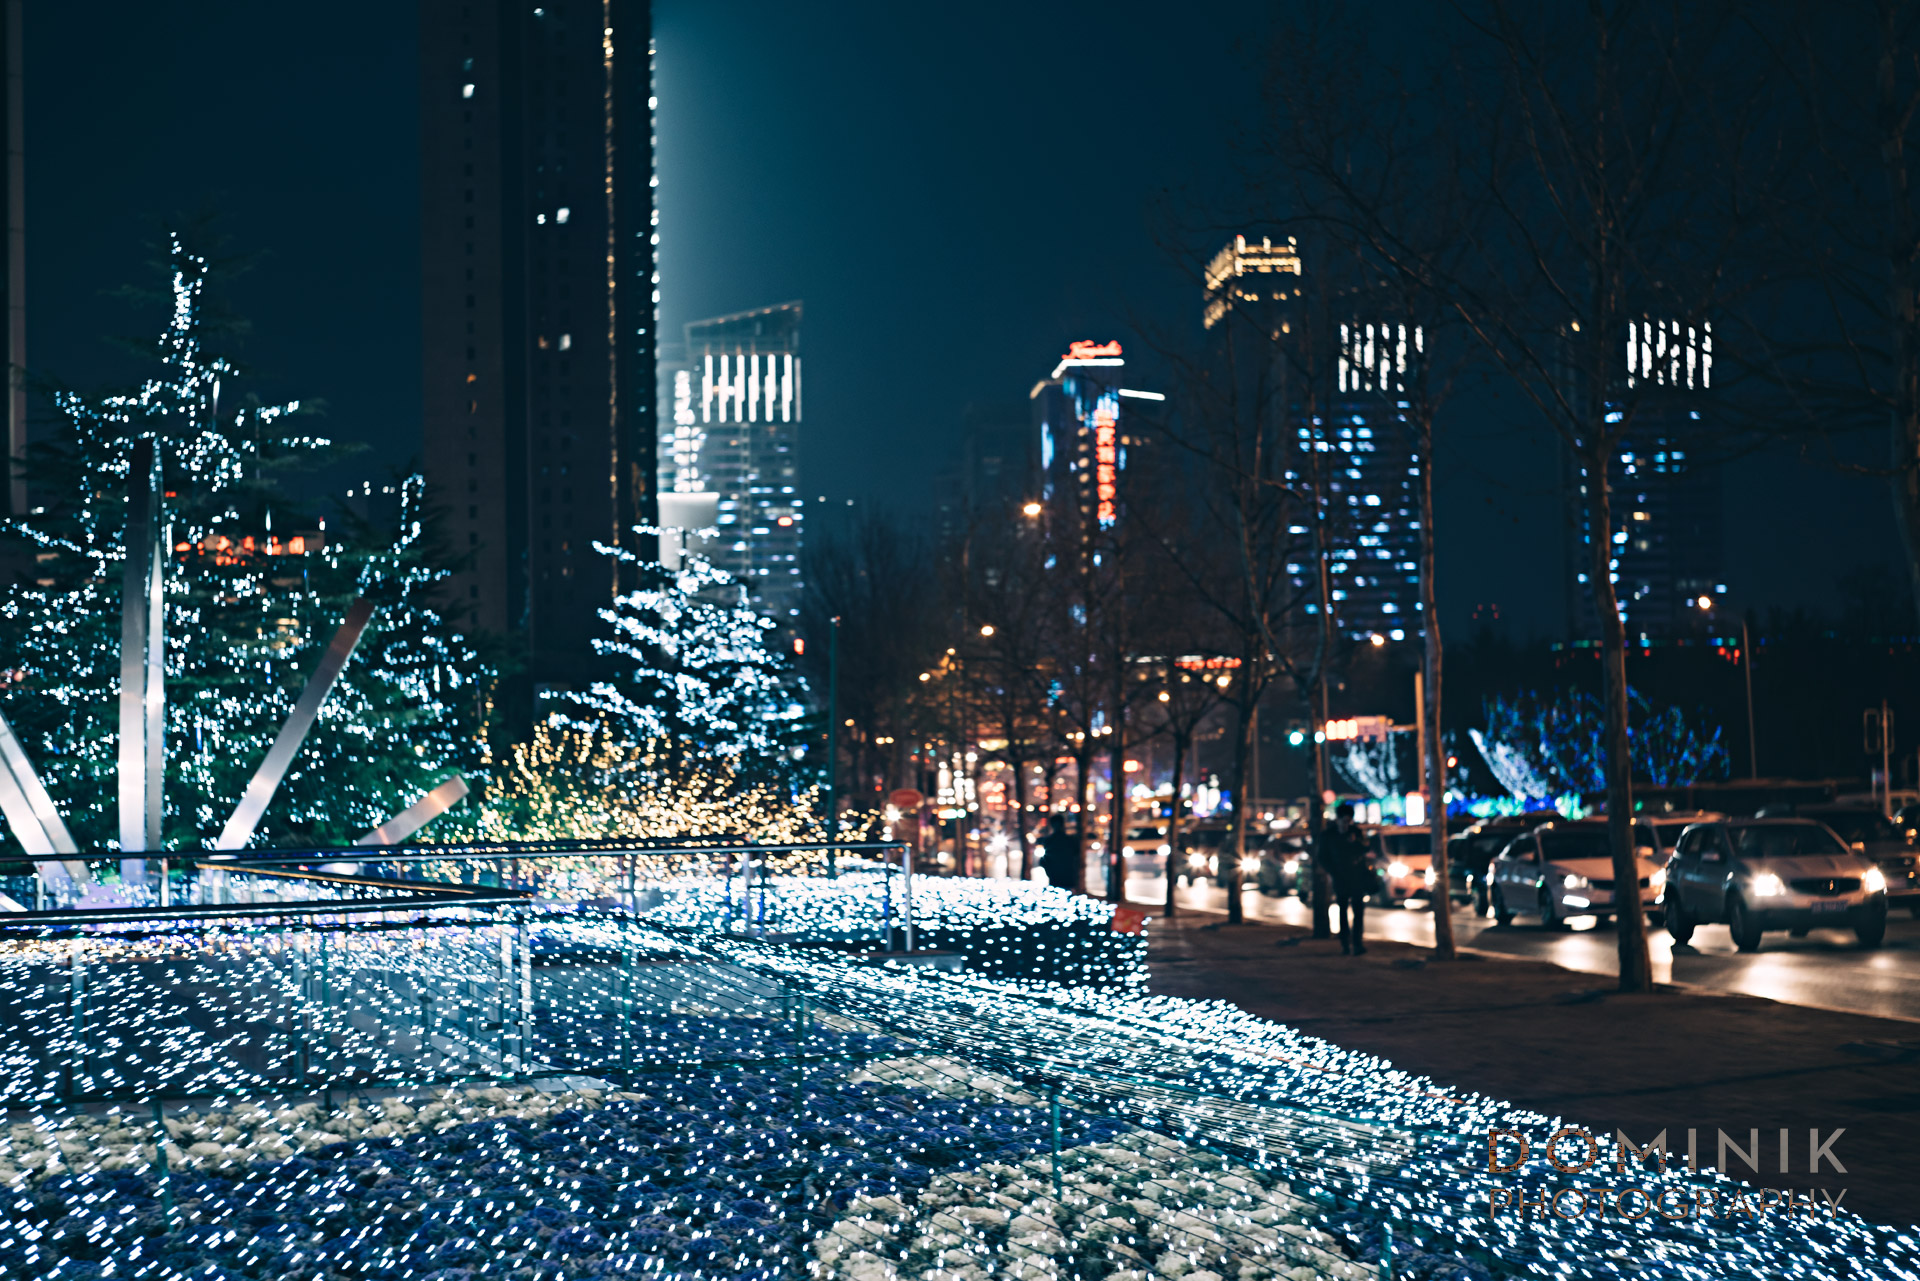
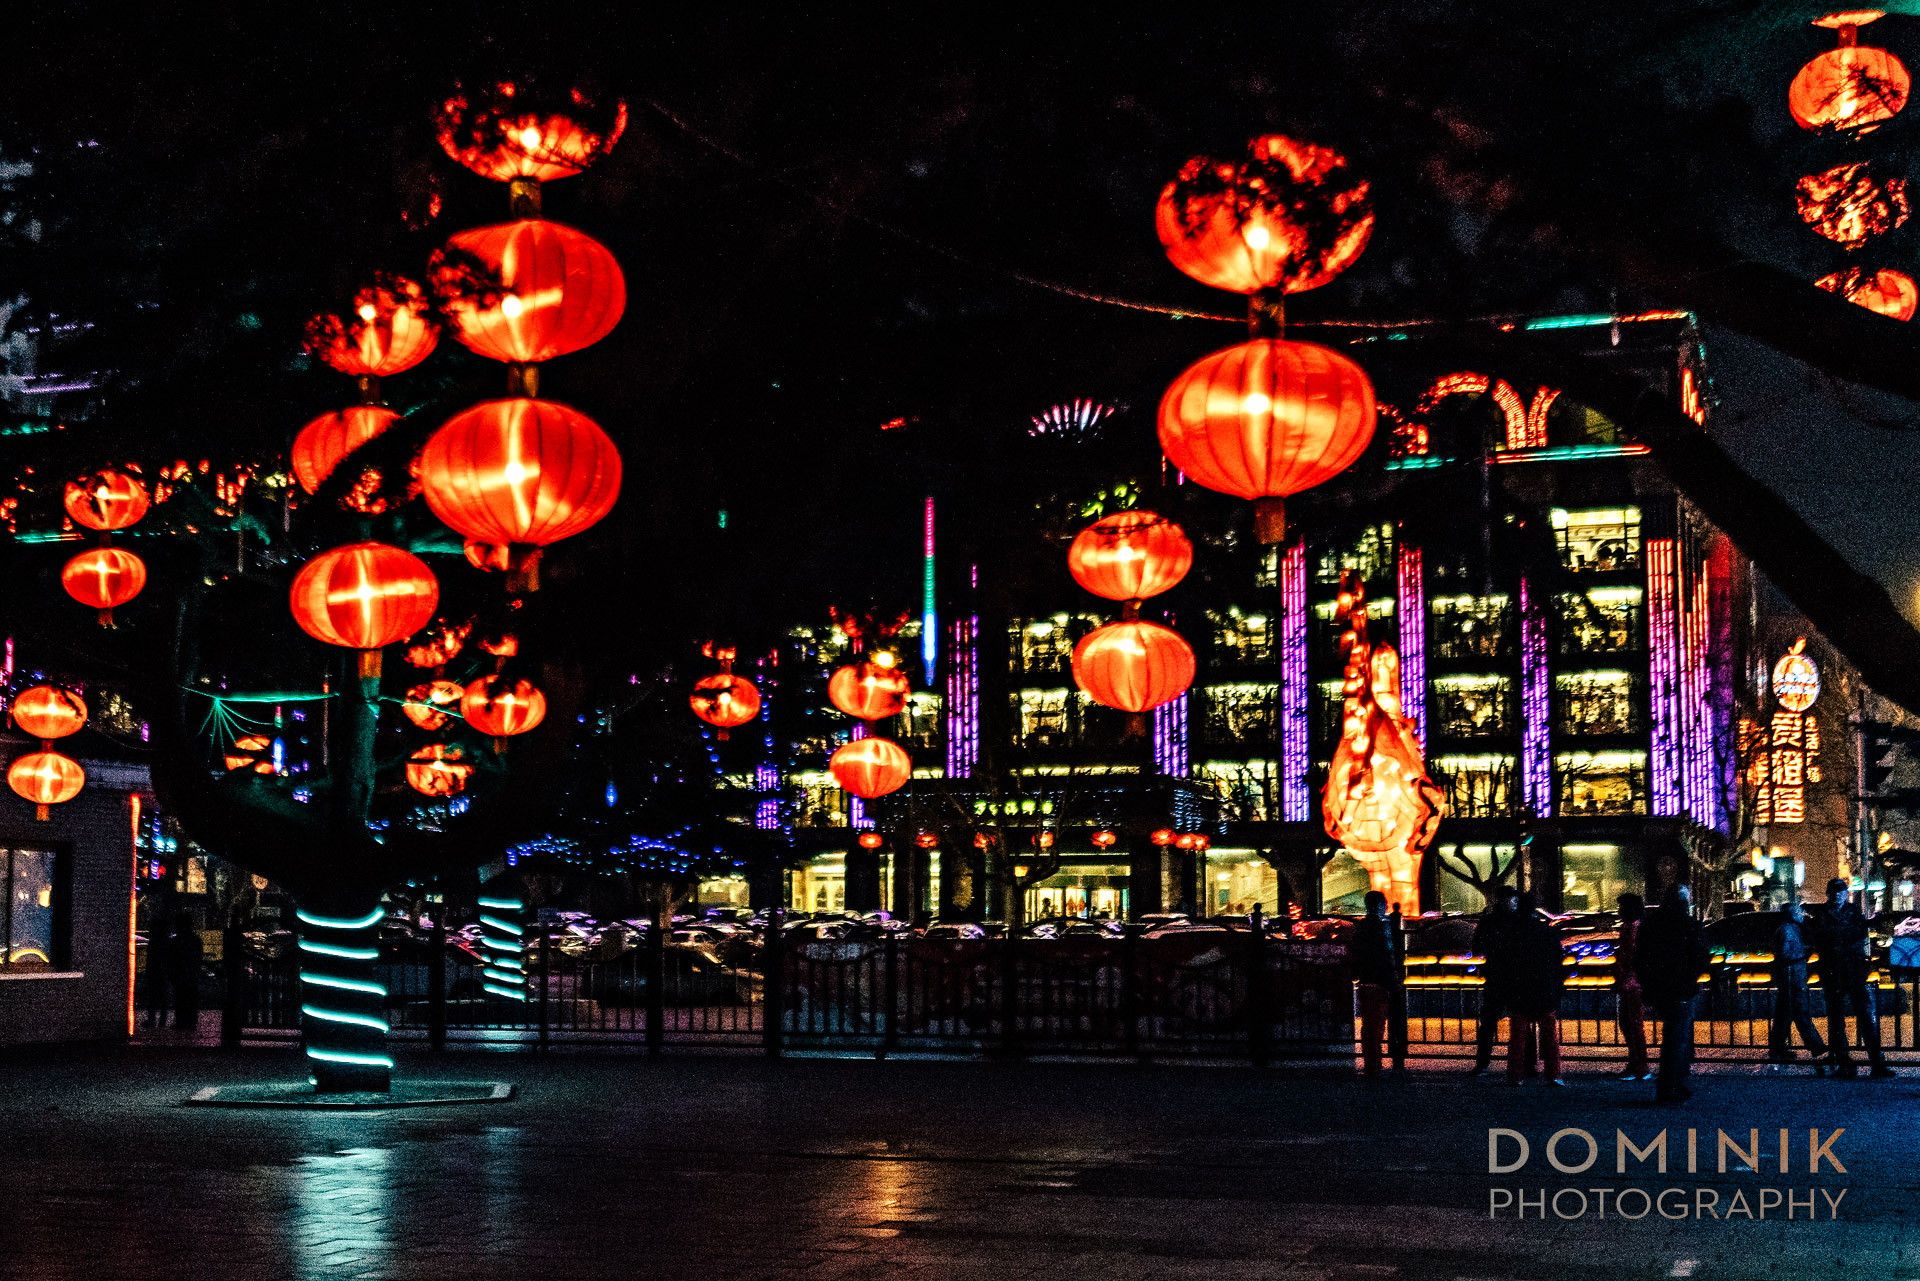
Dalian turned out to be ideal for this. Because especially during the winter months North China’s cities are beautifully decorated with lights all over the place.
In the following please see some examples of those photographs:
Yes, I know the photos is a repetition… But I like it so much.

Downtown Dalian at night

Fitness in the park.
Dalian at night

I was there in the year of the rooster
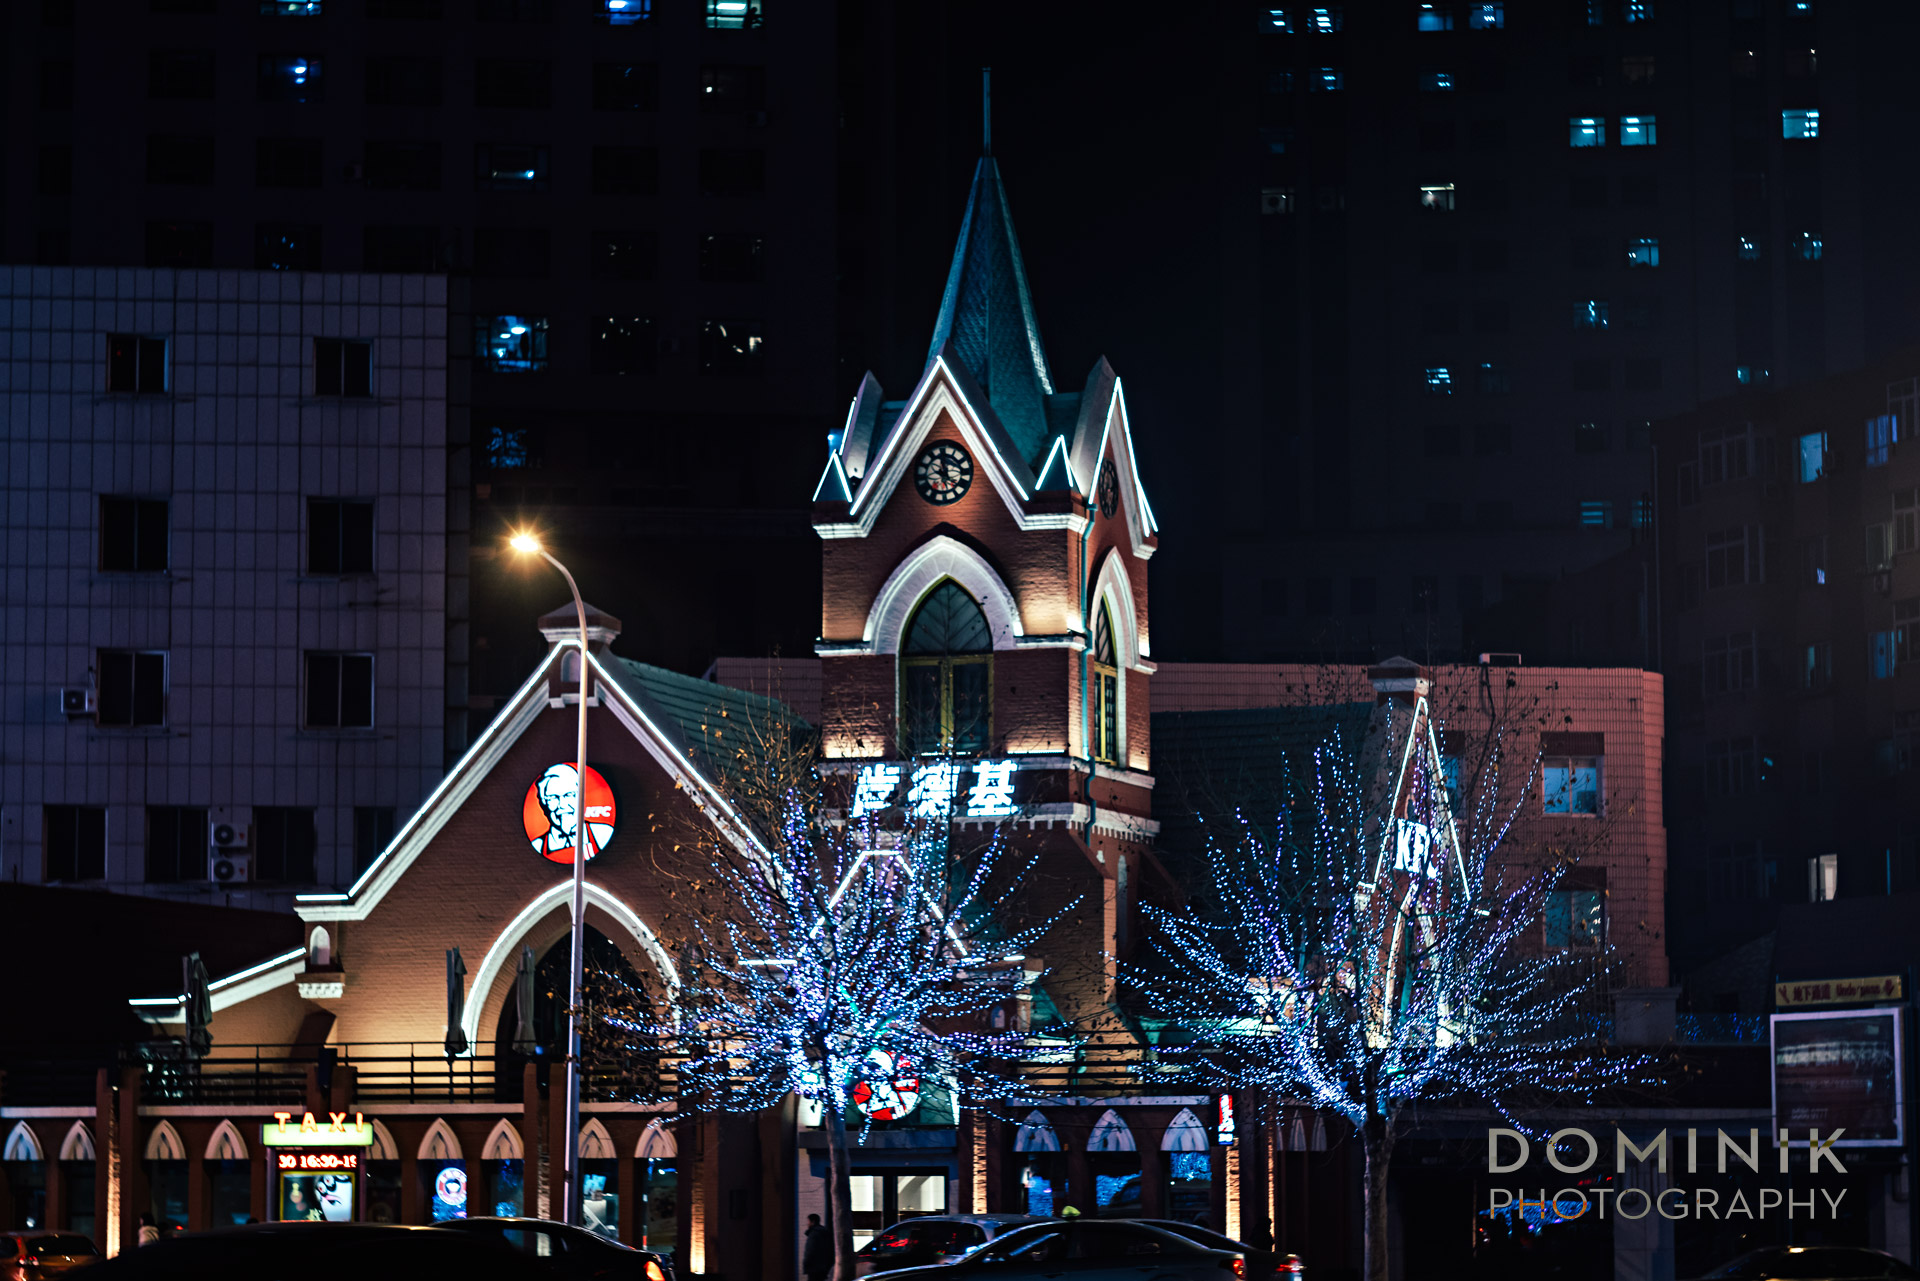
KFC on a cultural mission?

Dalian at night

another night view of Dalian
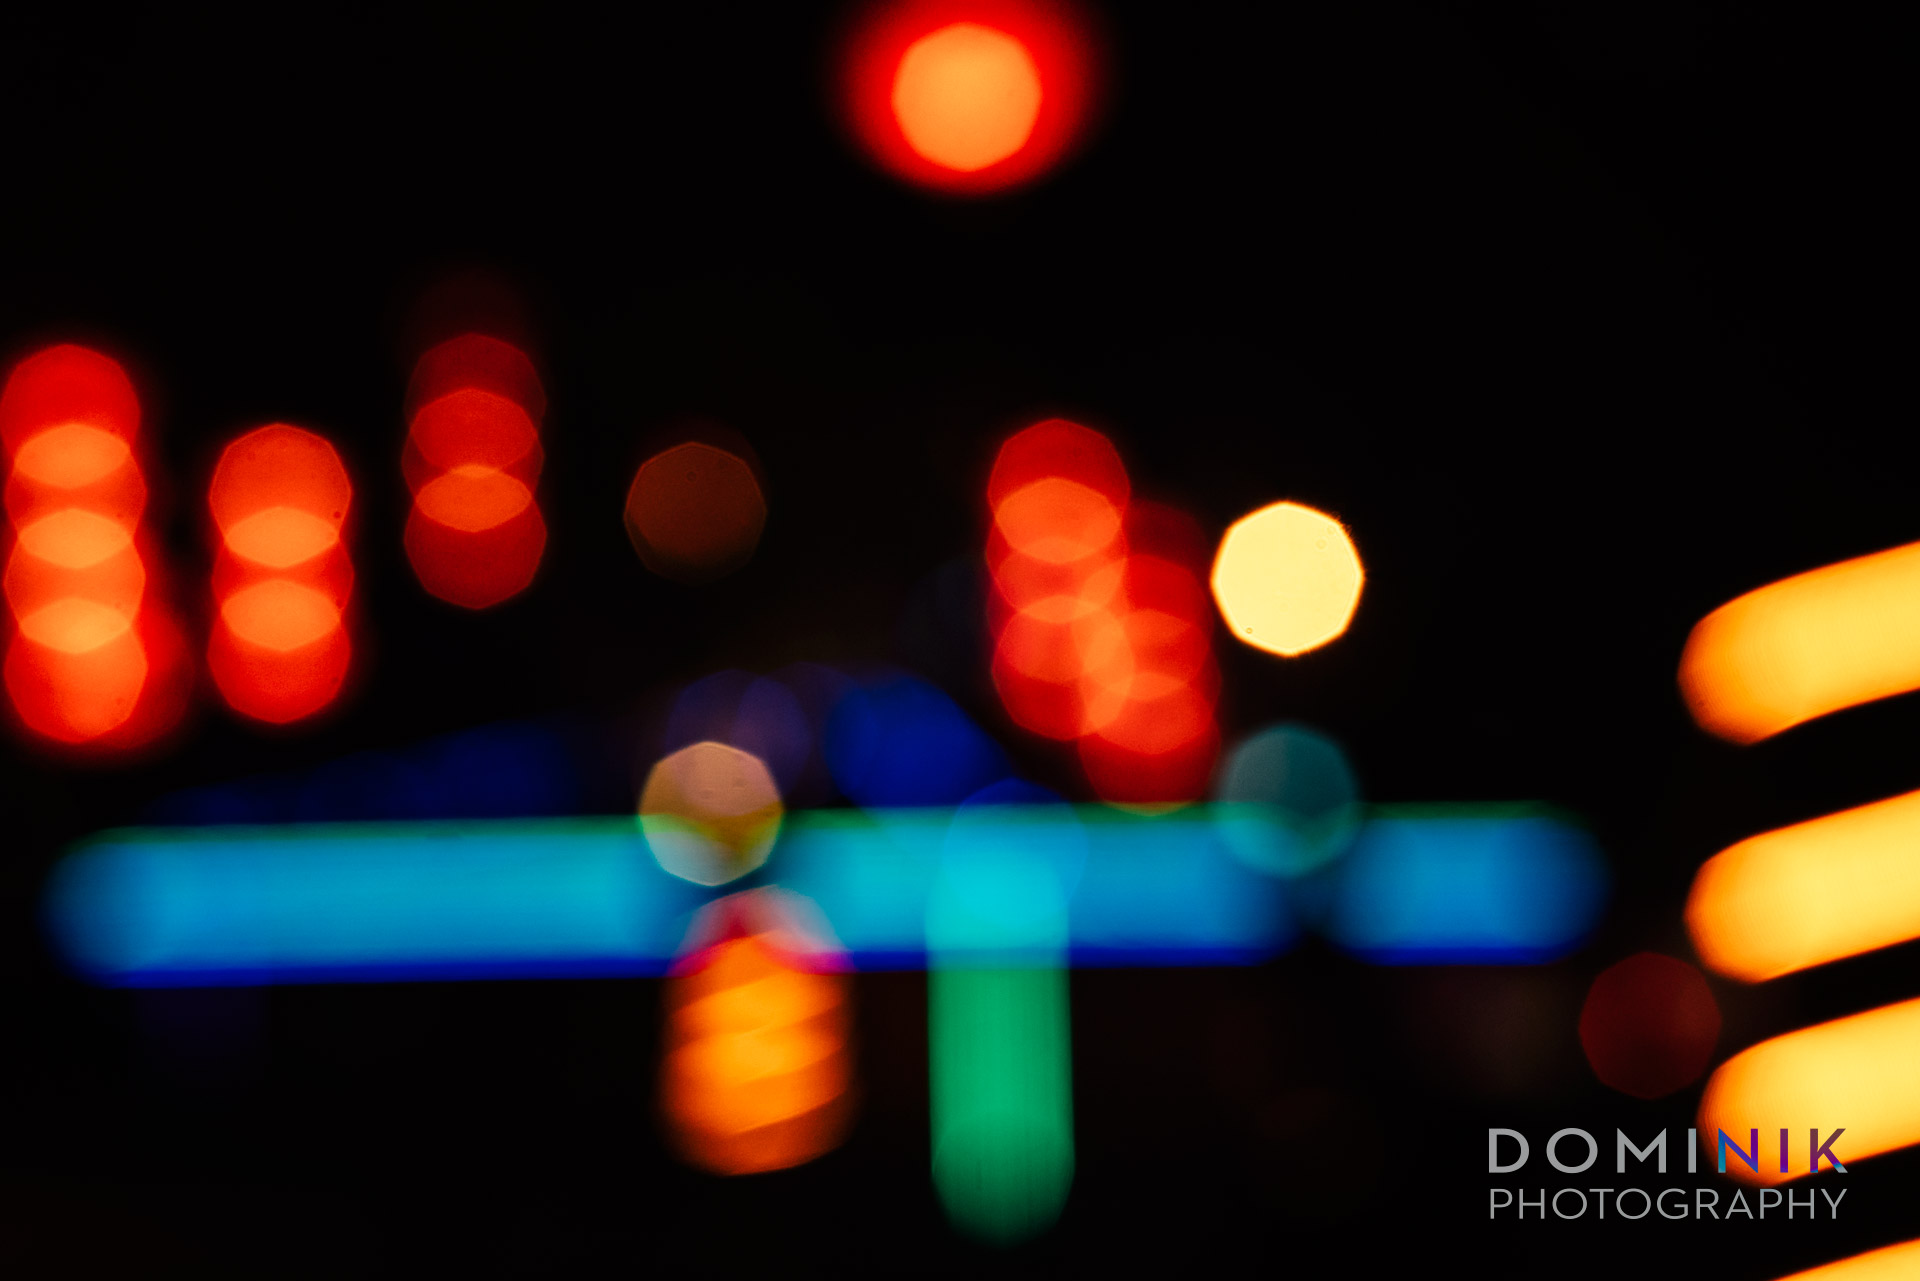
And here are some ‘abstract’ night photographs:


Should you visit Dalian ?
Not necessarily.
I can think of many other cities in China that would have much more to see in terms of attractions and places of interest for a visitor.
But if you have already visited the ‘usual suspects’ such as Beijing, Shanghai, Guangzhou, Suzhou, Hangzhou, etc… and you are looking for a more ‘off-the-beaten’ track place in China then Dalian is certainly worth a visit.
Or if you, like me, plan to visit the Snow & Ice’ festival in Harbin then it may be a good idea to combine this with a visit to Dalian.
Although I came to Dalian during the cold winter months I suspect that Dalian with its countless parks and the beach is also quite nice in summer.
I very much enjoyed my stay in Dalian. And so has my family. Here you can see my ‘family photos’ from that Dalian / Harbin trip.
Truly’ DOMINIK

Yours Truly contemplating his next move…
FOLLOW ME ON
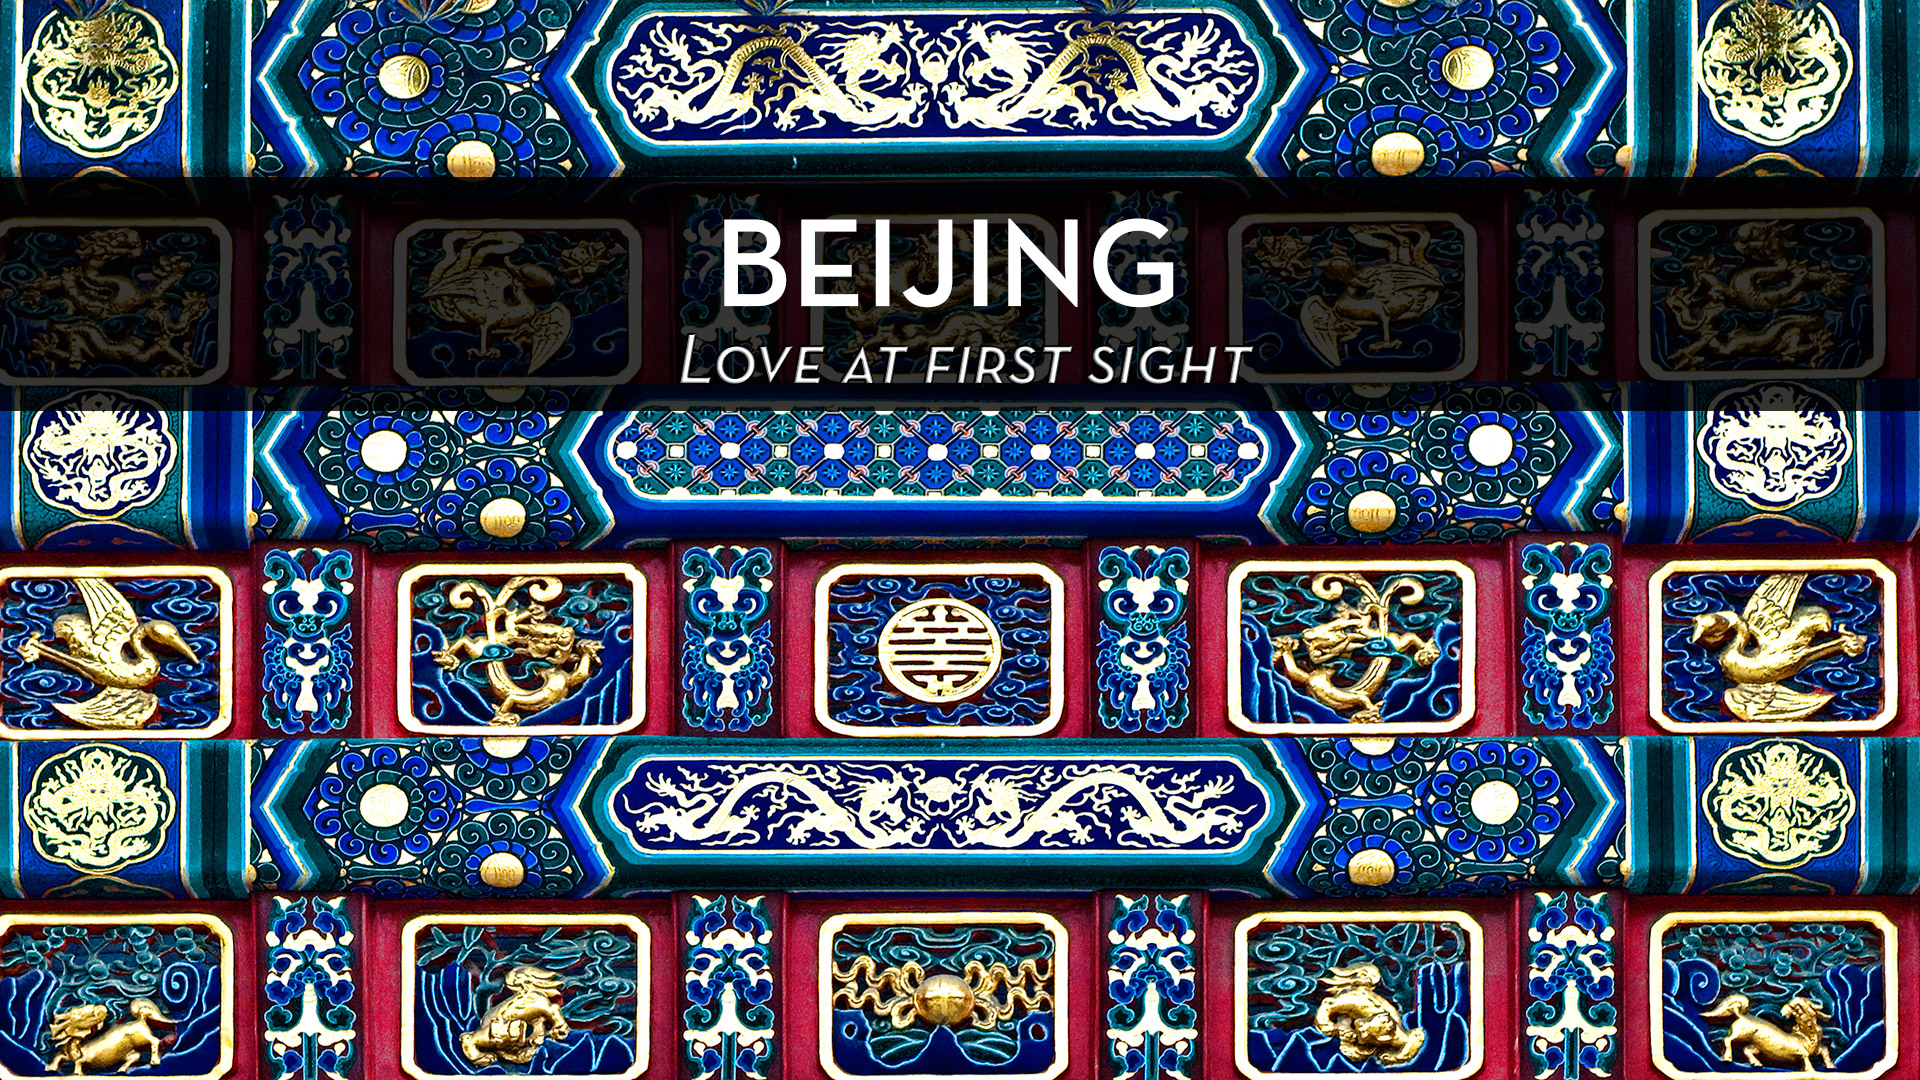
Beijing – Love at first sight
If you ask anyone in Beijing what are the must-see sights they will tell you: ‘The forbidden city’.
And I agree. Indeed the ‘forbidden city’ is impressive and maybe even one of the top must-see sites – not only in Beijing but in the world.
During my first visit to Beijing, I had 2 weeks with no particular plans or agenda other than being a visitor. The weather was perfect and I was in top shape and good spirits. My hotel was also in walking distance from the forbidden city.
Yet, I did not visit the forbidden city.
Why ? How could anyone visit Beijing and not see it’s №1 attraction?
I will let you know why later. But let’s see some photos of Beijing first:

Roofs of the royal buildings in Beijing
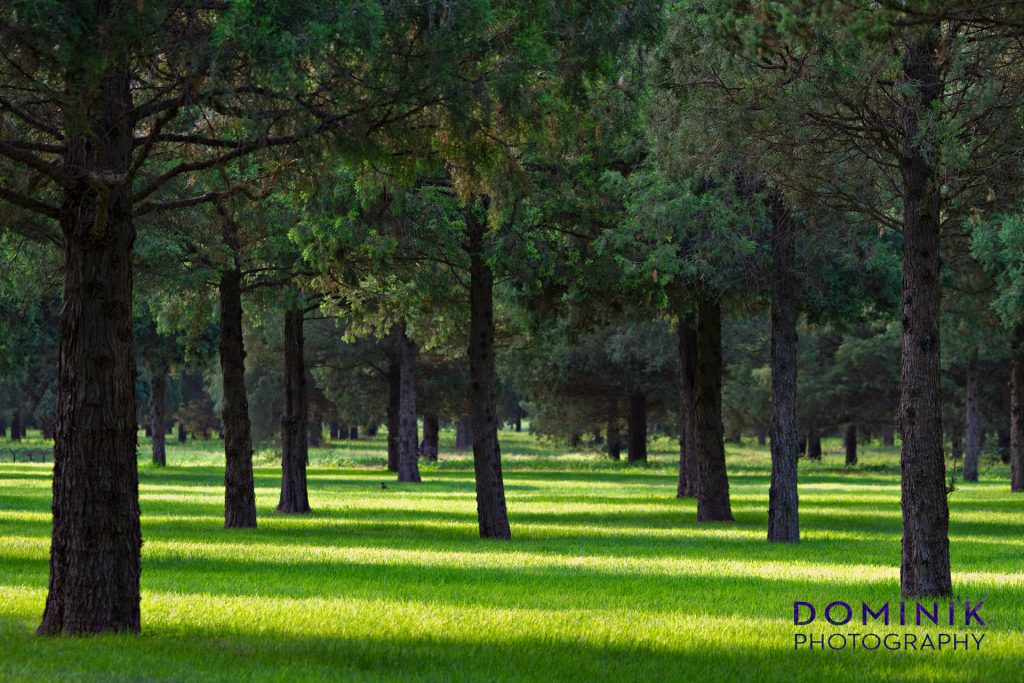
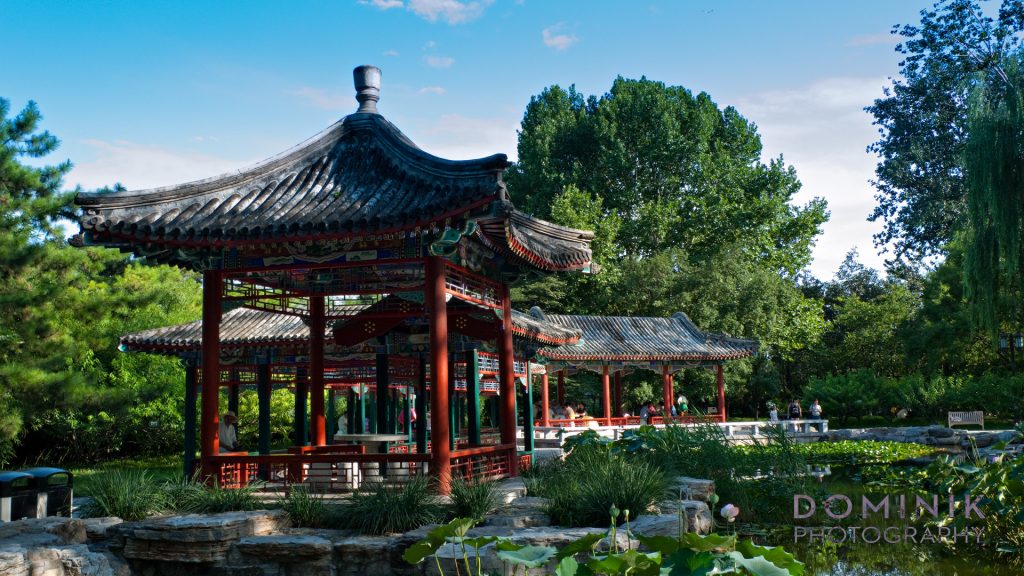
a inner-city park in Beijing
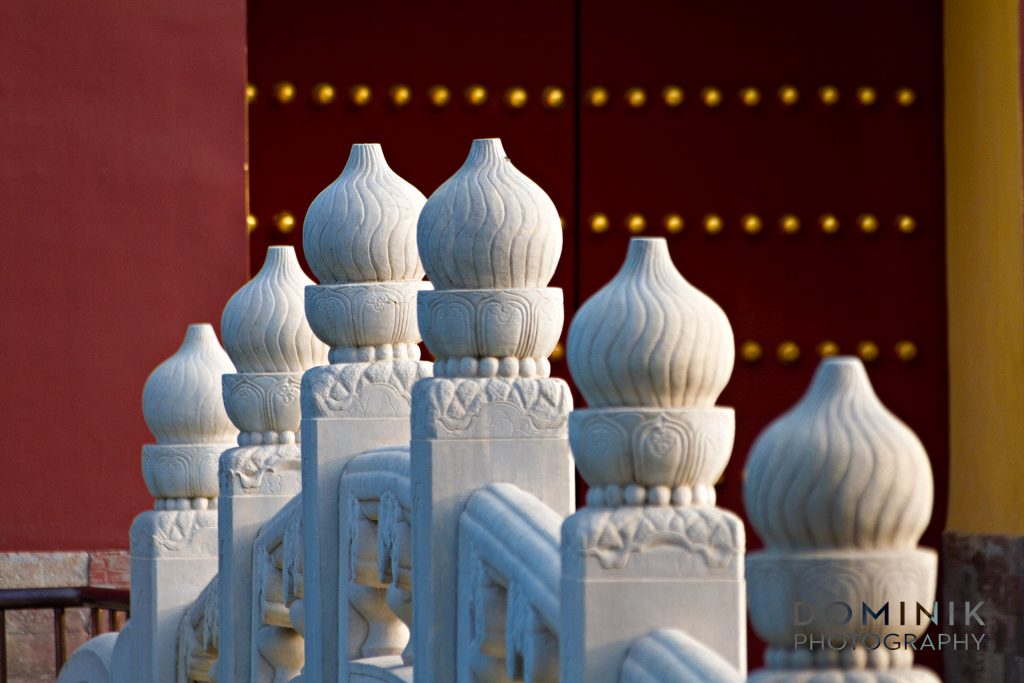
Chinese architectural features

In the heart of Beijing
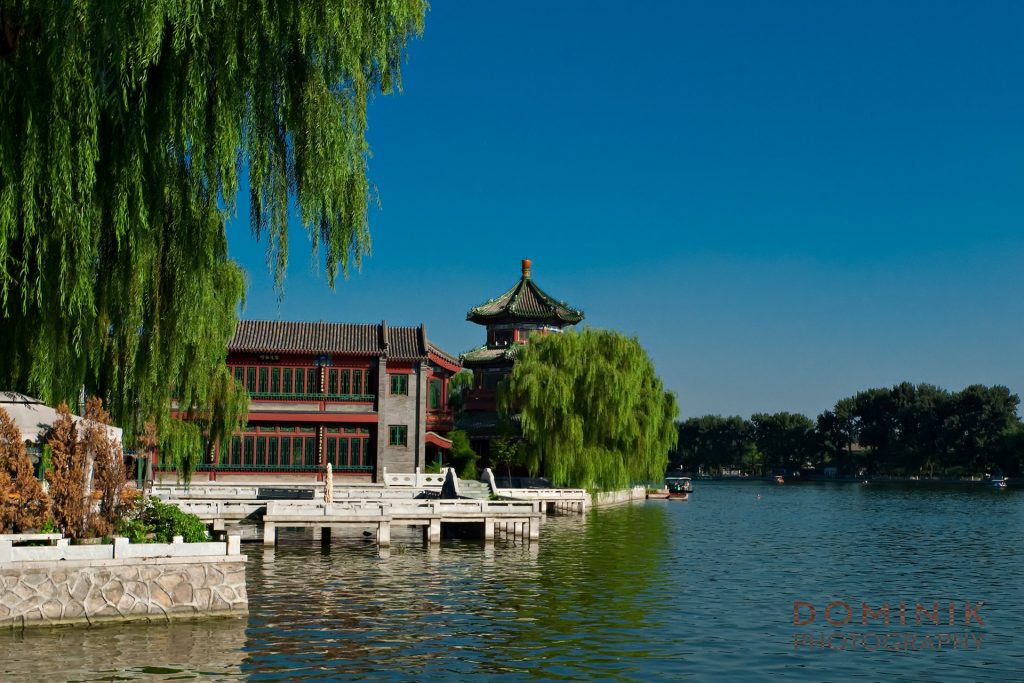
Ho Hai area — inner city park & entertainment area in Beijing

Architectural features of China

Beijing in summer is very green and pleasant
What I love about Beijing
Beijing is a great city. It has so many things to see and things to do that you could probably spend an entire month there and not run out of places to visit and stuff to do.
Whether you want to immerse yourself in China’s rich culture, or you want to see the modernity that is China today. Or it’s abundant history. You will find it all in Beijing.
Beijing is also not only the political and cultural capital of China but also it’s food capital. Even if you are not into Chinese cuisine Beijing is still a great place to dine out because there is also a lot of excellent international cuisine available.
Inner-city Beijing is surprisingly easy to navigate despite its vastness. That is because it was cleverly planned and built — almost like a chessboard.
At the heart of Beijing is the forbidden city. Surrounding it there are 8 or 9 ring roads built in concentric circles. Though as a visitor you will hardly ever transverse beyond the 3rd ring road.
Beijing has one of the largest subway networks in the world and the rides are cheap. The good news is destinations and the signage are all written in English as well. Find one major capital city in the Western World that has writings in Chinese…
Above all Beijing is a great place to ride a bicycle, except during winter.
There are dedicated bicycle lanes almost everywhere. And in spite, China’s relentless pursuit of modernization bicycle culture is still alive and well in Beijing. Pollution from cars is certainly a problem, but a week or two won’t kill ya…

Outdoor cafes in Beijing

in the back alleys of Beijing
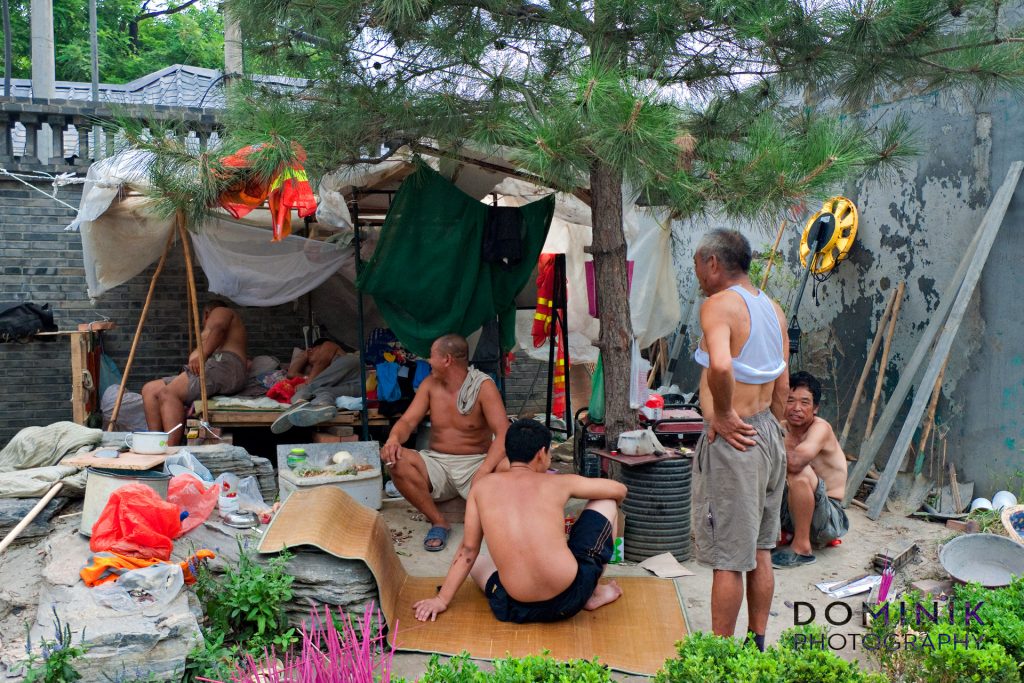
Construction workers — the men who are building China
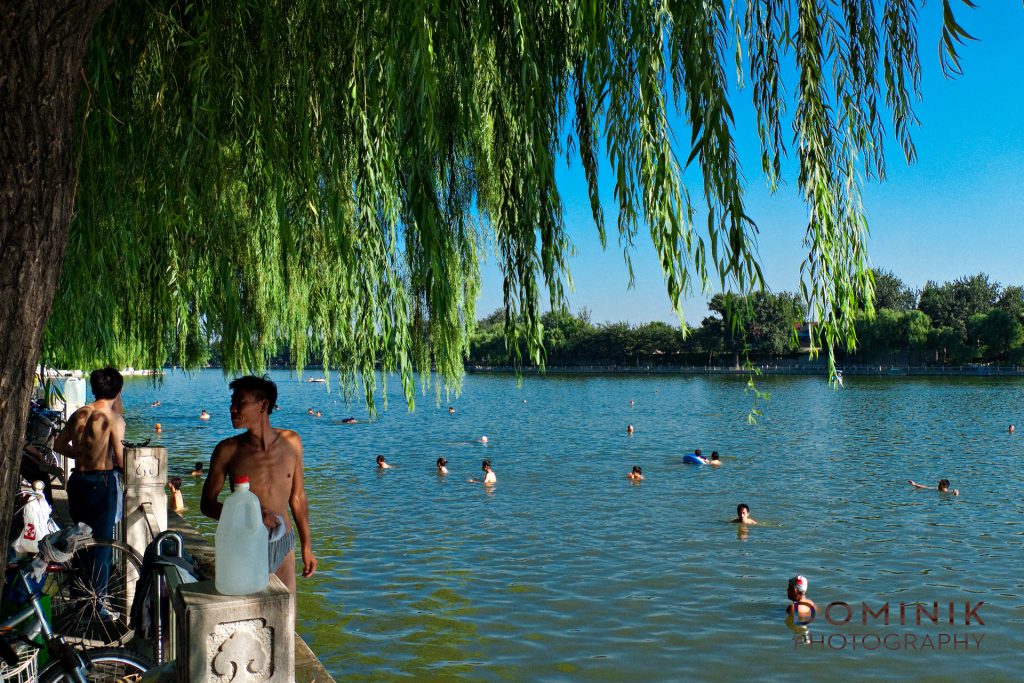
Swimming forbidden and nobody gives a sh… ‘love their attitude…

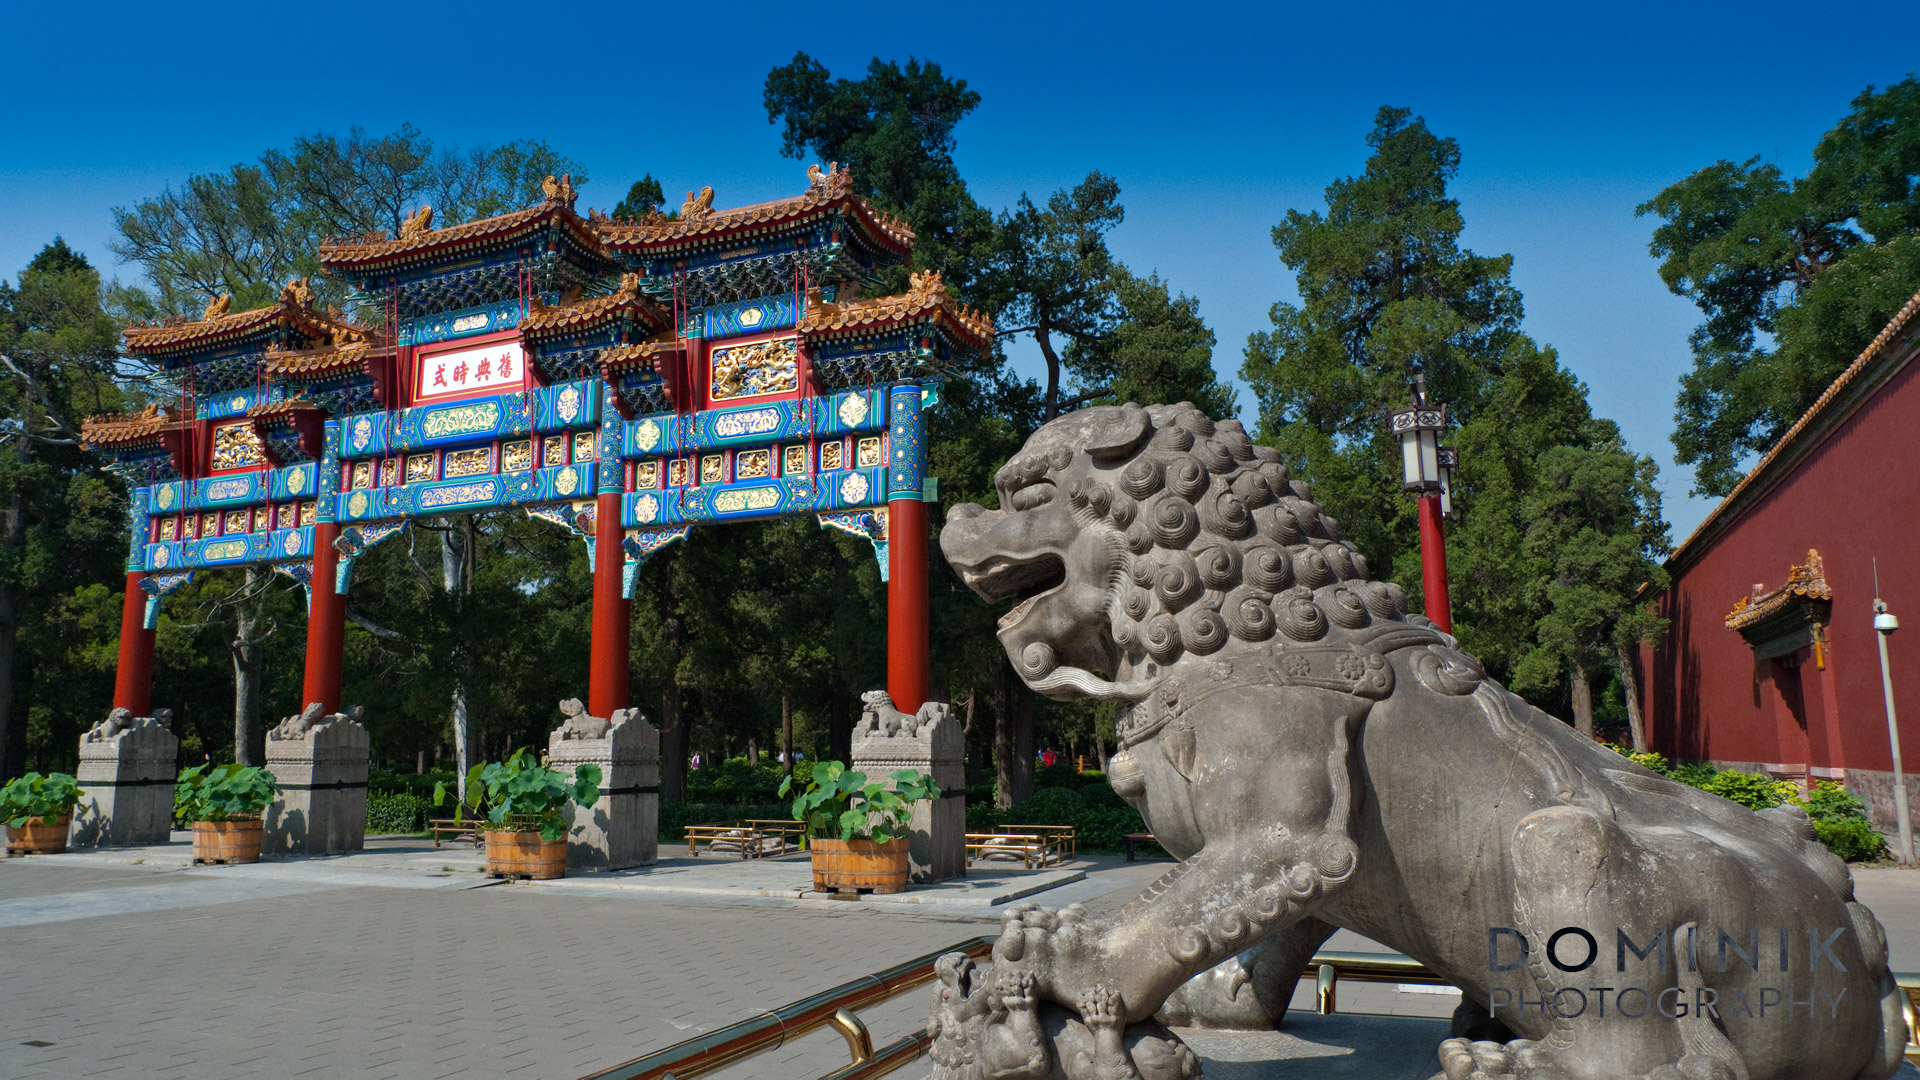
Iconic buildings in the heart of Beijing

Modern Sanlitun area in Beijing

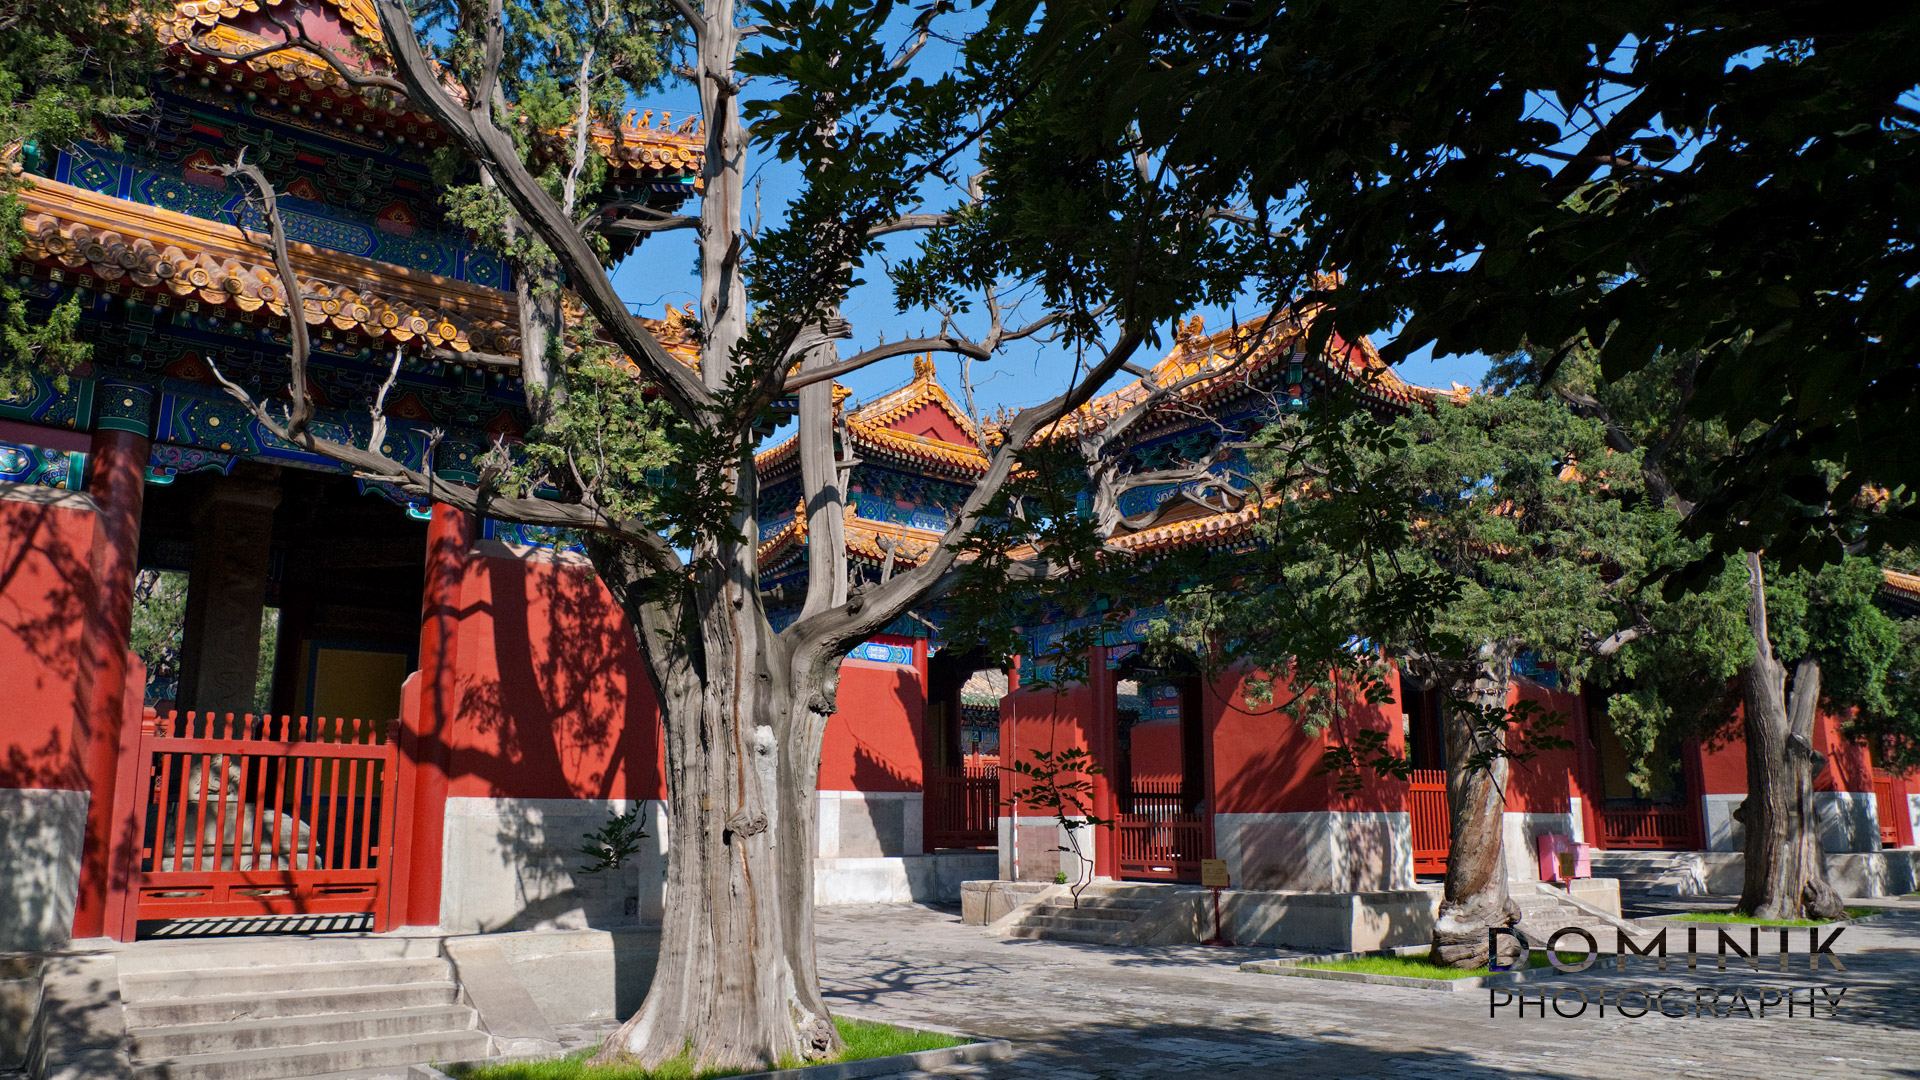
Confucius temple in Beijing
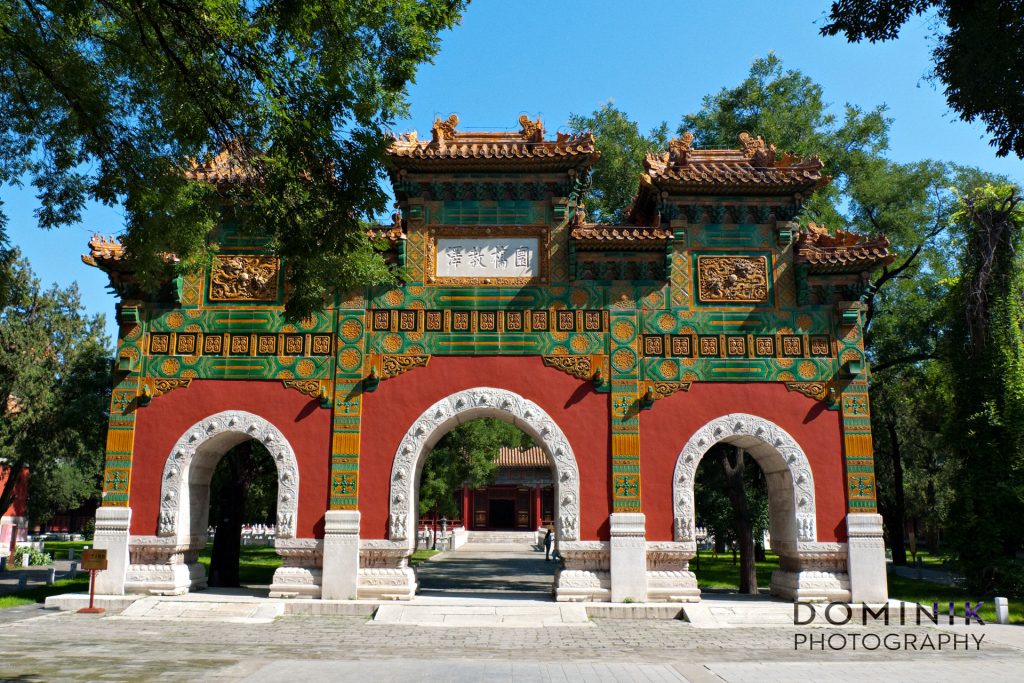
architectural feature of Confucius temple in Beijing
I was very lucky during my time in Beijing
Many people who have visited Beijing or know the city have remarked that these photos must heavily ‘photoshopped’. Arguing that such blue skies are (virtually) unknown in Beijing. Those who say so are right and wrong at the same time.
They are right saying that it is very unusual for Beijing to have such blue skies and such good weather. But they are wrong about the photos being fake or ‘photoshopped’. I was just plain lucky that for over 8 days I had this perfect weather. It was hot though… in the upper 30-ies (Celsius).

Beautiful ornament with Chinese carvings
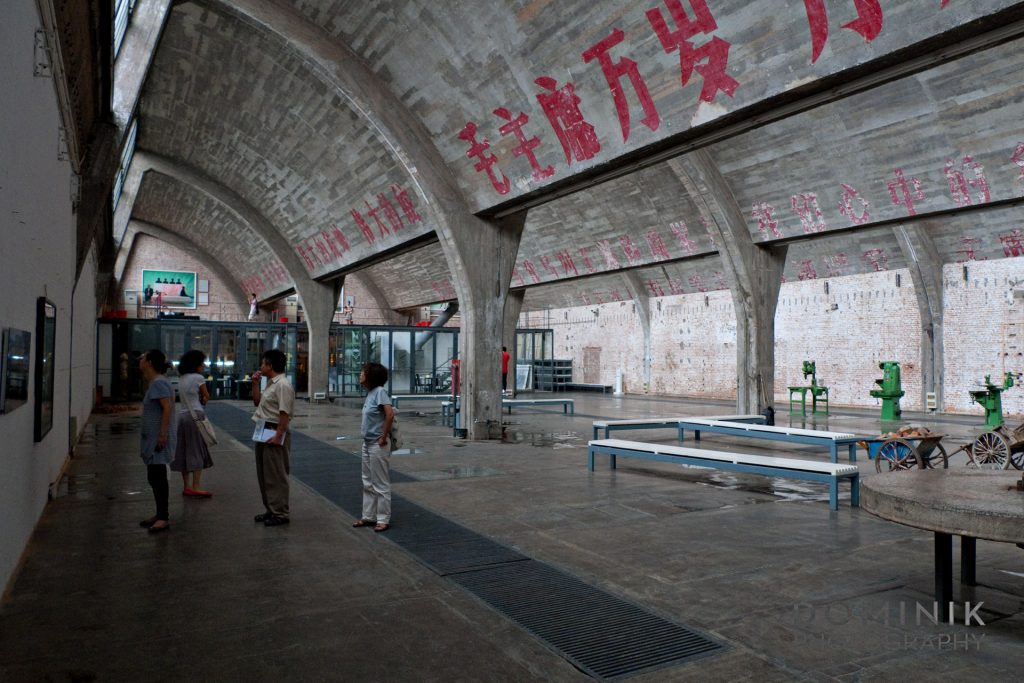
Art Gallery at 798 art district

Sights of Beijing
Temple of Earth park in central Beijing

I love you, Beijing… till we meet again
Why I did not visit the forbidden city
The reason for that is much simpler than you may have thought. I like, or should I say love, Beijing so much that I knew I will come back again.
Indeed over the years, I have visited Beijing 5 or 6 times. And of course, I have visited the forbidden city during subsequent visits to Beijing.
And I will not to miss any further opportunity to visit Beijing again.
I hope you have enjoyed this essay about Beijing. And if you did enjoy it I have great news for you. There will be several more essay about Beijing.
Truly — DOMINIK
Here are 2 photos of yours Truly during that visit to Beijing:
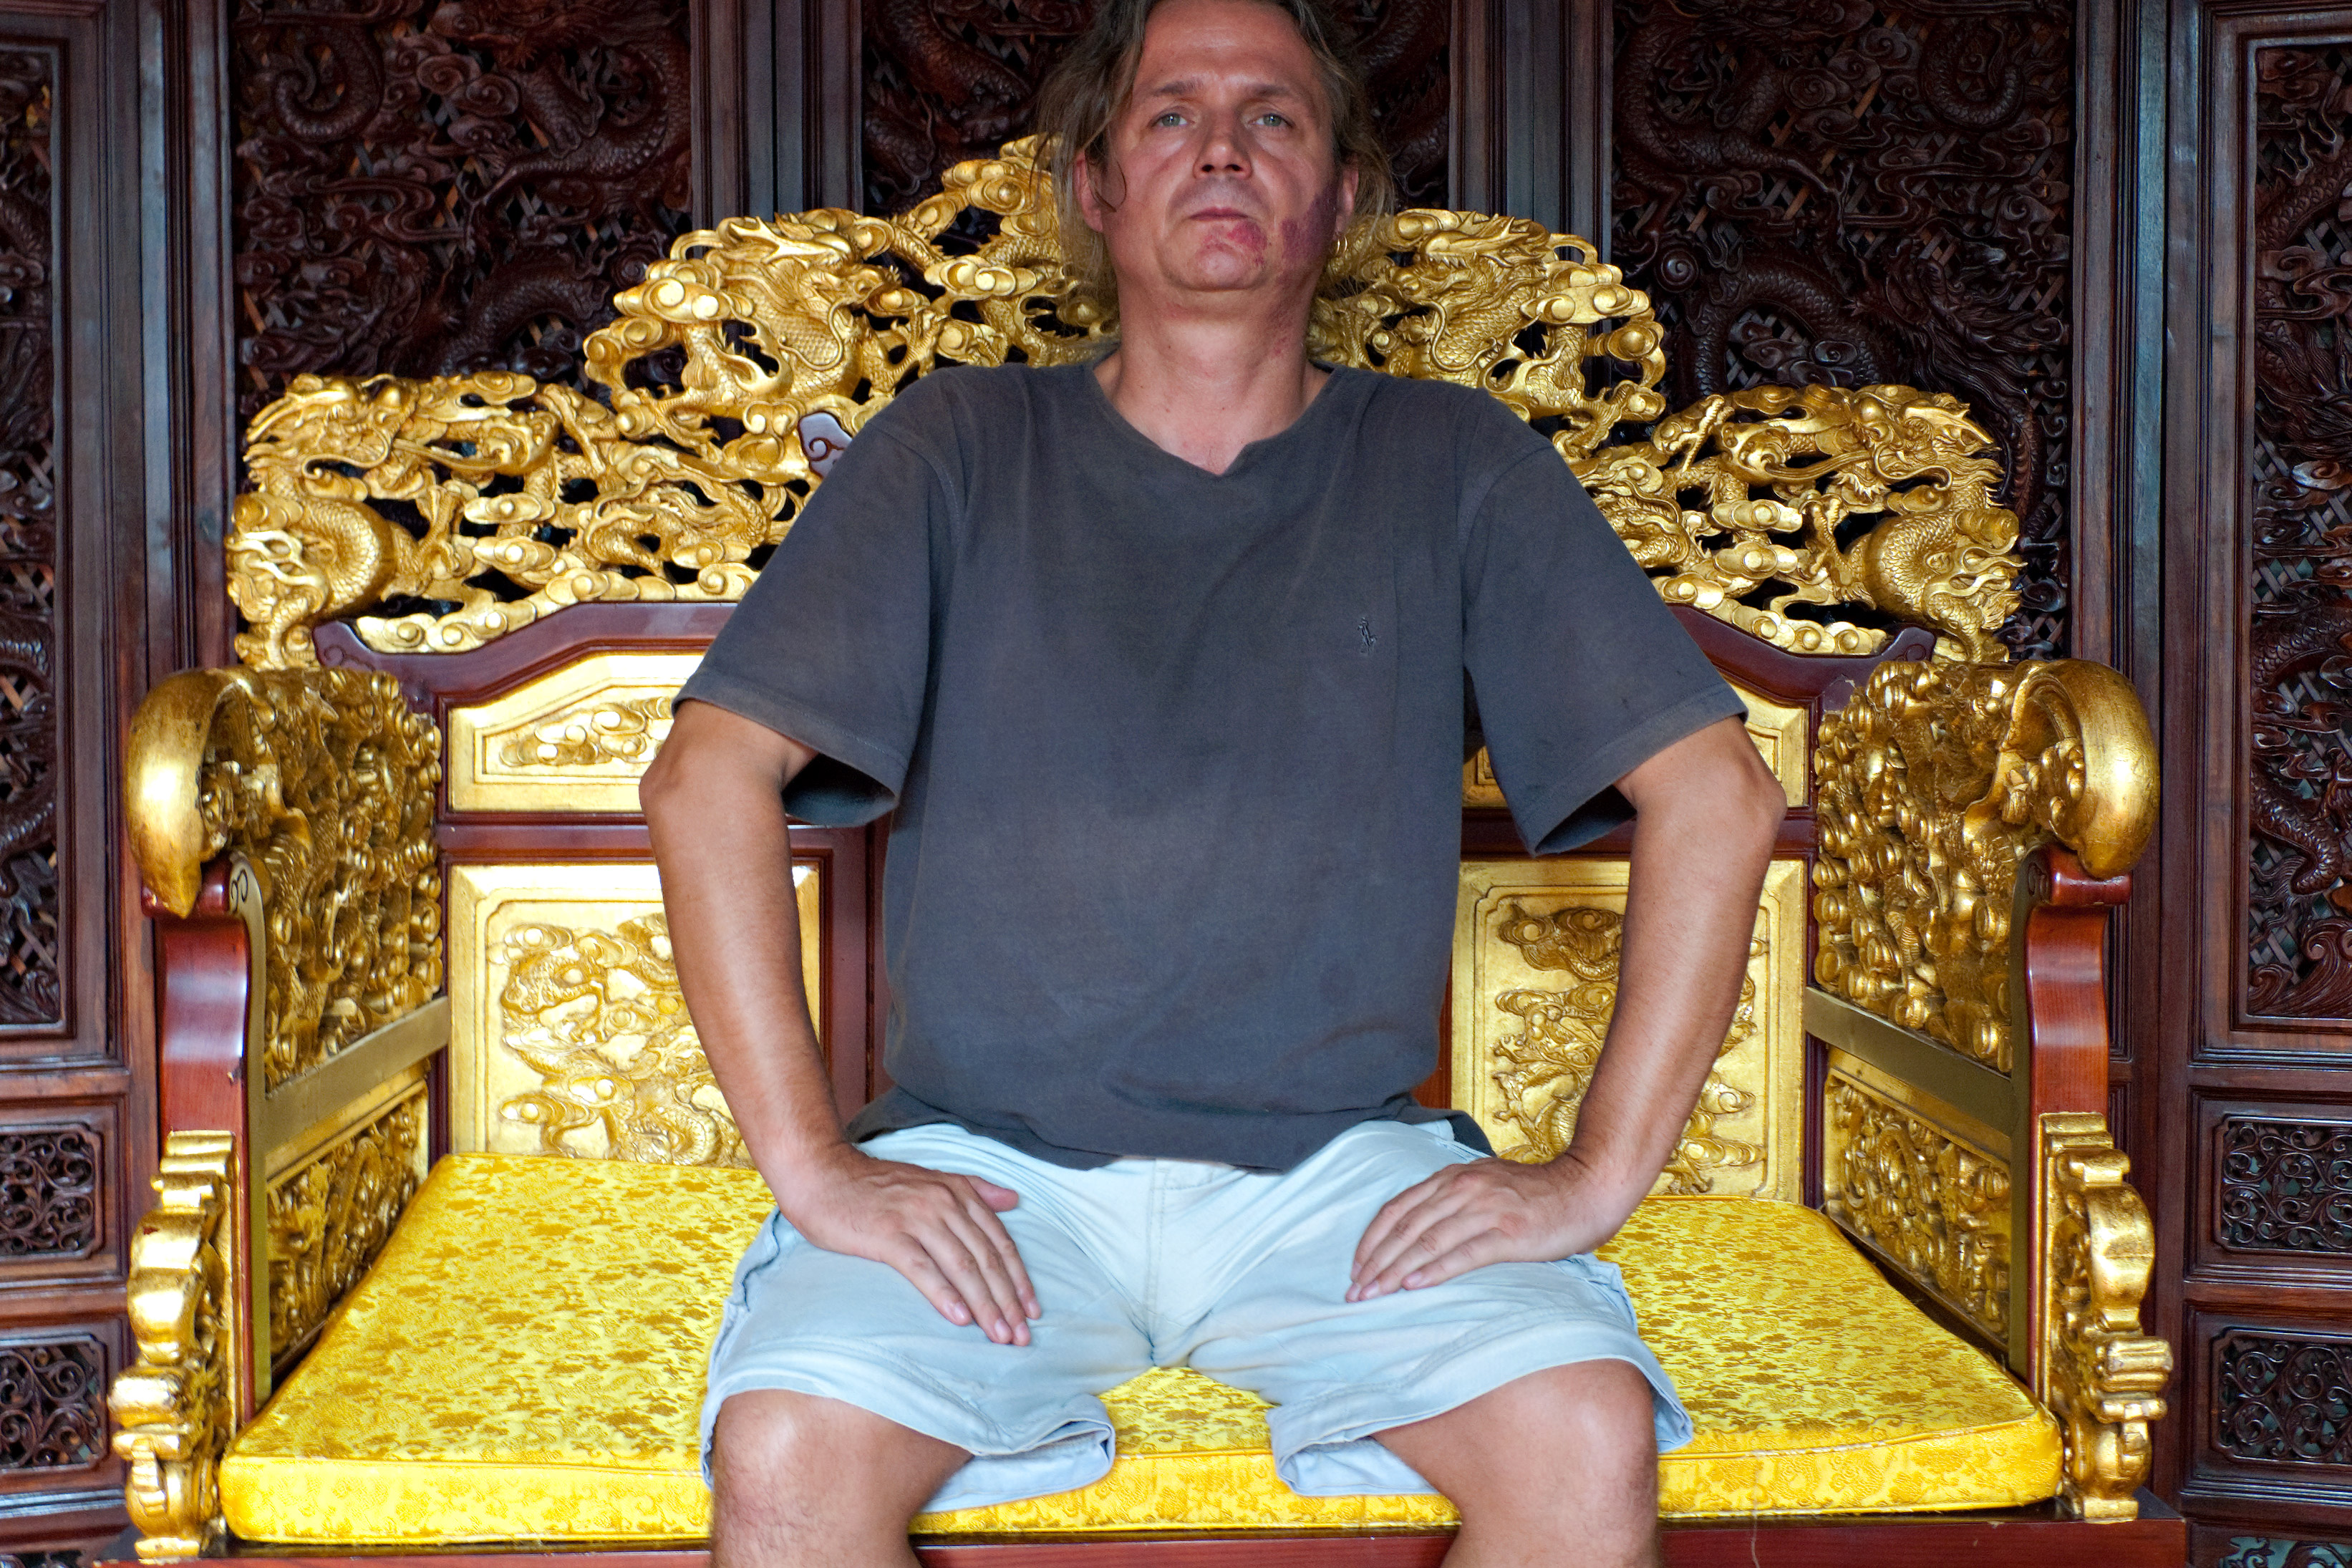

DOMINIK in Beijing for the first time
FOLLOW ME ON